
Summer of 2000
There are quite a few images on this page, they will take awhile to load.
Sound samples are here now so you can be really amazed at how such a small amount of equipment can produce such a MARVELOUS sound! The samples below weren't done to showcase my playing abilities, they were done quickly so you could hear how cool SCPOP sounds. Just so you know. :-)
To listen, click on "Listen"
|
Stop(s) |
Length |
File Size |
Click to listen |
|
Great Full Organ |
14 seconds |
239 KB | |
|
Full Organ w/Trumpet solo on Swell |
13 seconds | 202 KB | |
|
Principal Chorus on Great (8-4-2) and Principal 16-8 on Pedal |
18 seconds | 283 KB | |
|
Principal 8-4 on Great, Cornet solo on Swell |
19 seconds | 296 KB | |
|
Principal 8-4 on Great, Oboe solo on Swell |
21 seconds | 333 KB | |
|
Rohrflote 8-4 on Swell, Gedeckt 8 on Great |
22 seconds | 338 KB | |
|
Flute 8-4-11/3 on Great, Bourdon 16-Principal-8 on Swell |
14 seconds | 220 KB |
Since I started playing the organ, I realized I could play better and with less error if I had an organ at home to go over the material on. I first looked at a pipe organ, but found the cost of buying to be too high, plus maintenance costs would kill me. Having a small space in my basement didn't exactly pull me toward a pipe organ either. I decided that I would go with an electronic organ.
After I decided on an electronic, I started
looking at the major brands. Rodgers, Allen, and Johannus were all way
out of my price range, which was to be under $1,000. I had done some
work with MIDI (click
here
to read a page devoted to MIDI, and to learn more about what it is) I explored
some options on building an organ using a MIDI interface. It would be too
expensive to equip an old console with MIDI, so I looked at using my computer
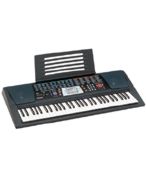
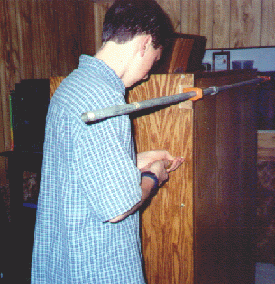
as the 'relay' and a synthesizer as the 'pipes'. My current MIDI keyboards
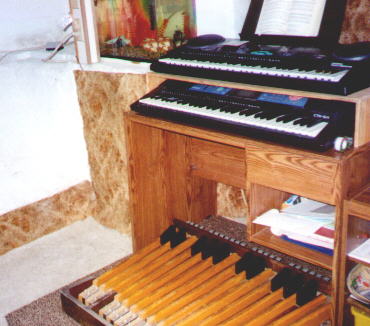
will be used as the input, below is a picture of my "Great" keyboard.
I purchased a Roland Sound Canvas SC-88VL,
which is fully MIDI equipped.
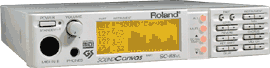
The reason I bought an Sound Canvas was because you need one to use the SCPOP (Sound Canvas Pipe Organ Project) software. SCPOP is a program that runs in Windows 95/98 that uses system exclusive codes to simulate the sounds of a real pipe organ. It takes the sounds that are already there (for example, flute) and changes the dynamics and 'genetics' of the sound to create a sound that arguably sounds like a pipe organ. The sound canvas is the only widely available hardware that allows users or programmers to change and tweak the sounds (and it isn't too expensive). They explain their program very well on their web site.
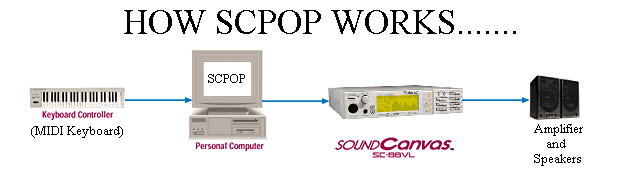
The diagram below shows how my MIDI system
works with the SCPOP.
When I want to use the SCPOP program, I simply
go to the start menu and select SCPOP. A window comes up that looks something
like this:
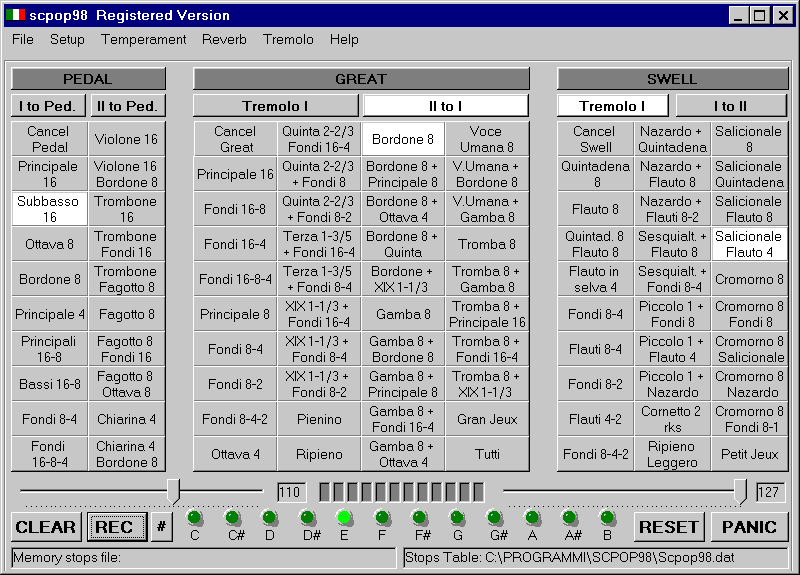
I can select one stop per division (Great, Swell, and Pedal). This sounds real limited but as you can see, there are sometimes more than one stop name on a button. (I renamed these stops to more common names) There are 12 memories that you can load that will always be there when you start the program (fixed memories). There are also 12 more 'free memories' that you have to save in a memory file and load them each time. You retrieve these by the F buttons on the top of your computer keyboard, F1-F12. So you get a total of 22 memories, more than many organs have. I am very pleased with the sounds.
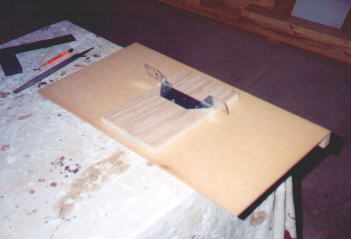
I found a 25 note pedalboard at a closing church that was with an 'ancient' Hammond organ. We junked the organ and kept the pedalboard and bench. The people that bought the church were turning it into a home so we got it for free. I attached the bottom 13 notes of the pedalboard to the bottom 13 notes of my Great keyboard with fishing line. Below is a picture of what the pedalboard looked like before we refinished it.
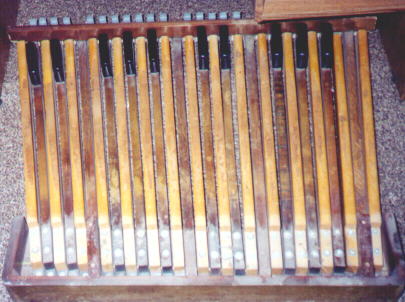
Before

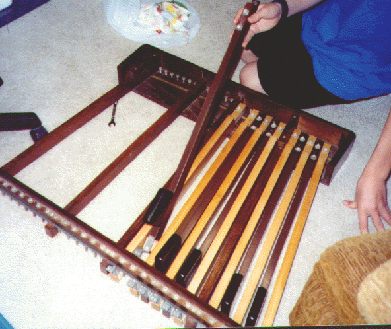
During
Putting the Pedals back
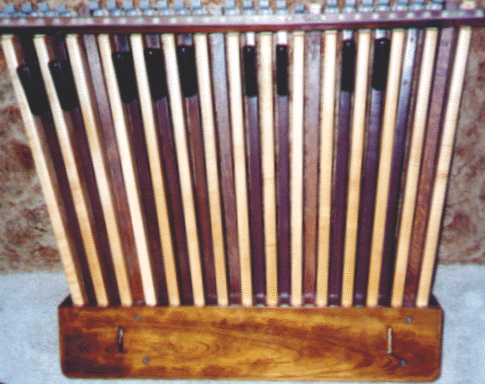
The finished product!
Tada! (I lost one of the caps for the sharp pedals)
Since it looked very cluttered (above) we
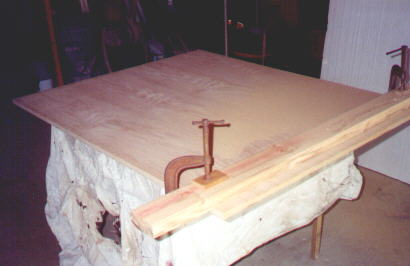
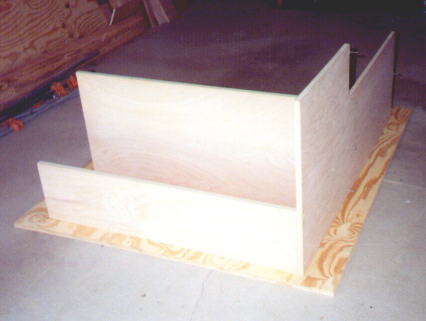
have built a console to house all of the different components of the organ.
Below are some pictures of the construction.

Finishing the console components
Back of Music Rack before
finish
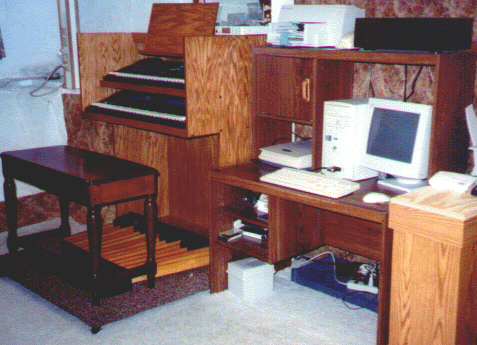
The whole system afterward
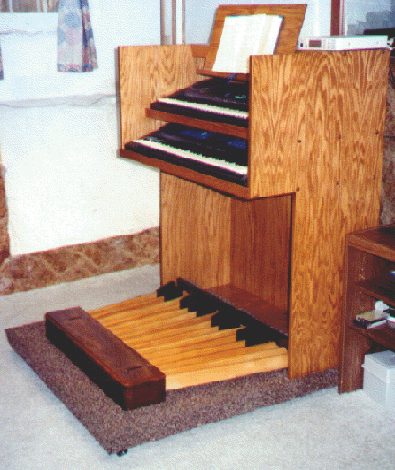
Just the console- doesn't
it look great??!!
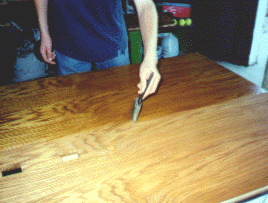
Well its all finished now. My dad drew out all the plans and he did a great job, I love the feel of this. No, he's not an architect or anything. My whole summer was spent working on this project and I would do it again. It took a little longer than we expected but that is partially because we used the regular hand tools- no professional grade woodworking equipment because I wanted to keep the cost down. The other reason is that we put 2 coats of stain and 3 coats of polyurethane on each side, and you can only do one coat and one side per day, so it took 10 days straight just to do that. The outcome was awesome! I will definitely enjoy this for years to come, since I can easily upgrade the sounds with other MIDI modules, even connect real pipes at some time, which I hope to do. Thanks for taking the time to check this out!!! I will have the plans for this online soon, if you want them send me an e-mail.
| Computer System | $550 |
| MIDI Keyboards | $350 |
| Amplifier and Speakers | $320 |
| Sound Canvas SC-88VL | $380 |
| Sustain Pedal for All-Note-Off | $20 |
| Building Supplies for Console | $100 |
| Labor 200+ hours | LOTS |
| TOTAL | $1720 |
A view of the SCPOP main control window:

