Ship Breakdown
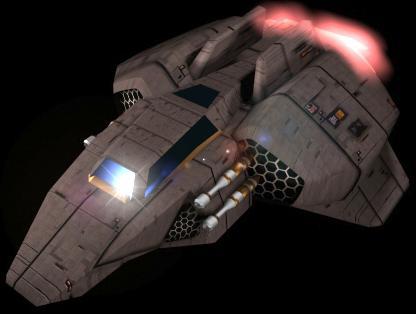
The Magnum-AHT is the heaviest by weight and by weapon loading of all the Descent 3 ships. Consequently, it also has the lowest top speed and the best shielding. The "Tank" will take a licking and keep on ticking! A fully armed Tank with strong shields is an awesome opponent to have to face!
Known primarily for its one-shot-kill primary weapon; the dreaded fully charged Triple Fusion, the Magnum has other qualities too! The positively evil Tri-Microwave beams of the Magnum will stop anything dead in its tracks! Although it will only reach 77% of the top speed of the Phoenix it will clear it's own "hit sphere" from a dead stop in exactly the same time. It also reaches 95% its top speed the quickest out of all ships.
The Tank should be used when weapons are plentiful, distances are short and the Fusion Cannon is available. Pilots who change to the tank may find that they make more kills and die a little less in many levels.
At 13% tougher shields than the Pyro-GL, the Magnum-AHT is well protected, but a good pilot in a Pheonix will cause a great deal of damage to any tank not driven extremely well.
With by far the fastest reloading Mass Driver of all (by 0.3 seconds!) it is an ideal snipers craft as well as playing the heavy bomber role superlatively well.
Although it has a slower turn rate than other craft, it delivers a massive load of weapons. Particular mention should be made of its mammoth load of 8 Smart Missiles. These can be deployed against attackers behind you with incredible stopping power. If you ever manage to fill a tank with all weapons, it takes over a minute of solid secondary fire to empty it!
Because the turn rate of the Magnum is the lowest of all ships, it is the slowest turning to face an attack from the rear. If we assume that you have your SENSITIVITY set to around 1.6 - try and boost the X axis up to 2.0 or 2.2 - this will make your turn rate more responsive (not faster!) and you'll move less left and right to be turning at your maximum turn rate. Leave the Y-axis alone, you'll retain more aiming accuracy by having a slower pitch rate.