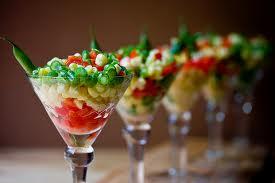
Taking Food Photographs in Natural Light
Food photography is heavily utilized for commercial purposes, as evidenced by a quick stroll down the grocery aisle. However, these images are carefully prepared and styled, as well as set up in situations with optimal lighting. Not only that, they also have a good amount of time – hours, at least – to get the perfect, mouth-watering shot.
However, real life doesn't work that way. You’re not likely to stroll into a restaurant toting a large amount of lighting equipment, and the odds of a restaurant being as bright as a photography studio is pretty slim. What’s one to do when he wants to take photos of a sumptuous meal? Rely on natural light. This, of course, assumes that you’re going to eat at a time when the sun is still up.
Professional product photographers don’t usually rely on natural light, and for good reason: the color, depending on the weather, can be inconsistent. If you aren’t already used to adjusting your white balance, this is a good time to do so. Cloudy days can give objects a different color cast from sunny days, and even sunlight differs in color, depending on the time. Going through your white balance settings until you find a setting that depicts colors the way you see them can make all the difference in a food shot.
Another problem with the sun being your only light source is that, unless your window is north or south-facing, you can encounter direct sunlight. It can work for certain shots, depending on what you’re trying to achieve, but generally, you want a diffused light. Diffused light softens shadows, removes overexposed areas, and makes the entire plate more evenly-colored. If you happen to be by a window with direct sunlight streaming in, use something to diffuse it – wax paper can make a fine substitute.
Diffused natural light can have a great effect on your subject, making it look more evenly-lit and colored. But since your light source is now softer than direct sunlight, you’ll need longer exposure times. You could compensate by increasing your ISO, but you could end up with grainy pictures, rendering the shot unusable. It’s better to keep a tripod handy for situations like that. Normally, any stable surface will do when taking shots with long exposure times, but in food photography, you want to be able to angle the lens downwards. If you place the camera directly on the table, you’ll see more plate than food.
Another thing to keep in mind when taking pictures of your food is that you want to work quickly. Product photographers may have a good amount of time to take their shots, or a back-up product if the first one doesn’t pan out. On the other hand, you restaurant-goer might have ordered time-bound food, like ice cream or a soufflé. You want to be able to take the pictures before the food stops looking appetizing. Besides, you’re there to eat, so the sooner you get to enjoy the food, the better! For more information go to my website - oneflare.com.au/photographer/nsw/sydney