| 1. Gather all the materials listed on chart |
| 2. Using a hole saw, drill a hole for the 2" bulkhead in the
50 gallon trash cans, used as filters, and the 300 gallon tank |
3. File all of the rough edges off then coat both the bulkheads
and the containers with caulk (too much is better than too little)
4. Trace the outline of the 2" bulkhead on the sides of the trash
cans (filters) as well as the 300 gallon tank |
5. Tighten the bulkhead to assure that there
will be no leaks (a large wrench may be necessary) |
 6.
Smear the caulk around the bulkhead to remove any large air bubbles 6.
Smear the caulk around the bulkhead to remove any large air bubbles |
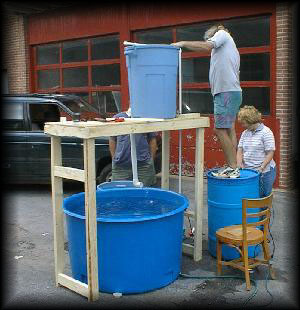
7. Build the frame to support the filter
and the pump. Make sure to make the table sturdy because it will
be holding substantial amount of weight (the filters and possibly
aquaponics). The frame resembles a table, two legs and a top.
The table must be wide and tall enough so that the 300 gallon tank can
fit underneath. The top of the frame has two supports that are evenly
spaced. The legs also have two horizontal supports, one near the
bottom, the other near the middle. The motor is mounted on a 2" x
4" that is laid on its side.
 
(left) The complete frame with the motor mounted. (right) The
top of the frame, without the plywood. |
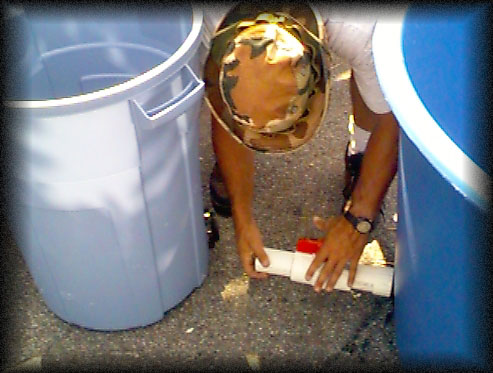
| 8. Cut the piping to the appropriate size
for the filters and drainage |
9. Drill holes in the appropriate piping for the filters and
add netting. This is a stand for the filter. |
 10. The filter has netting to prevent the filters from being clogged.
 |
 11. Screen is should be placed over the filter so that fish cannot
be sucked into the filter
11. Screen is should be placed over the filter so that fish cannot
be sucked into the filter |
| 12. File down any rough edges made from cutting the pipe |
| 13. Put the system together to ensure that the pieces fit |
 14. This is the top of the upflow filter
 |
. 15.
The sprinkler system for the trickeldown filter 15.
The sprinkler system for the trickeldown filter
 . . |
16. Use PVC primer around all joints that are to be glued
17. Glue the pieces together
18. Use teflon tape around all screw joints |
19. Use a flexible cuffing to attach the upflow filter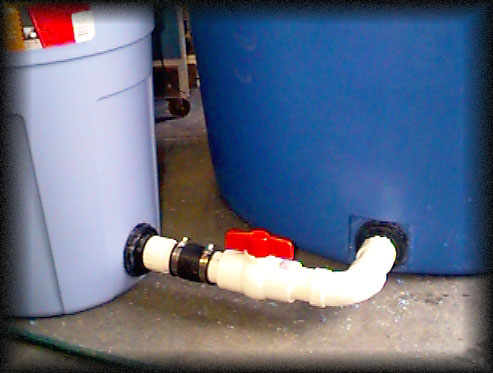 |
 20.
Connect the filter to the tank with piping and a blue head 20.
Connect the filter to the tank with piping and a blue head |
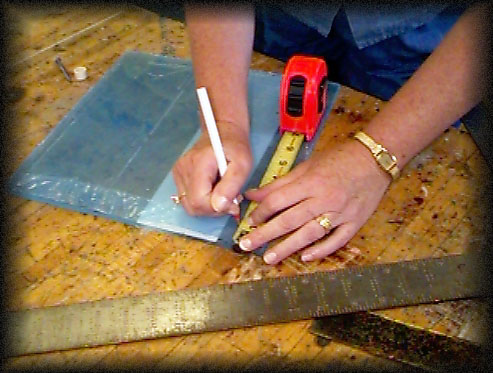 21.
A window may be added by cutting the Plexiglas an inch wider than the desired
window on all sides 21.
A window may be added by cutting the Plexiglas an inch wider than the desired
window on all sides |
| 22. Trace the Plexiglas onto the side of the tank then trace
a square an inch into the traced window |
23. Cut the inside line out to make the hole for the window |
24. Drill holes into the Plexiglas around the perimeter of the
Plexiglas
25. Hold the Plexiglas up the the hole in the tank and drill
the hole using the holes already in the plexiglas as guides |
 26.
After all of the holes are drilled, place the screws in, caulk, then
tighten the screws down 26.
After all of the holes are drilled, place the screws in, caulk, then
tighten the screws down |
27. The final tank system |

