
This is an original design, it is meant for your personal use only.
SanVan23@hotmail.com
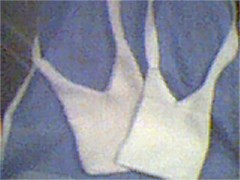
(the purse on the left was made of the peaches and cream yarn as described below and it measured approx. 11 1/2 x 12" for the cargo area; the tapered sides are approx, 4 1/2" high; and the handle is 2" wide x 35"long. The purse on the left was made from Speed-Cro-Sheen and it came out a bit smaller, but it's appearance is more like the purses you see in the retail stores. You can make the handle the length you like.)
MATERIALS: I used Peaches and Cream 100% cotton, 4-ply, Ecru. I bought a 1lb. cone and it was more than enough to make one purse, I made this purse and a smaller purse with one cone and had a small amount left over. I think I used a size G steel crochet hook. Gauge is not real important in this project, a F or H hook would also work.
You will also need a sewing needle large enough to accomodate the crochet thread.
You will need some lining fabric large enough to fit inside the purse including seam allowance, and extra allowance for the top.
Sewing machine
Snap set, with snapclamp
Skill level of crochet is fairly easy, some sewing experience is neccessary, attaching the snap is probably the most difficult step in the purse construction, but can be left off if desired. I like my purse snapped for privacy.
DIRECTIONS:
Begin at bottom of purse, you will be working in rounds to make a tube for the main cargo area. ch 80. join with slst to beginning to make a ring. Ch 1, hdc in next ch and each ch around. At end of each rnd join with slst, ch 1, continue in this manner until purse measures 11 1/2" high. Fasten off.
To Make Tapered Sides:
Mark the 20th and 60th ch from beginning at top- to be where the tapered sides meet. (There will be two). With right side of purse facing you, attach yarn to one of the marks, work 20 sc. (This should reach the other mark). Ch 1, turn, skip 1 sc, sc across leaving last sc unworked. Ch 1, turn, sk 1 sc, sc across, leaving last sc unworked. Continue in this manner, always leaving the last sc unworked and skipping the first sc of each row. The last row should have 8 sc. Fasten off.
Reattach thread at top of purse at one of the the marks so that you can work toward the other mark in the same way as the first tapered side. Donot fasten off after the 8 sc row, but continue working back and forth with 8 sc in each row, this will form the handle or strap of the purse. I made mine approx. 35" long, you can make yours any length you desire, but keep in mind that when you put objects in your purse it will cause the strap to stretch some and may make purse hang at an undesirable length. I pinned mine to the opposite side and loaded the cargo area with common objects before sewing to be sure puse hung where I wanted it to. When length of handle has been reached, making sure the handle is not twisted, pin handle to top of opposite tapered side and slip stitch together. Donot fasten off yet.
For Finishing: slst along entire top edge of purse including tapered sides and handle. You will need to fasten off and reattach to the other side to complete edging.
Now you are ready to sew up the bottom. Turn purse inside-out and match bottom edges, then sew together using whip stitch. Turn back, pushing out corners. Use the purse itself as a pattern for the lining. I used muslin for the lining, but you can use what you like. I made a 1" (finished measure) turned seam for the top so the snap had 3-layers of fabric to go through. I also made it so the top edge of the lining is 1/2" below the top edge of purse at the point where the tapered sides meet. Sew other three sides together. Donot turn the lining around, keep it so the right sides are together. Determine the center of the lining where you want your snap to be fastened and attach. Now you can put the lining in the crocheted purse, center, and sew the top edge of the lining to the inside of the purse using a blind stitch, and sew very securely, maybe even twice around since this part of the purse will be under constant stress from opening and closing.
I am pretty new at writting down my creations. I try to be as accurate as possible, but I know different people are accustomed to different styles of writting; so if you have any comments concerning this pattern, you can contact me at the e-mail address above. Please feel free to let me know what you think of this project.
https://www.angelfire.com/ky2/madeatsandyshome/index1.html
