
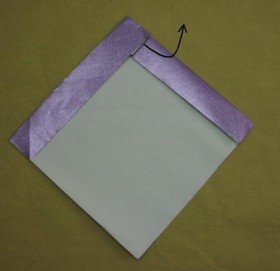
1. A thin square paper preferably foil paper, 10' x 10", is used. Fold
the left and right edges with a width of
11/2". Then stretch out the loose flap as far as it can go. See below.

2. Squash-fold the triangular flap of the top of the paper.
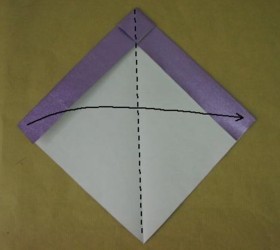
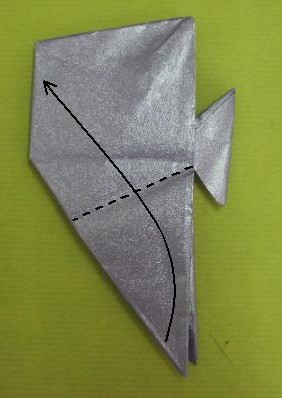
3. Fold the paper into half with a valley fold.

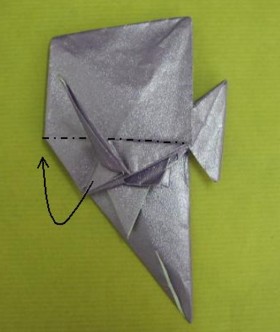
4. Stretch out the hidden squash fold.

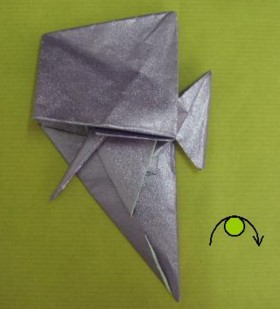
5. Crimp the right side of the model to form the tail part.
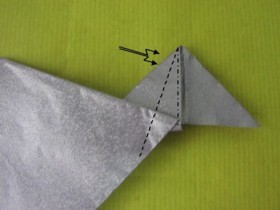
6. Crimp the tail part to form the tail. Open up the small triangular flap on the right as you crimp. See below.

This is an enlarged part of the photo below.
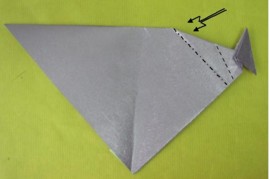
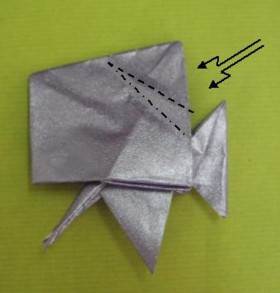
7. Crimp the right side of the model.

8. Crimp the right side of the model again.

9. Crimp the left side of the model to form the anal fin of the fish. It will be hidden in the model.

10. Narrow the bottom of the model to the long pelvic fin part with a mountain fold. Repeat behind.
11. Swing up the pelvic-fin part with a valley fold. Repeat behind.

12. Rabbit-ear the pelvic-fin part.

13. Narrow the pelvic fin with a rabbit-ear fold and swing it up.
14. Tuck in the pelvic fin with a mountain fold.
15. Turn the model over and repeat the same process on the other pelvic-fin part from Nos: 11 to 14.
16. Crimp the top of the model to form the dorsal fin.

17. Crimp the head and neck part.

18. Inside reverse-fold the lower part of the head to form the pectoral fins.

19. Narrow the pectoral fin with a mountain fold. Repeat behind. Mountain-fold
the legs to narrow them.
Shape the back part of the body. Repeat behind. Adjust the tail down
in a proper position. Done!
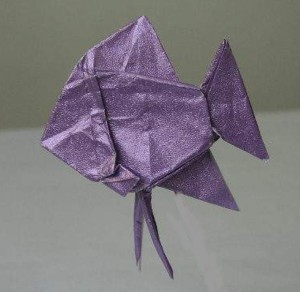
20. The Completed Blue Angel Fish
(Created on 25.3.2006)
