
Folding Phalaenopsis
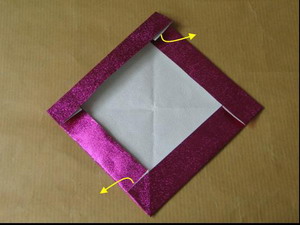
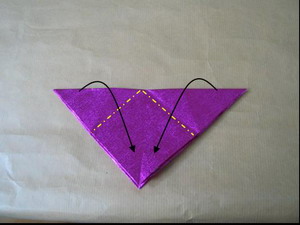
1. Use a sheet of square paper, 73/4 in. x 73/4 in. Fold all the sides,
with a width of 1 in. Then stretch out the loose paper
from the top and bottom corners, as seen below.

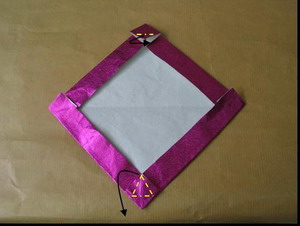
2. Squash-fold the top and bottom flaps.
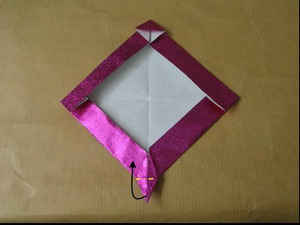
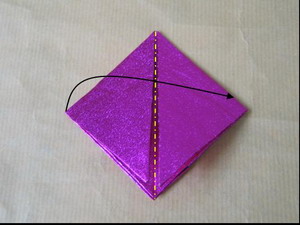
3. For the top layer of the top squash fold, narrow it with a valley fold . Then petal-fold the bottom squash fold.
4. Valley-fold the petal fold.
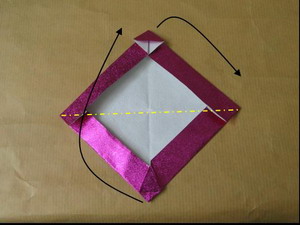
5. Fold the model into half with a valley fold. Then swing it down to
a horizontal position as shown below.
(Please follow this instruction strictly)
6. Valley-fold both the left and right triangular flaps.
7. Fold the model into half with a valley fold.
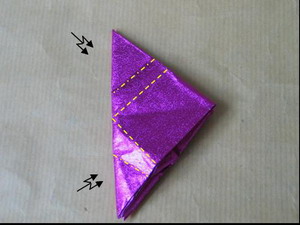
8. Crimp the top and bottom triangular flaps.
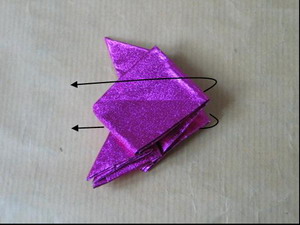
9. Open the model as shown below.
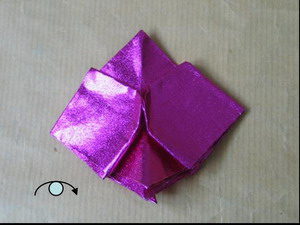
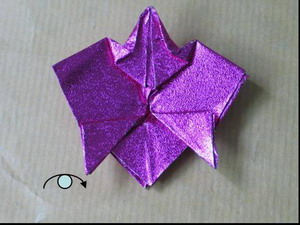
10. Turn the model over.

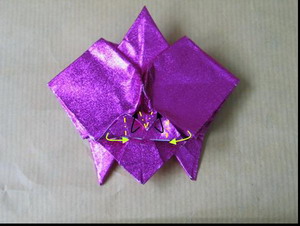
11. Valley-fold the top left and right edges of the model. Then swing the bottom triangular flaps upwards.

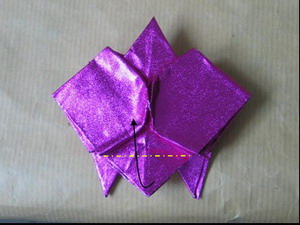
12. Swing down both the triangular flaps with valley folds.
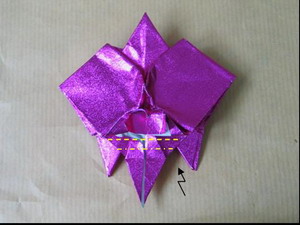
13. Turn the model over.
14. Valley-fold the top layer of the triangular flaps.
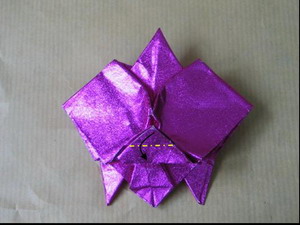
15. Valley-fold the small triangular flap.
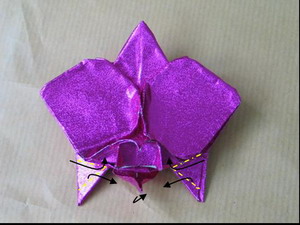
16. Narrow the small top triangular flap with valley folds. Then fold the small left and right flaps with valley folds.

17. Stretch down the hidden petal fold as shown below.
18. Pleat-fold the petal fold.

19. Rabbit-ear the petal fold.
20. Widen both the bottom petals with mountain and valley folds. Then
crimp the tip of the rabbit-ear fold.
Tuck in the loose ends below the big petals of the phalaenopsis. Shape
them accordingly. Done!
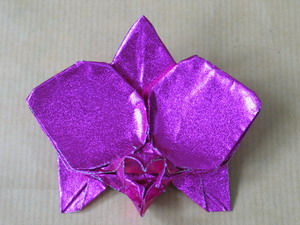
21. The Completed Phalaenopsis
