
Sprang
Sprang is a wonderful art form, which creates a fairly elastic fabric. It was definitely used for caps and hairnets, stockings/leggings, pouches, belts or sashes, pyjama strings, altar cloths, and in some cases (Native American 1300's) sweaters/vests. There is even evidence that sprang was used in Peru. That particular piece is a 4-panelled shroud, with 4 different colors in it, and iconography of cats and other divine animals.
I personally believe that sprang was used much more extensively, simply because of the ease and speed of construction. I think that it was used for socks and mittens, gloves and other mundane items. Why didn't they survive? Well, because they were mundane items. Folks didn't save dishcloths as being special, just as they would not have saved a regular, everyday hairnet or pair of mittens. Indeed, when the item wore out, it was likely used as a rag or simply burned, instead of being kept in a nice, pretty box for us to discover years later. (Such shortsightness on the part of our predecessors shall be dealt with the moment I invent a time machine and can go back and have a word with them! -grin-)
I digress. I do that often, just bear with me.
So it is my dual goal to
a)increase awareness and accuracy of KNOWN sprang items, as well as give instructions on how to re-create them or something like them, if desired, and
b)to present arguments, through experiments of my own, as to whether it would have been feasible or practical to make other necessary items from this method.
And sometimes, I'll add in things that I've made, whether period or not, just because I love sprang and really enjoy making things with this method!
In the past 4 1/2 years that I've been doing and teaching sprang, I've done many items I no longer have. If you have one of my pouches or hairnets, and have a picture of it, please send it to me, so that I might add it to this page!
*************************************************
Basic Sprang
Basic sprang, as found in hair nets and stockings from early period, is done rather quickly and easily. It takes just the very basic knowledge of how to twist the threads, to make either item, as well as pouches, and any of the other items mentioned above. The only thing that might need to change is the size of the loom.
Sprang items found in the Middle East and in Scandinavia were generally done in wool. The European existing pieces are monochromatic, but to tell the truth, that makes little sense to me. Knowing that the Norse people (or Vikings, as a generalization), used lots of color in their garb and jewelry, I believe that there are many pieces of sprang that simply have not survived, and that they would have been colorful, indeed.
Now the Middle Eastern sprang enthusiasts... they not only loved color, but they loved design. There are many pouches and caps that have been found in the Karanis dig in Egypt, which is a Roman Coptic era find, that give weight to these findings. Red, orange, yellow, green, blue, and black were the main colors used, though there have been a few pieces found that also include yellow-green yarn and purple. The Copts also were very enthusiastic with their design, letting vertical lines interact with diagonals, diamonds, and dots. The method of these 'twining' designs is simple enough, once one has a working knowledge of basic sprang.
The Copts also enjoyed using S and Z twist patterning in their work. Sometimes in addition to the twining, which gives a very cool effect! S and Z twist patterning is often very intricate, with many intersecting points that give great textural interest to the pieces they grace. Some are fairly simple to re-create... others, not so much.
But the Copts weren't the only ones that enjoyed playing with texture... our Norse friends did as well, using alternating bands of S and Z twist to add interest. The alternating bands also reduce the tendency to curl, which is something that most sprang pieces have, if they're not sewn into a pouch or hairnet. Lying flat, they tend to want to pretend to be a strand of DNA, and curl up fairly tightly.
In the following pictures, I hope to give the basics, without bogging the reader down with too much information at once! More pictures and projects can be found in my book, Sprang: A Twisted Little Art, available from The Spanish Peacock. URL is at the bottom of the page.
***************************************************
What you will need to get started:
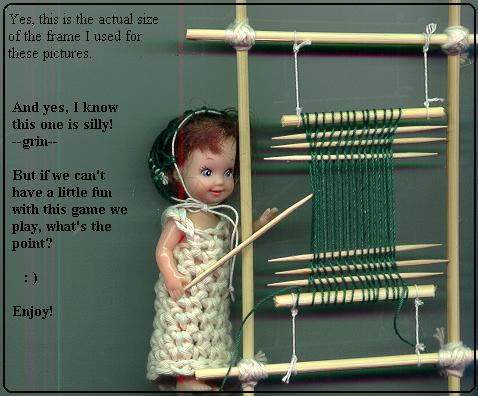
1) a frame of some sort. You can use two sticks, one tied to a doorknob, the other tied to a belt at your waist... just stand close enough that it will work! You can also use a large picture frame (I found one at a yard sale that was about 2 feet by 1 1/2 feet. turned out to be perfect for the first few projects, but didn't hold up under continued strain as I ventured into more elaborate designs). You can also make a simple frame using sticks of 3/4" PVC and 4 90degree PVC angles. These can be found at your local hardware, home improvement, or plumbing store.
2) yarn. I suggest using cotton or acrylic yarn to start with. Something cheap, but something you will also be proud to show off, if your first piece turns out as great as I know it will. I tend to use 'dishcloth' cotton yarn when teaching my beginnger's class.
3) tension rods. These should be thick dowels... about 1/4" to 3/8" thick, and almost as wide as the opening of your frame.
4) Something to use for shed sticks. Quite simply, you need something to hold the twists made in the last row, while you're making the twists in the working row. I used bamboo shishkebab skewers for a long time, and still put them in my kits when teaching. You can also use double-pointed knitting needles, which is convenient as they tend to come in pack of 4-6. The size of the shed stick is important only if you are planning not to pack the warp (see section below on that). If you're packing the warp as you work, it will not matter so much, but the thinner the shed stick, the tighter the work, generally speaking.
5) Patience. This is one of those arts that takes a bit of muttering under your breath, unless you're a major string-geek, and sometimes even then! Just read the instructions carefully, and pay attention to the front AND back of your work. Often, you won't see a missed thread on the front, but it will show up on the back as a 'floater', and you can go back and fix it. So check often until you know how to recognize a mistake from the front.
6) Have fun! Unless you're entering something into SCA competition, the sky's the limit. You're only hampered by the size of your frame and your own imagination.
***************************************************
Step One: Setting up your frame
Put your frame together.
Next, using the same size loops of thread, tie the tension rods to the top and bottom of your frame. You will want to pass the end of the loop through the other end of itself, around the bar of the frame, then stick the dowel into the now-dangling loop and wind it up a few times. I use a CD case to tie my tension loops, to give a nice, uniform size, and this is the right size to allow the yarn to pass over the tension rod, between the rod and the frame. You want to leave enough room for that!
image
Step Two: Warping
Tie your yarn to the bottom left hand of the tension rod, AFTER the loop holding the tension rod on. You want to warp between those loops, not outside of them!
Now, take the ball of yarn up and pass it from the front to the back over the top of the top tension rod. Take the ball back down to the bottom, and pass it from back to front under the bottom tension rod. Note that you are simply making a big loop around the tension rods. You're not criss-crossing them at all. You want to be able to stick your hand between the front and back threads, and be able to touch both tension rods without encountering any threads.
You'll also want to be sure to keep the threads side by side, not crossing. If you're having trouble with this, you can tie a thread across the middle of the frame, and warp like this:
pass the yarn up from the bottom rod, behind the middle thread, then up and from the front to the back, over the top rod.
Then take the yarn down from the back, come to the front and over the middle thread, then again to the back and from back to front under the bottom rod.
What this does, is simply a way to keep all the threads in the right place as you're warping. This is especially useful when using smaller thread or a very large warp, where things can get tangled rather easily during tension adjustment.
When you've got the warp large enough, tie off the yarn to the bottom right hand end of the bottom rod.
Tension
As you're warping, keep in mind that you want the warp to be taut, but not so tight that you could use it for a bow! It should be the same tension all the way across, but you'll find that most times, you need to go back and adjust this after you're done warping. Simply ease the looser strings up or down (using the front threads only), until you have the right tension. Sometimes it also helps to adjust string by string, but hopefully you won't be that OCD on your first project! As long as it's fairly even and tight, you'll be fine.
If it's too tight, you can alter the tension by releasing one of the loops on one of the tension rods. Remember that I had you loop the dangling end of the tension loops around the rod? Now would be a good time to let one of those loops unwind, on both ends. This will relax the warp somewhat, and you shouldn't need to adjust it again until you're well into your sprang.
Step Three: Sprang!
***Please check back for updates... I'll be working on this page quite a bit over the next few days!***
My booklet can be ordered from http://spanishpeacock.com
Thanks so much for your understanding, and look for the revised instructions soon!
Click on the link below if you'd like to join the Sprang discussion group!
