Pond Construction
One year after the main pond was completed we constructed a pond addition.

Step 1 - Site Selection and Planning
At the south end of the main pond there was a 7 foot young maple tree. Our concern was that it would grow to completely shade the pond. After the tree was relocated, there was an 18" deep hole. The pond addition was centered around that hole.
Because the area was lower than the main pond, a stream was planned to connect the main pond with the addition. A second skimmer and pump were also located to move the water back to the top pond.
Using spray paint, I outlined the area to be dug. A second line was used to indicate different water depths.


On the left: looking north toward the main pond.
On the right: looking south east. Note the markings to delineate the different water depths.
|
Step 2 - Excavation
Being blessed with 2 strong teenage sons, I was able to have my pond dug by hand. In our area it is mostly clay. The pond is approximately 15 feet by 12 feet, 18" deep at the center and 12" deep at the periphery. A 2x4 with a carpenter's level was used to set the skimmer at a depth that would leave 1 inch of the opening above water level. It was also used to make sure that the sides of the pond were level. In this case, the north side was slightly higher than the south.
The stream is approximately 4 feet long and drops about 4 inches. The black box contains the pump and skimmer. The holes in the ledge are for planting. Because there are many turtles in the main pond, the stream did not yet broach the fence.


On the left: looking north toward the main pond, skimmer at the west end.
On the right: looking north east. Note the planting trenches on the ledge.

On the bottom: looking east. The stream comes up to, but not past, the fence.
|
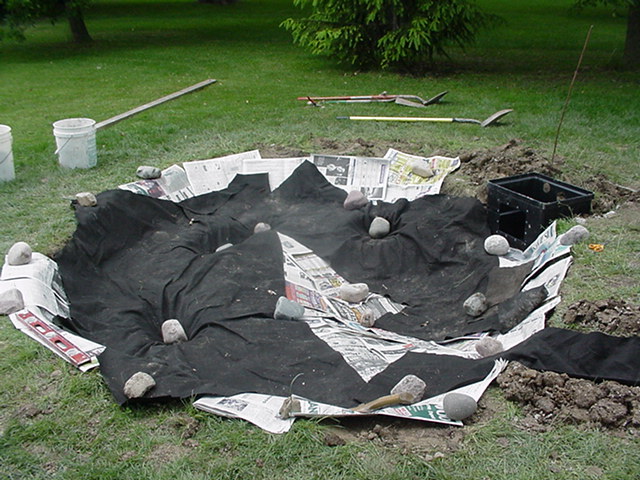
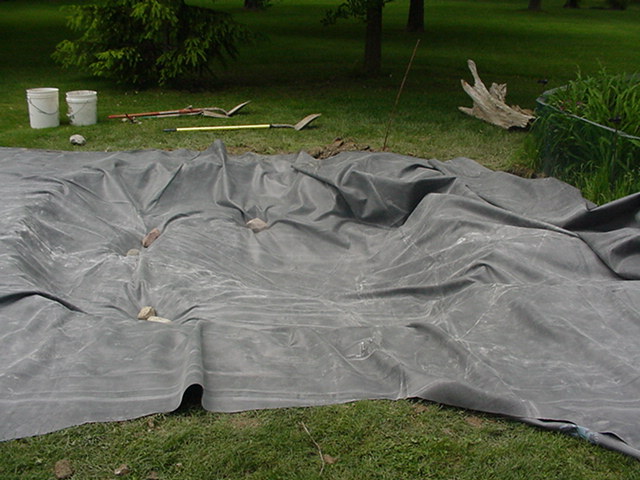
Step 3 - Underlayment
To prevent hard objects from poking holes in the liner, the hole is lined with padding. We used pieces of Geo-textile underlayment left from the main pond construction the previous year. The gaps were filled with multiple layers of newspaper. Carpet remnants can also be used.
Because the day was windy, rocks were used to temporarily hold everything in place.
The liner continues up the stream to the fence. |
Step 4 - Placement of the Liner
A single piece of 45 mil EPDM rubber liner was used to cover the entire project. Adequate material was left at the north end to extend the entire length of the stream plus 1 foot. It was molded into the trenches and around the skimmer.
A hole was cut in the liner to match the opening in the skimmer, silicone sealant was applied, and the overplate was screwed into place. Then excess rubber was trimmed leaving about 6" around the perimeter.

On the left: looking west.
On the right: looking north.
|
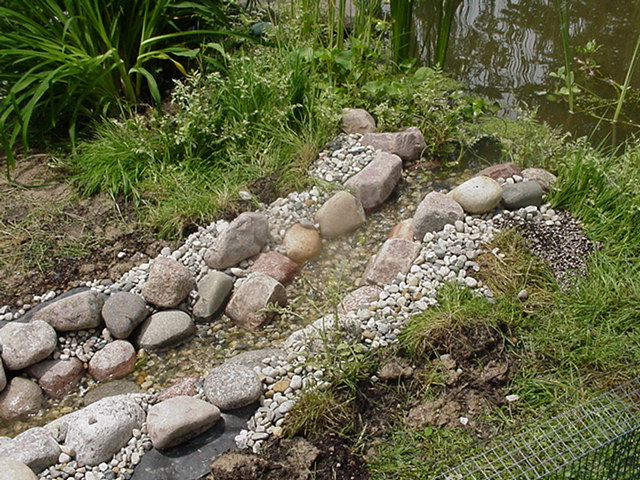
Step 5 - Rock and Gravel
It is advantageous to rinse your rock and gravel prior to placing in the pond, otherwise the fine dust will cloud your water temporarily. Rocks and stones of various sizes are used to line the steeper slopes. Everything else is covered with gravel. Here you will see the use of granite.
Water was pumped from the main pond into the pond addition. This lowered the main pond water level sufficiently to permit access to the main pond liner.
The fence was opened at the area where the stream was planned. Plants were moved. Dirt was dug. The main pond liner was elevated and cleaned. The end of the stream liner was placed under the main pond liner and sealed with Beckett Pond Liner tape. The joining tape is 2 inches wide and we placed two rows, making a 4" juncture. Because the water was running downstream over the junction, we did not have to worry too much about leakage.
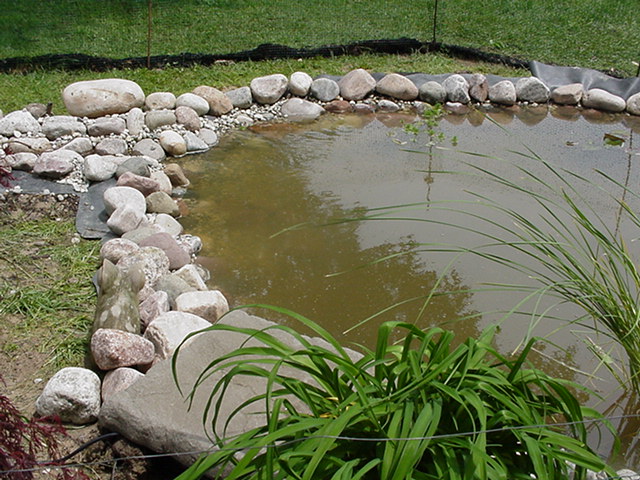
Then gravel and rocks were placed. Additional fencing was rapidly constructed to prevent escape. The ponds were filled to capacity with water. The pumps were started.
Waterlilies, aerating water plants (Myriophyllum) and dwarf cattails were planted. The roots were dug into the trenches and covered with gravel. Duckweed and water hyacinth floated down the stream and took up residence in the new pond.
| | | | |