![]()
![]()
Origami Form 1-step 1
|
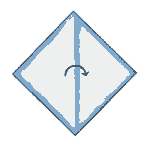
Take one white 8" square of origami paper and start with a diamond shape, colored side down, folding in half right to left corner lining up the edges carefully, and then unfold. This leaves the center crease. |
Origami Form 1-step 2
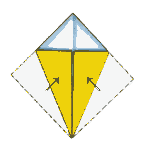
| Fold the left and right sides to the center crease, so your paper looks like a kite. |
Bunny Body
|
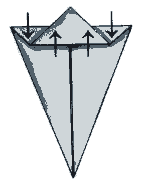
This is a two-part form. You'll start by making the bunny's body. After you've followed the directions to make the basic form above, fold the top point down to the horizontal line made by the two sides you just folded in. Then fold it back again half way up, following the diagram to the left. |
Cut The Ears
|
Fold the entire sheet in half lengthwise, making sure the two folds you just made are on the inside. This is called a valley fold. From the thin end, make a cut a third of the length of the form. |
Fold The Ears
|
Lay the origami flat, with the cut edge to the left. To make the bunny's ears, fold both of the cut flaps back one at a time towards the right keeping both lined up with the center fold, following the diagram to the left |
Back Legs
|
Now take the front flap on the right and fold it forward, keeping the bottom edges lined up. Turn the bunny over and repeat on the other side. The bunny's body is now finished. |
Bunny's Head
|
To make the bunny's head, start with a 4" square piece of white origami paper. (Make sure the paper is exactly half the size of the other sheet.) Follow the directions above to make the basic form steps one and two to look like a kite. |
Bunny Head Step 2
|
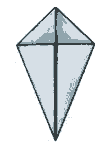
a. Take the bottommost point and fold it up to the top point where the two sides meet. b. Fold the form in half so that the point you just folded up is inside the fold. |
Attach Head To Body
|
Now you're ready to slip the head piece inside the body, lining up the two forms along the bottom egges. Tape the head in place. |
![]()
![]()
Origami Bunny
|
To make your bunny really look cute, glue the cotton ball on for a tail. Draw on or glue on wiggly eyes. Add a pink pom pom for the nose. For whiskers, ask a parent to poke two tiny holes in the nose with a tooth pick. Then thread one tooth pick from the lower left hole to the upper right hole. With a second toothpick, thread it diagonally in the opposite direction so that they form an X inside the nose. With markers or colored pencils, draw pink triangles inside the ears and lightly sketch in hind legs as shown. |
![]()