
Case Mod
Seeing that so many people have decided to mod their own cases, I decided to do something to my own full tower. Summer has just started and temperatures in my case shot up to above the 95F mark, which I think is too hot. People suggested turning the ac on, but that sure would waste a lot of electricity. Shooting down all those ideas, I went for the other suggestion, making blowholes and intake fans.
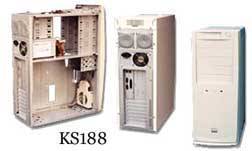
I chose the Antec KS188 because of its great price and its spacious interior. Here is a pic of what the case before the mod looks like :
This
is what will be hiding inside the case :
Asus P3B-F 1005 Beta Bios
P3 550e @ 825Mhz (150FSB) with an Alpha P3125
2X128mb Infineon PC-133 Ram
Asus V6600 Geforce SGram
Sound Blaster Live! Value
SMC 1211 10/100 NIC
Cnet 56k Modem
Adaptec 2930 SCSI Adapter
8.4 WD Caviar HD
16.8 IBM Deskstar HD
Hitachi 5X DVDrom
Ricoh 6X4X24 SCSI RW
Now on with the tools and supplies I will be using. Here they are :
Dremel Multi-Pro Variable (Model #395)
Safety Goggles
Work Gloves
Ruler
Pencil
Philips Screwdriver
Sunon 1 X 120mm with metal grill
Sunon 2 X 80mm with metal grills
Antec 1 X 92mm with metal grill
YStech 1 X 60mm with metal grill
Many people say that the Dremel is hard to control and isn't the best suited
for this job. Totally false! It provides the best control and the most precise
cutting you'll ever get. Only pre-requisite you must have to use this tool is
that you have to be patient. If you decide to move the Dremel to fast around
a hole, you'll get a very nasty slip and cut. So TAKE YOUR TIME! Don't want
to ruin that nice clean case of yours! Oh, by the way, please get the steel
reinforced cut-off wheels. I tried with the ones they give you with the kit,
and it broke off in 2 minutes of heavy use and almost took my eyes out.
Always measure, measure and measure. Be precise in the area you are cutting
and draw lines with a pencil. It'll save you headaches from cutting out odd
looking shapes in your case. Make sure you take out all the components in your
case. You definitely don't want a fireworks special coming out of your case
after putting your computer back together.
Blowhole
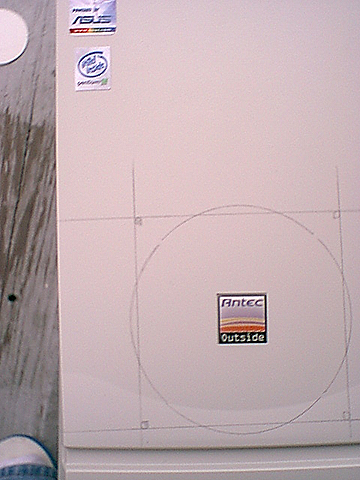
Having taken very simple physics in high school and college :), I figured that since hot air rises, an exhaust or 'blowhole' would be the simplest way of getting rid of heat. I will be using a 92mm Antec fan to do my dirty work. I used a 92mm grill to draw the hole. So I began chopping away at the top of my case for that perfect blowhole:

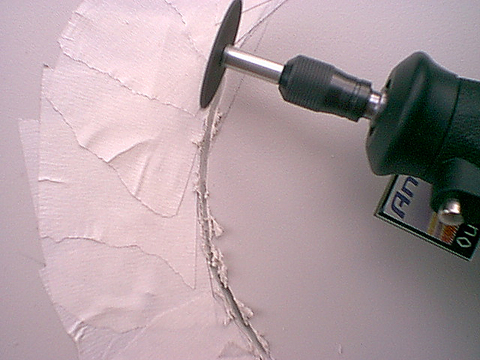
For the next step, I used masking tape to go cover the surrounding area of the
blowhole to prevent any paint chipping and so forth. It also provides a very
safe area to cut since if you slip, you won't scratch your case.

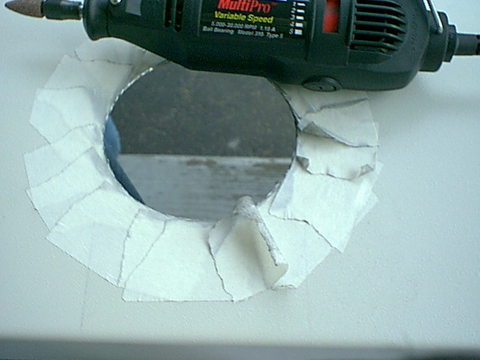
Now I slapped a cut off wheel onto the dremel and cut around the circumference of the hole. After cutting the hole, you would want to use the cone shape bit to sand down the hole to get rid of the burrs. I strongly recommend this! Don't run your finger along the hole after cutting it like me, unless you want some nasty cuts on your fingers :(
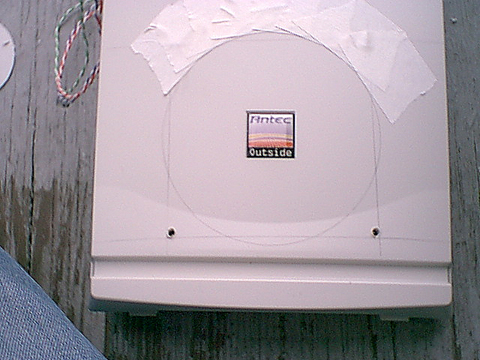
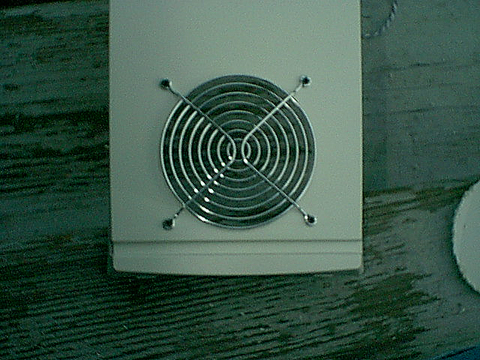
After
getting rid of the burrs, punch some holes in with the drill bit, put the grill
on it and you have yourself a very nice looking blowhole :

Front Intake
I
saw how the case came with a plastic front holder for an 80mm fan. How the hell
is this supposed to draw in enough air to cool all the components in a full
tower case? Barely enough in my mind, so I went out and bought a very nice Sunon
120mm fan. I decided to tear a bigger hole in the front to bring in more cool
air. Here is a picture I took before ripping the front intake. Notice how those
standard tiny holes are catching all that dust without letting any air in. So
I cut through the front, totally :

Again, I measured up the dimensions of the fan by using the grill. Penciled in the lines and shapes, and here is how it looked:
Now I stuck some masking tape on it again to prevent any accidental movements on my part. The only thing you should look out for is that the front plastic cover is very easily melted by the very fast and hot spinning Dremel. Do this outside or make sure you are in a very well ventilated place. The smell of melting plastic is enough to make you barf. Go slow or you'll have a very ugly looking mess. If you have the Multi-Pro, use the 5k-10k RPM setting. That is enough to cut through the plastic very neatly.
You should be seeing this type of severe burrring with the plastic. Don't worry, just use the sanding cone to get rid of those pesky extras.
Apply
the grill and you got yourself a very neat finished product!
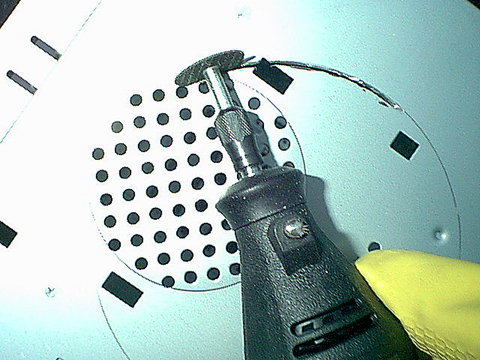
The inside metal is a lot harder and thicker. I decided to not put masking tape around this time. Since it was gonna be inside my case, I took my chances and did it freehand going around the pencil mark. It took about 3 cut-off wheels to finish it off. So make sure you buy enough of those things! I drew up lines with a pencil again :

There are sparks in this picture, but the flash kind of took it out. Make sure you have gloves and goggles on at this point, it hurts to have shooting sparks coming at you:
This is the result. A very large hole that provides very little air disturbance and noise. Slapped my 120mm fan in there and its ready to go! You can see my feet in the picture. Don't laugh, those slippers are very comfortable.
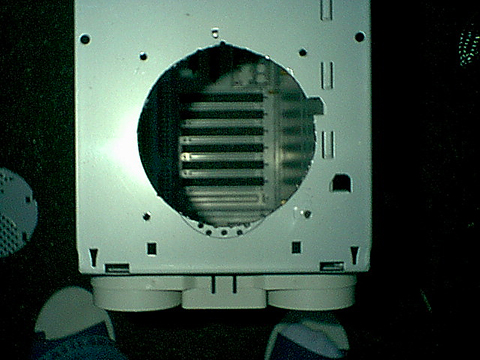
One more thing, while I was cutting the hole I noticed that the case speakers had to be moved. So just take a pair of pliers and open up the brackets holding the speakers, and move them somewhere else. I just used plain electrical tape and put them to the side. Very simple
The Rear Exhaust
With all that air coming in through the front, you need to make sure it goes out to create that perfect air 'tunnel'. So the most perfect place to stick these 2 80mm bad boys was in the back. Very nicely done on Antec's part was that they already drilled 2 spots for it in the back. The only bad part was that again, they decided to use tiny itsy bitsy holes :
After the normal penciling and masking taping, heres the end result :

This has probably got to be the easiest and most efficient way to get air out. It also greatly reduced the noise level since the holes have been chopped out.
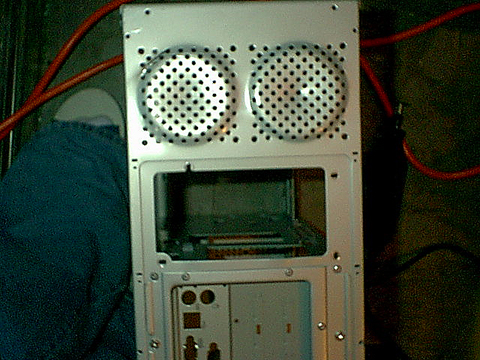
I had a spare YS Tech that I ripped out of a Globalwin hs/fan combo so I decided to stick it in the space next to the I/O panel right above my Geforce. Since I had my Alpha heatsink fans suck air out, there was a tremendous amount of hot air sitting right on top of my Geforce. The video card itself was pumping out heat also so this was a good way to get rid of some air at the hottest spot. I penciled, taped and drilled. I had a couple of mistakes because this panel for some reason was very stubborn. Maybe it was because I was getting very impatient and wanted to get the damn thing over with :) :
I
am not lying when I say that I did this in one Friday afternoon (yes, I lead
a less than boring life where I can do this on a Friday afternoon...). The longest
wait I had, was waiting for all the parts coming in (ie. fans, grills, DREMEL!%#^!).
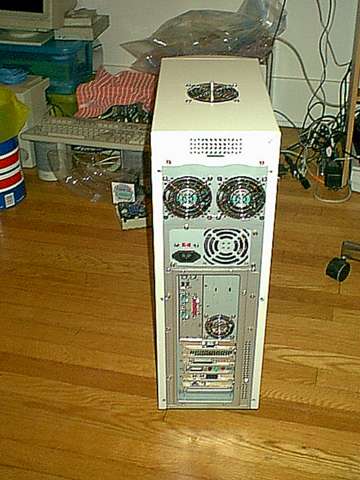
So here is what the monster looks like :

Here is a view from the back. Nicely ventilated, finally! :
This is screenshot of Motherboard Monitor. It hasn't dipped above these temperature since I have put this mod in and it is really hot here in the summer! :

TAKEN FROM GIDEONTECH.COM
