Kevin's Super Mario 64 page
Kevin's Super Mario 64 page
Super Mario 64 Walkthrough
Course 3: Jolly Roger Bay
My walkthrough is designed to help you in your Bowser- battling and star-collecting journeys. Unlike some Mario guides, which only give info on getting
stars, My walkthrough shows the exact directions to get the stars and secrets, plus info on the courses.
The goal of Mario 64 is to get back all 120 power stars in the castle that Bowser stole. I will give detailed directions for how to get each of them on every level.
Good luck!
Level Description: Jolly Roger Bay
Jolly Roger Bay is SM64's first water stage, so it would be wise to master the swimming and diving techniques before attempting to achieve any underwater stars. Located inside the bottom-right room of the castle's first floor, this stage requires 3 stars to enter. Jump into the painting with a sunken ship to enter the Bay.
There are a handful of new enemies dwelling in the new environment, along with the familiar Goombas and Bob-omb buddies. Included in Jolly Roger Bay are a underwater cave, a sunken ship, and 1 cannon. You will also have to avoid drowning in the water, therefore losing a stock. This is the first Mario game that Mario can die by losing air, but the water also provides a beneficial effect--healing. Since Mario loses air (which is the same as health) when he goes underwater, he also regains all the air (health) when he surfaces. What does that mean? If you wear yourself down to 2 health pieces elsewhere, a jump into the water (plus surfacing) means you get all your health back! Sweet!
Level Statistics:
coins: 104
cannons: 1
shells: 1, underwater
caps: 0 wing, 3 metal, 0 vanish
warps: 0
hearts: 0
blue coin switch: yes
Star 1: Plunder in the Sunken Ship
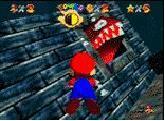
Jump in the water and swim all the way forward. When you're in the deep water, dive down. You should see a sunken ship with a big eel sticking out of its hole.
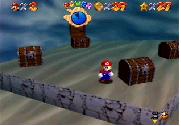
Get the eel's attention by swimming near it, and quickly swim back up to get more air. The second time you come back down, the eel will be gone, and the hole will be vacant. Enter the hole, and you'll be inside the ship! Go to the front of the ship to get some air, and venture back to the area with many chests. Go right next to the chest's keyhole to open it. Open the right chest, and a number will pop out, along with an air bubble that replenishes 5 health pieces.
Get the wrong chest, and you'll be zapped with electricity. Below is a map of the order the chests are to be opened.
Open all the chests in the right order, the water will drain out, and the ship will rise to the water's surface! Turn around, and you'll see a bunch of ledges leading to the front of the ship. Using a combination of different kinds of jumps, ascend up to the top. At the highest ledge, a '!'box holds your star!
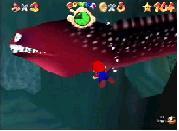
Star 2: Can the Eel Come Out to Play?
After you get the first star, some noticable changes will take place in Jolly Roger Bay. The sunken ship will be raised, and the eel that once guarded the ship window has returned to its hole. Dive down next to the ship and search the area to find the eel's hole(the eel's head should be sticking out). Get the eel's attention(again), and it will slither out. There will be a power star on its tail! You must swim to get it.
Be careful not to get hit, because the eel can hurt you BADLY. If you miss, surface to replenish air. For the average gamer, this star may take you up to 15 minutes to get, especially if you're not used to swimming.
Star 3: Treasure in the Ocean Cove
Dive in the deep water again and explore the left side. you will see a hole that you can go in. Come to the surface to get more air, and go in the grotto. Be very cautious, because there are pillars that fall without caution! At the end of the grotto, there will be 4 chests.
As with the chests inside the ship, a wrong choice will result in electrocution.
As soon as the chests open, a star pops out!
Star 4: Red Coins on the Ship Afloat
Jolly Roger Bay's red coins are not hard to find, and 4 of them are guarded by pink-shelled clams. To snatch the coins away from these hard-shelled creatures, stay close to them and wait. Eventually, they will take a breath and open their shell. Take that oppertunity to quickly grab the coin. Here is a list of the coins:
Red Coin #1: At the beginning of the level, these hard-to-miss coins are inside clams.
Red Coin #3: In a clam near the pink Bob-omb.
Red Coin #4: Climb the pole near the pink Bob-omb and do a handstand at the top(ouch!) to get this coin.
Red Coin #5: Guarded by a clam, this coin is underneath the ship.
Red Coin #6: Step on the purple '!' near the Pink Bob-Omb to activate a series of bridges that lead to the ship. Cross the bridges and get this coin on the ship.
Red Coin #7: Up at the very front of the ship, atop the steep incline. Time a backflip onto the front when the rocking of the ship is in your favor. You can also double/triple jump to get up on top.
Red Coin #8: Same thing as Red Coin #7, just a few feet away from it.
Lucky for you, the star marker is right there on the ship, making this star even easier to get.
Star 5: Blast to the Stone Pillar
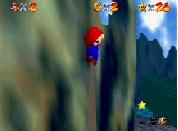
Swim over to the Bob-omb buddy at the right of this level. One cannon, located by the shallow water, will be open for you. Aim towards the first stalagmite on the left.
Be careful to aim above the stalagmite, because you need to grab the tip of the pole(or you will simply slide down).
Now, with Mario's back facing the slab of rock where a power star lies. Jump, and you should land on the pillar. It's just a few steps away from the star!
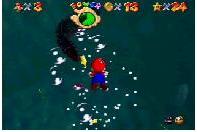
Star 6: Through the Jet Stream
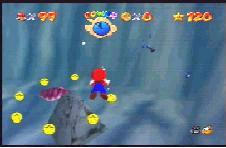
Okay, you must have beaten Bowser for the first time, entered Hazy Maze Cave(stage 6), and stepped on the Green Cap Switch to achieve this star. Stepping on the switch will cause 3 Green blocks to fill in. On the platform with the purple '!' switch, grab the Metal Cap from the Green Block. Immediatly jump in the water.
Mario will sink to the bottom and be able to walk on the sea floor. Go to the star in the center of the bubbles and jump to get the star. Be sure the Metal Cap doesn't run out!
Star 7: 100 Coins
Getting 100 coins in this course shouldn't be a real problem if you can swim very well. There are only 104 coins total in this level, and 30 of them are from blue coins activated by stomping the blue coin switch. That means if you miss one blue coin, you'll never get the 100 coins needed. Many coins appear in circles of 8, and some coin circles are more hidden than others. Don't forget the red coins and the coins on the docks!