Jackson Gamers' 25mm Medieval Battle The Irminsul

Photo by Jim Pitts
The Frankish army slogs it way forward at the height of the attack on the Irminsul hill. A Saxon defender scurries to the rear. Additional defenders from the Saxon right wing can be seen on and approaching the far side of the hill.
This game was played on February 16, 2008, using parts of the 25mm armies of Jim Pitts, Robert Whitfield and Jay Stribling. During the time of Charlemagne, various Saxon lords attempted to resist the Frankish army of Charlemagne. Sean Pitts was the Game-master for this battle. We used the "Rules by Ral" to play this game.
The commanders
Franks - Phil Young(left wing), Jay stribling (center) and Larry Reeves (right wing)
Saxons - Jim Pitts (right wing) and Ed Sansing (left wing)
Situation: After winning the last two battles, Charlemagne advances into deeper into Saxonia, this time aiming to capture, up-root, and burn the Irminsul, the Saxons most sacred worship site. This ancient tree, shorn of almost all of its branches provides the center for the Saxon religious fervor. The Saxons will surely defend it to the last man. But if Charlemagne can capture it, then the last of the Saxon resistance will crumble.
The wounding of Charlemagne and the two right wing commanders and thier subsequent absence from the battle critically impacted the Franks ability to rally their fleeing units. The tenacity of the Saxon defense on the Irminsul hill, especially their ability to move reserves from the right flank to the center resulted in a hard-won Saxon victory. The battle had could have gone either way right up to the very last -- a good fight by all concerned.

Photo by Jim Pitts
The center of the Saxon line, with the Irminsul perched on top of the hill. This was the position at the start of the game. Three Saxon axe-armed, heavy infantry units and an archer unit were the initial defenders of this hill. Two peasant units were held in the rear of the hill.
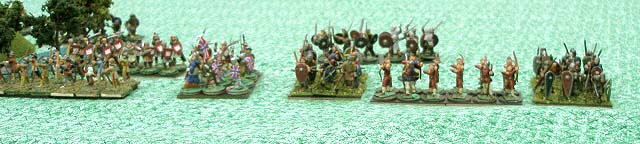
Photo by Jim Pitts
The Saxon left wing, commanded by Jim Pitts, with three spear units, two archer units, and two heavy infantry units.

Photo by Jim Pitts
The Saxon right wing, commanded by Bill Hamilton, with three archer units, three spear units, two heavy infantry units, and two units of peasants. Because of the immobility of their opponents, several of the units in this wing were moved to reinforce the center and help protect the Irminsul.

Photo by Jim Pitts
The Frankish left flank, commanded by Phil Young, with two cavalry units, two pike units, one spear unit, and one archer unit. Until late in the battle, this wing was refused and didn't really do anything.

Photo by Jim Pitts
The Frankish right wing, commanded by Larry Reeves, with four cavalry units, four spear units, and one archer unit. His task was to sweep the Saxon left wing from the field and encircle the Irminsul hill.
This photo also shows some of the debris of tape measures, dice, rules and elbows that afflict the battlefield whenever the Jackson gamers play.

Photo by Jim Pitts
A closer look at the Saxon center, commanded by Jim Pitts, as they prepare to defend the Irminsul from the attacking Franks.

Photo by Jim Pitts
The initial attack on the Saxon left. The Franks came in swiftly and both sides began inflicting horrendous casualties on each other.

Photo by Jim Pitts
The Frankish center attacks the hill. This force, commanded by Jay Stribling, consisted of four spear units and two archer units, led by Charlemagne himself.
Jay Stribling notes: "The Franks (mainly me) made a mistake in our initial assesment and planning. The plan was for a direct frontal assault on the hill while our left and right wings kept the enemy from reinforcing. On the right, where Larry Reeves outnumbered and outpowered his Saxon Foe, this worked. In the center, terrain kept me from using all of my force. I still ground up the original defenders, but we could not keep the Saxon right wing from entering the battle in the center. They fed in fresh units, because we had made our left wing, commanded by Phil Young too weak."
Stribling continues: "Because of a long patch of woods that formed a shield which neither our left nor the Saxon right could penetrate, we were not able to keep Bill Hamilton out of the fight for the center. That ruined us! A better plan would have been for the Franks to make our right very strong and completly crush the Saxon left, and then pinch out the hill before making the assault. While Larry Reeves actually did a mini-version of this, it was not enough, and the Frankish center was not able to take the hill.
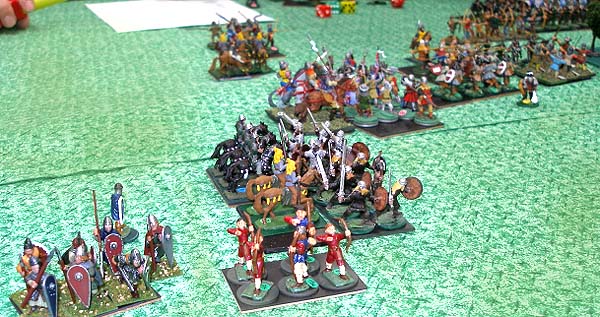
Photo by Jim Pitts
After the initial attacks, the Frankish cavalry demolished the Saxon left wing, although suffering heavy cavalry losses to themselves. Here Saxon units can be seen fleeing while Frankish cavalry attacks another Saxon unit in the rear.

Photo by Jim Pitts
With many of its defenders dead or fled, the Irminsul hill is lightly held. But many of the Franks are also dead and Charlemagne is critically wounded and carried from the field. With the two commanders of the Frankish right flank also casualties (one captured and one killed), the Franks seem to lose heart.

Photo by Jim Pitts
And the remnants of the Saxon force doggedly defend the Irminsul as night falls and the Franks withdraw to lick their wounds.
And how did the entire campaign turn out?
The four-battle campaign was a draw with the Saxons winning the first and last battles and the Franks winning the two in the middle.
Go to the first game in this mini-campaign.
Go to the second game in this mini-campaign.
Go to the third game in this mini-campaign.
Return to the Master Index of Photos and Games
Return to the Jackson Gamers' Homepage
Angelfire - Free Home Pages
Free Web Building Help
Angelfire HTML Library
htmlGEAR - free polls, guestbooks, and more!
Thank you for visiting The Jackson Gamers' pages at Angelfire. Please come back and visit again!