D'Erlon's First Corps attacks on June 18, 1815
The Attack on the Center
This battle report was written by Jay Stribling, from notes provided by Jim Pitts and Ed Sansing. We used our Brom Napoleonic rules, adapted from Larry Brom's "Standard Rules" on this web site.
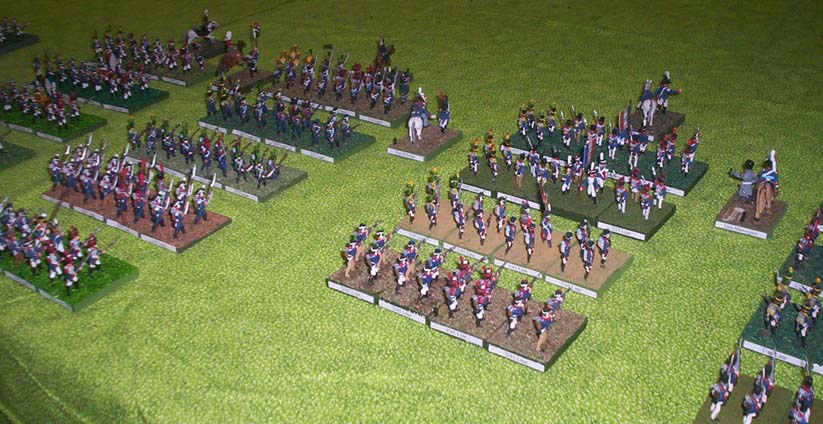
Photo by Robert Whitfield
French 2nd and 3rd Divisions of D'Erlon's Corps began their approach march. These two divisions were in brigade columns with battalions deployed in line.

Photo by Robert Whitfield
Part of the British defensive line. General Bijlandt's Dutch-Belgian Brigade and the artillery are the only units visible to the French. The rest of the Allied forces are marked by the rocks.
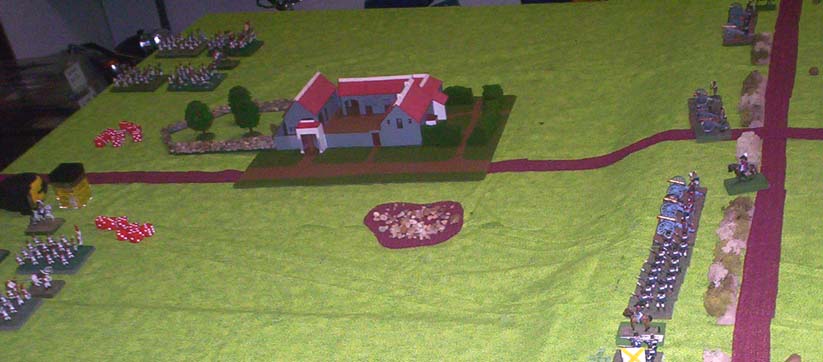
Photo by Robert Whitfield
La Haye Sainte and the French 1st Division with part of Bijlandt's Brigade on the ridge.
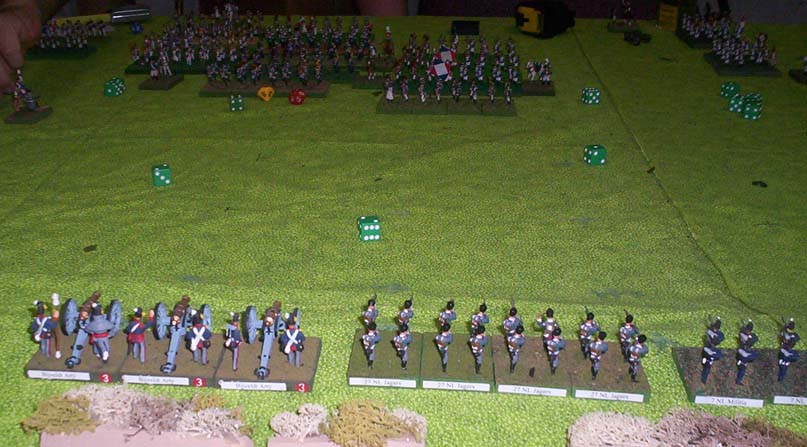
Photo by Robert Whitfield
Looking from behind Bijlandt's position toward the advancing French. Unknown to the French, Bijlandt's Brigade had been badly shaken by the French bombardment and were rated as "Red" (poorest) morale.

Photo by Robert Whitfield
More British troops are now visible to the French, mainly Kempt's Brigade, including part of the 95th Rifles in the sand pit.
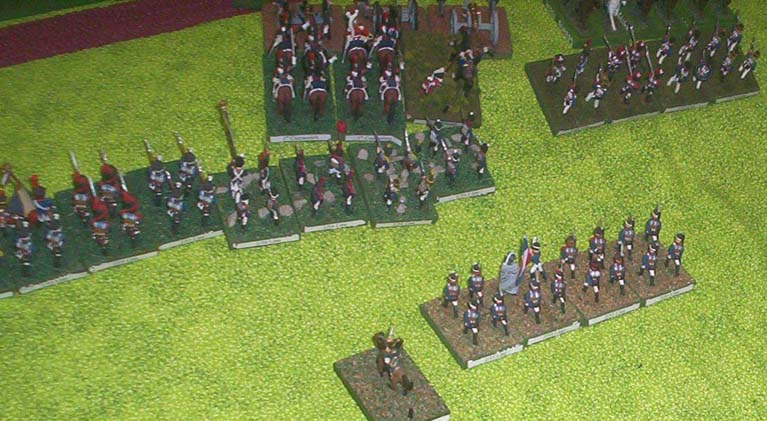
Photo by Robert Whitfield
French attack by 1st Division and the Cuirassiers against Ompteda's KGL Brigade.
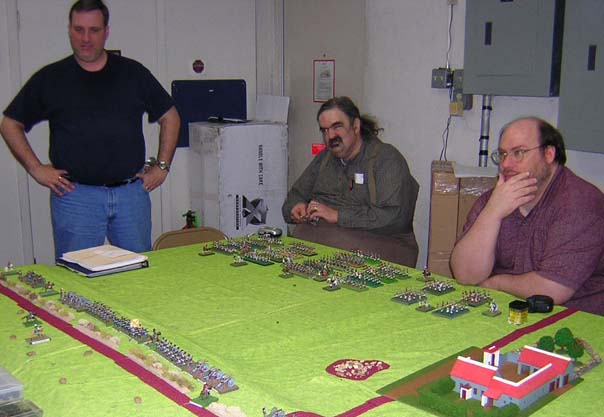
Photo by Ed Sansing
A view of most of the field from the British side. Jim, Robert and Rick are listening to Jim talk about the scenario.After this we chose up sides.
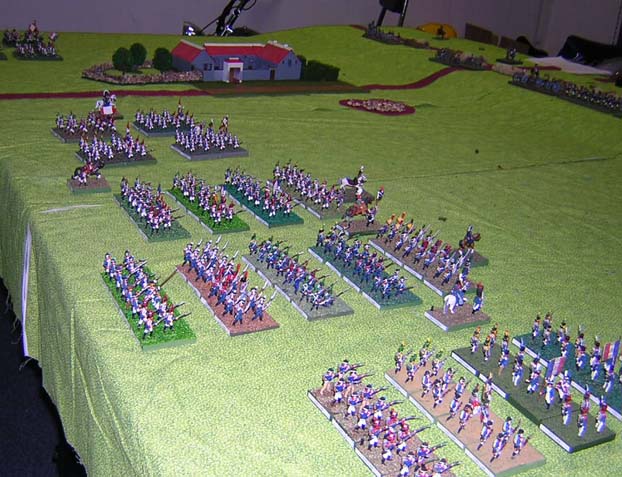
Photo by Ed Sansing
A view from the French side of the battlefield showing all their troops at the start of the battle.
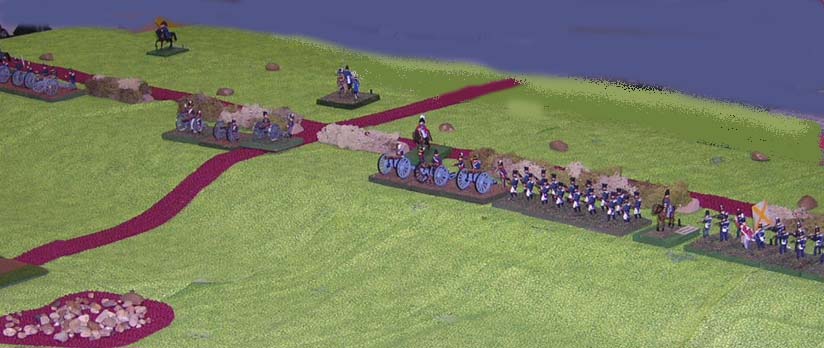
Photo by Ed Sansing
The French perspective of the British line. A lot of cannon and a few infantry on the forward slopes. Due to good luck (Excellent die rolling by the British) only one of the artillery batteries was damaged by the French preliminary bombardment. (The British/allied gunners lost one figure out of 30 at risk!)
Unknown to the French, all of Bijlandt's Brigade was badly shaken by the bombardment and were rated as "Red" (poorest) morale.

Photo by Ed Sansing
The French commanders (Left to Right): Fred Diamond, Rick Loveday and Jim Woodrick. They are placing some late arriving cavalry on the board in their first move. Loveday seems concerned about the quality of his men!
Bill Estes (not shown) arrived late and replaced the wounded Woodrick.
The Scenario
Two days ago, on June 16, 1815, the Emperor Napoleon's army drove the British/Allied army and the Prussian Army apart at the twin battles of Quatre Bras and Ligny. Lord Wellington, commanding the British and their allies has fallen back to a position near Mont St. Jean, just in front of a great woods. The Prussians under the injured Field-Marshal Blucher and his Anglophobe co-commander General Gneisenau are thought by the Emperor to be falling back towards the Rhine, after being very roughly handled on June 16th.
Now is the time to crush the British. The Emperor, after some minor opening moves has ordred Marshall D'Erlon to attack the British/Dutch center of Wellington's line. Two brigades have been split off to mask the allied forces on D'Erlon's right, and the remaining five brigades, supported by part of the French Cavalry, slog through the mud and began to move uphill toward the British line. This is intended by the Emperor to be the decisive assault of the day. On this attack may hang the future of Europe.
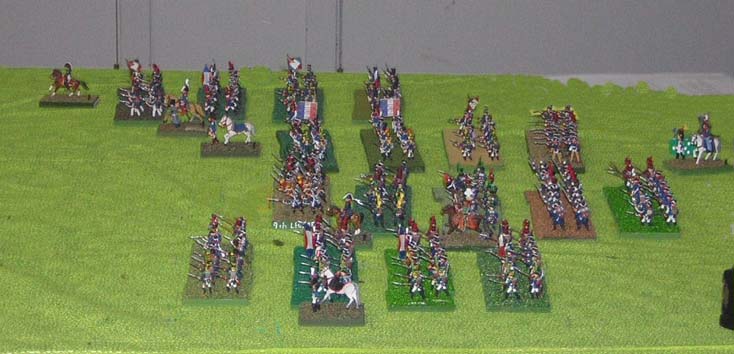
Photo by Ed Sansing
A blury image of the French right as it advances toward the British lines. Fred's Diamond's 3rd Division, had less soggy ground to traverse and pulled ahead of its companions in the 2nd Division.
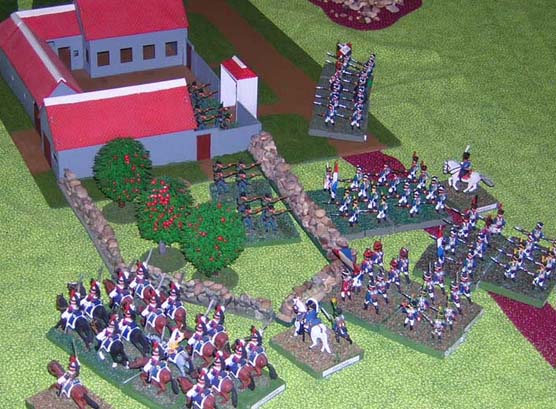
Photo by Ed Sansing
Parts of the French 1st Division assault the KGL light infantry in La Haye Sainte. They were never able to take it. The cuirassiers are disdaining this infantry squabble, seeking better game
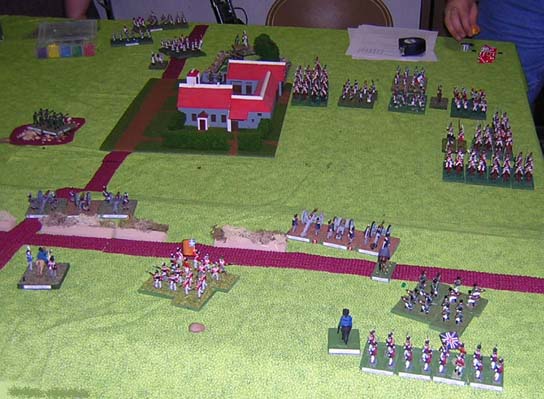
Photo by Ed Sansing
The French cavalry approach the British lines and begin to see the British infantry waiting behind the hedgerow.

Photo by Ed Sansing
The cavalry charges the guns and a square of infantry. The square is supported by another unit in line behind it. This battery was able to stand the charge but the battery next to it broke.
Flag images above are from the marvellous WARFLAG site
Go to Page 2 of The Attack on the Center
Return to the Master Index of Photos and Games
Return to the Jackson Gamers' Homepage
Angelfire - Free Home Pages
Free Web Building Help
Angelfire HTML Library
htmlGEAR - free polls, guestbooks, and more!
Thank you for visiting The Jackson Gamers' pages at Angelfire. Please come back and visit again!