The Jackson Gamers' American Revolution Battle
Greene Takes Command
This game was played on June 4, 2005. This was our first game using Larry Brom's new rules set for the American Revolution Disperse ye Damned Rebels!. While there were a few nits to pick, we enjoyed the game greatly except for Travis Melton, whose dice turned against him.
This game assumed that General Nathanial Greene was sent south to command the American forces there, in 1780, instead of the luckless General Horatio Gates. This represents a fictitious battle in which the British are advancing to "Get to know" the new American commander-in-chief of the south.
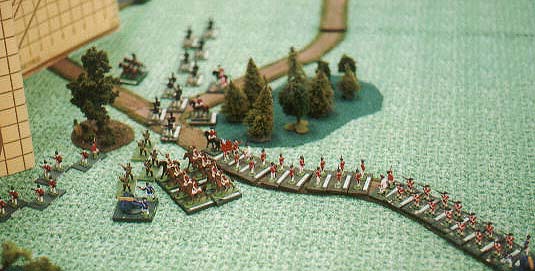
Photo by Jay Stribling
The British force just after set-up. You can still see the patented folding screen to the left, which allowed a hidden set-up within the limits proscribed by the game-master. The enemy (the patriots) is to the left, behind the screen. The British used a very concentrated set-up, unlike their opponents.
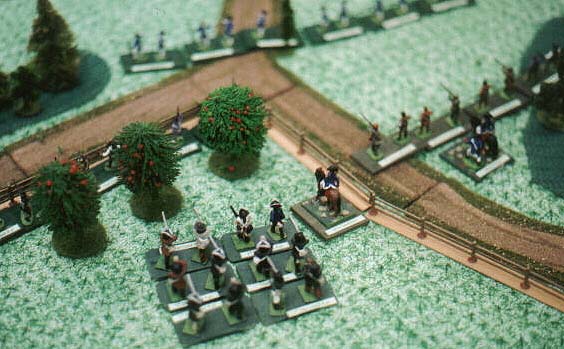
Photo by Jay Stribling
A close up of some of the Rebel infantry awaiting the British. There was a small river/stream between the two armies at set-up which cannot be seen here, but is ahead of the Patriots.

Photo by Jay Stribling
A bit blurry but showing the two cannons that the patriots moved out on the left-center of their line, firing to the right with a very nice enfilade of any British units crossing the stream. The blurry troops in the forground were three units of Virgina Militia in support of the guns.
|
American Forces - MajGen Greene
Advance Guard - Col Bland
Continental Artillery - 4 guns (2 x 6-lbrs and 2 x 3-lbrs)
For morale purposes, there are no "rifles." All Continental
Total Number of Stands:8 leader, 88 infantry,
|
British Forces - LtGen Lord Cornwallis
Advance Guard - Col. O'Hara
Royal Artillery - 6 guns (4 x 6-lbrs and 2 x 3-lbrs)
For morale purposes, all infantry except Jagers
Total Number of Stands: 5 leaders, 64 infantry,
|

Photo by Jay Stribling
A shot (the only shot) of the Patriot right, showing infantry in line, gradually moving up to the river line. The Patriots knew that the stream was fordable all along it's length. The game-master made the British dice for each section to see if it was fordable or not!
The British were allowed to set up close to the screen, which generally ran along the stream, but they were not allowed to spread out into line at start, except for one unit. The Patriots could deploy anywhere and in any formation, but no closer than 12" to the stream.
So the first problem of the British was to spread out and deploy into line. The Rebel's first task was to move up to their chosen fighting positions (the line of the stream.)
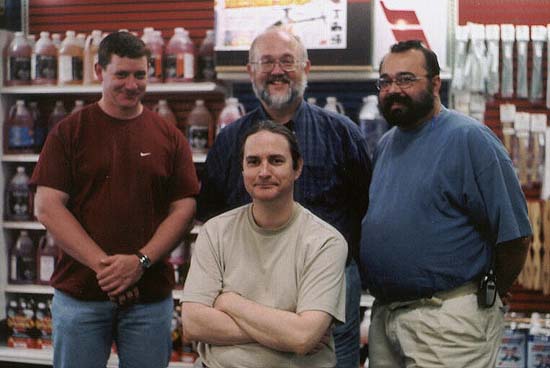
Photo by Jay Stribling
The Rebel commanders. Sttnding, left to right: Mark Gilbert, Jay Stribling, John Hesselrig. Seated: Phil Young (General Greene).

Photo by Jay Stribling
The British commanders, standing, left to right: Bill Estes, Travis Melton, Sean Pitts. I cannot remember who was the commander-in-chief. Seated: the Game-Master Jim Pitts.
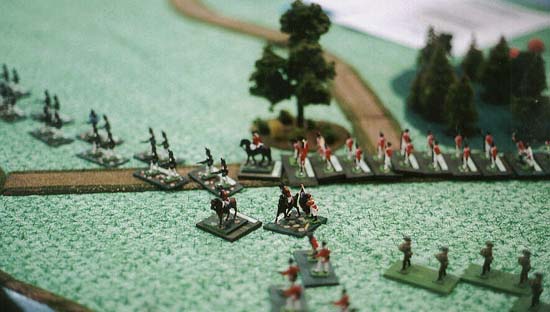
Photo by Jay Stribling
Turn one! The screen has come down. Light troops stretch left and right in open order. Columns of redcoats march for the one marked ford over the stream.
|
British Special Instructions
British Victory Conditions
Patriot Special Instructions
Patriot Victory Conditions Victory Conditions:
|

Photo by Jay Stribling
Sean Pitts (British) seizes the moment - and the dice! Travis Melton prepares to take the measure of the situation. A young onlooker in red seems to wish she was marching with the British.
Travis later faced the troops he was moving to their left (right in the photo) to guard against four stands of Patriot cavalry that showed up in the corner of the table (where the opened gray box is in this photo.) These mounted troops kept two British regiments in line awaiting a cavalry assault that never came.
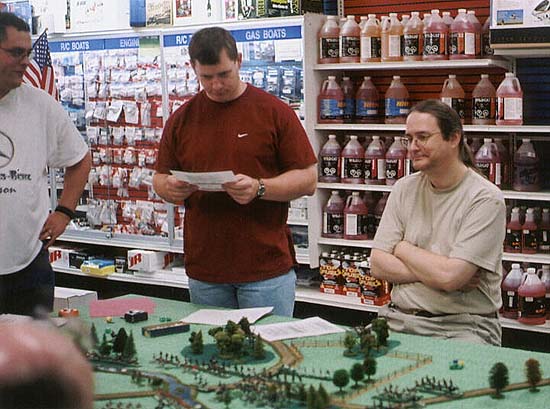
Photo by Jay Stribling
American General Mark Gilbert carefully checks the victory conditions and set-up guide while General Greene (Phil Young) keeps a calm over-view of the situation.

Photo by Jay Stribling
The center of the line at one of the turning points of the game. Loyalist and Patriot light infantry struggle for the woods in the center of the line. If these woods fall to the British, the Patriot advanced battery that did such good work will have to be destroyed. To the left long lines of troops blaze away at each other.
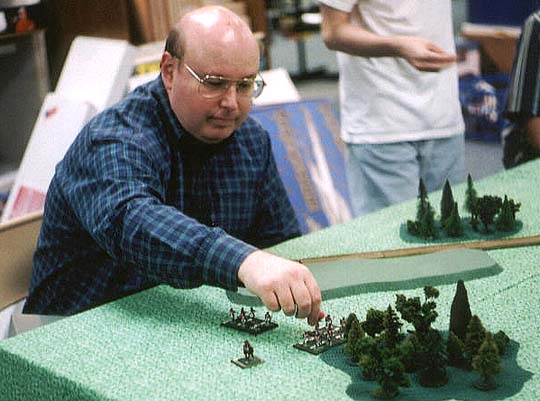
Photo by Jay Stribling
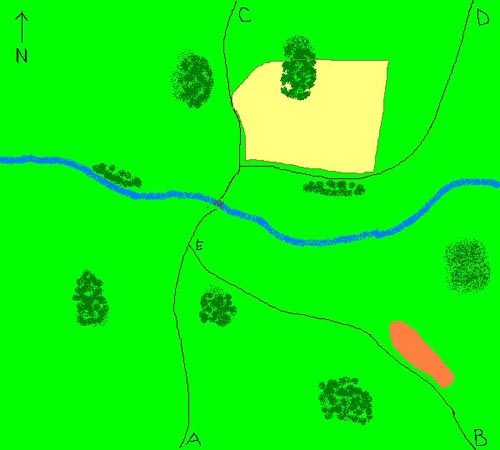
On turn three, the Patriots were shocked when from their left flank, a new column of Redcoats arrives, under the command of Bill Estes. He entered on road "B" (see map below) and immediately made for and occupied a nerby copse of woods.

Photo by Jay Stribling
The copse of woods - occupied by the British.
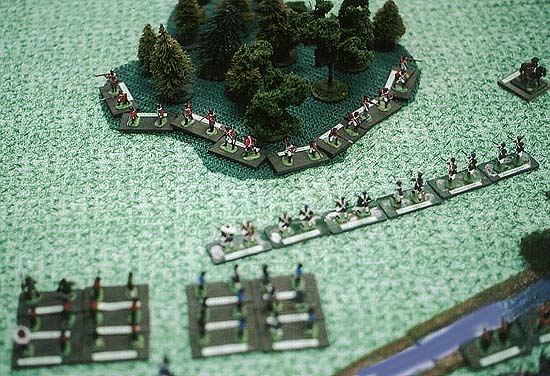
Photo by Jay Stribling
British player Bill Estes has deployed his troops in the woods to line the edge. An patriot milita unit forms into line, firing at them and being fired at. Two other patriot milita regiments are in support, but, because of the rules on deployment and movemen, cannot get to the flank and deploy where they could have added thier weight to the fire fight.
The Jackson gamers were impressed by the movement and deployment rules, but they certainly were a realistic inconvenience at times!
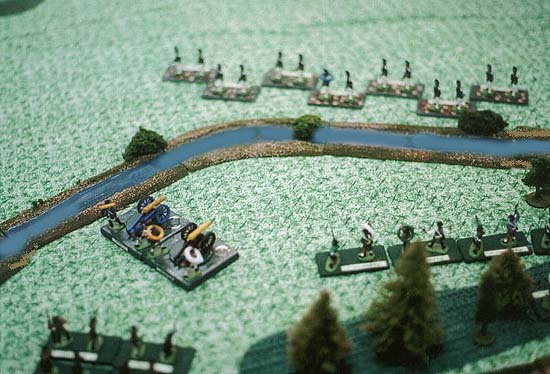
Photo by Jay Stribling
A view of the center, with the Patriot's flanking battery. The figures in the staggered formation (open order) were loyalist light troops.
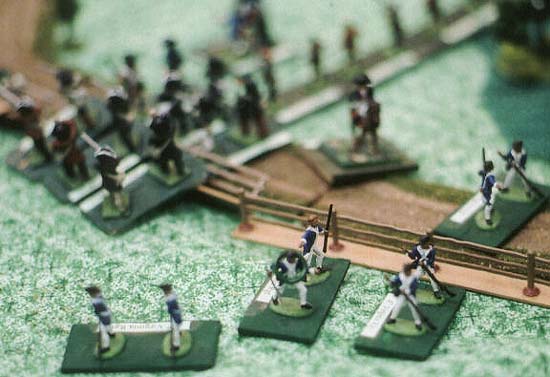
Photo by Jay Stribling
Part of the Rebels' advance guard that fell back after a spirited volley from His Majesty's light infantry. They rallied and attempted to return to the front, but were frustrated by poor traffic control in the Patriot's rear.
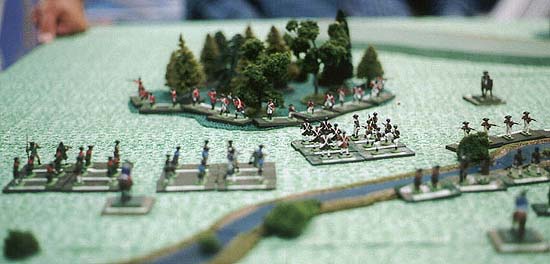
Photo by Jay Stribling
The line of milita broke and ran after attempting to fire-fight with Bill Estes' British troops in the copse of woods on the patriots' left, three other militia regiments move forward. The unit in column on the right was able to deploy and with it's first volley, convinced the British unit that they really did not need that woods.
The militia was treated to the not-often seen sight of the redcoats in flight!
SO - Who won the game?
The Patriots won it overwhelmingly. Their victory conditions called for not allowing the British to exit the battlefield on roads "C" and "D" (see map below) in the Patriot rear. Since the Rebels were able to hold the line of the stream, not to mention a rearward wooded position, the British/Loyalist troops never got a chance to accumulate any victory points for exiting the battlefield in the Patriot rear.
The other important point in both sides' victory conditions was to destroy or rout enemy units, and preserve thier own forces. The Patriots would have also lost even more points for milita casualties, as General Greene knew the importance of building that force up, and not letting it take heavy, demoralizing, casualties. The militia only had one unit forced back, and that one rallied.
Each side had a number of D10 dice to roll to determine final victory points, as a result of how well they had or had not fulfilled victory conditons. The King's forces had 30-odd points as a result of these dice. General Greene's forces had 80+ points!
Map by Jim Pitts
The British and Loyalist units entered from Road A at the start of the game, and several turns later from road B.
Jim Pitts supplied this map, and i believe that he has some more descriptions of troops set-up coming via a hard-riding courier.
Return to the Master Index of Photos and Games
Return to the Jackson Gamers' Homepage
Angelfire - Free Home Pages
Free Web Building Help
Angelfire HTML Library
htmlGEAR - free polls, guestbooks, and more!
Thank you for visiting The Jackson Gamers' pages at Angelfire. Please come back and visit again!