Jackson Gamers' Revolutionary War Game
Cornwallis Strikes at Greene
Using Rules concepts by Fr. Aelred Glidden, published in MWAN
We Played this game at HOBBYTOWN in Flowood Mississippi on February 17th, 2007. Our rules were derived from a set printed in MWAN many years ago and found on MAGWEB. The 25mm armies were painted by Jim Pitts.
The British were given a note from their spy in the Patriot camp. Nathanial Greene was pursuing the British, strung out along the roads, and his lead elements were only a few miles in the rear of the British force, near the village of Mudville. Lord Cornwallis immediately struck at the Rebel army, hoping to bite off a chunk before Greene could concentrate his forces.
You can see our version of the rules that we used here at: Quick Tricorne.

Photo by Jim Pitts
Sean Pitts is shown at the southeast corner of the battlefield. The Rebels found the Rebel forces well concentrated and advancing on British, hoping for a general engagement with their whole force.

Photo by Jim Pitts
The Rebel cavalry (25mm Minifigs) spur to the west of Mudville, while their infantry advances, hoping to occupy the village before the British advance guard reaches it.
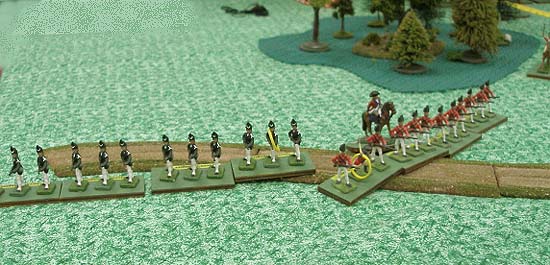
Photo by Jim Pitts
The British advance guard moves to the west of Mudville (just off the image to the right) with British Light infantry shown on the right, and the Queen's rangers to the left. This view is looking to the north.

Photo by Jim Pitts
Rebel infantry moves to the east of Mudville. A patriot battery has reached the summit of a small hillock, but not deployed to fire. In this set of rules, units may move, OR fire, OR change formation/deploy.
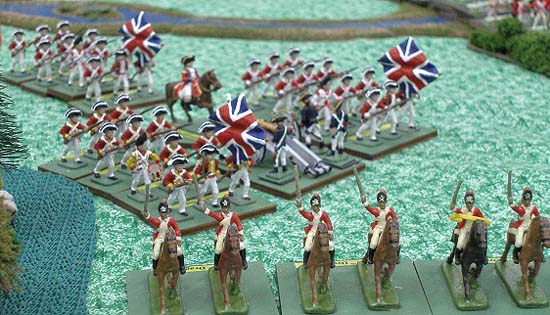
Photo by Jim Pitts
The first British line brigade moves towards Mudville, screened by British light dragoons. They are advancing from the Northwest, aiming for the village which is off the edge of the photo to the bottom right. In the extreme upper right, a small section of the road leading to Mudville can be seen. This was jammed with British troops for most of the game. This was a very small battlefield - presumably surrounded by impenetrable woods on all sides. Deployment was very difficult.
Mudville was not important at all to victory in the battle. Both sides wanted it as a position for infantry to snipe at the enemy. In this rules set, a village, once occupied, must be taken with cold steel. You cannot blow the enemy out with fire.

Photo by Jim Pitts
The British Brigade shown in the previous image has deployed from column to line. The unit with the flag shown close to the camera is in that brigade commanded by Jay Stribling. The troops on the road are another brigade, led by Ed Sansing.
| The British/Loyalist | The Rebels | |
| Ed Sansing (Lord Cornwallis) - Left Flank | Phil Young (General Greene) - right flank | |
| Jay Stribling - Right Flank | Sean Pitts - Left Flank | |

Photo by Jim Pitts
The Hessian contingent enters the board. A fine body of troops with their own gun. Their officer's bad luck (Jay Stribling commanded them) began to tell as soon as they got into action.
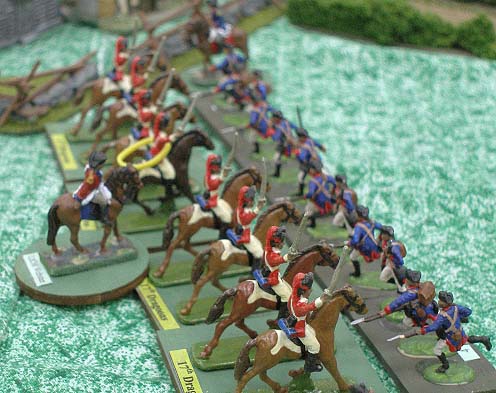
Photo by Jim Pitts
The British 17th Light Dragoons charged a Rebel line of infantry. As usual, Stribling's luck was not there and the cavalry fell back disordered from this melee.

Photo by Jim Pitts
The Hessians have gotten into action. They marched foward and engaged the Patriots on the Norther side of the village. Immediately, their officer's bad luck showed and they began to become disordered and fall back.

Photo by Jim Pitts
No photo here

Photo by Jim Pitts
The British light dragoons after falling back out of thier melee. Note also Hessian Grenadiers, falling back from the town, and British lights falling back also. This is a description of the action on the British right flank. Forward - back - forward - back - repeat...

Photo by Jim Pitts
British grenadiers try to take the village. This small town was NOT in our victory conditions, but we butted our heads against it again and again, to try to stop the American fire coming out of it.
Why did you fight this Battle?
That blasted spy who convinced the British that the Americans were advancing, strung-out badly along the roads, was obviously a double agent. The entire game was a trap for the British, who obligingly advanced and thrust their troops into the slaughter pen.
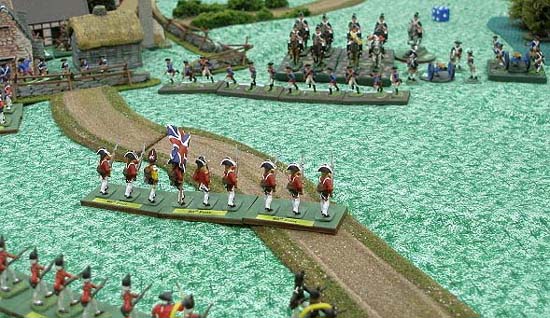
Photo by Jim Pitts
British infantry in line (already lost a stand) and light infantry behind them (rallied from falling back) confront the Rebels. The Patriot cavalry is about to charge.

Photo by Jim Pitts
The Patriot cavalry is in disorder, as are many of the British. This was the largest open space on the battlefield where the two sides could engage each other. Many units swept forwards then back over this space.

Photo by Jim Pitts
On the British left, the ground was largely broken up by patches of woods. Neither the British nor the Rebels could advance cleanly through them. The light troops of both sides were elsewhere. Largely this flank was a standoff. Many of the British units on this flank participated in the assaults on the town.
Note the Hessians in disorder on the extreme right.

Photo by Jim Pitts
No photo

Photo by Jim Pitts
A view of the second melee for the town. Like the first, the British could not take the town, but did wear down the 2 units of Rebel defenders. Also, several other Patriot units were kept inactive, ready to reinforce the place, so it was not quite as one-sided as it seemed.
And, almost at the end of the game General Greene, the American Commander-in-Chief was shot down by an unknown Briton as he worked to thrust reinforcements into the town. The two "victory dice" that the British received when the points were totalled up, after combat had ceased, were decisive.
Who Won this Battle?
Both sides received "Victory dice" according to the following schedule:
Amazingly, the British/Loyalist forces won! The British/Hessian force had nine victory Dice to roll and scored 33 points
The Americans had nine victory Dice also but scored only 25 points!
Even though the Americans had largely repulsed the British troops and had chewed up a number of British units, the loss of General Greene was the turning point.
Return to the Master Index of Photos and Games
Return to the Jackson Gamers' Homepage
Angelfire - Free Home Pages
Free Web Building Help
Angelfire HTML Library
htmlGEAR - free polls, guestbooks, and more!
Thank you for visiting The Jackson Gamers' pages at Angelfire. Please come back and visit again!