Jackson Gamers' 18th Century War Game
Who Stole my Tricorne?
Using Rules concepts by Fr. Aelred Glidden, published in MWAN
We played this game at HOBBYTOWN in Flowood Mississippi on August 19, 2006. This was a second test of these rules. Jay Stribling ran the game using his 15mm French and British "Age of Reason" armies. You can see our version of these rules HERE

Photo by Ed Sansing
The British commanders. Left to right, Sean Pitts, Jim Pitts (British Commander), John Hesselberg.
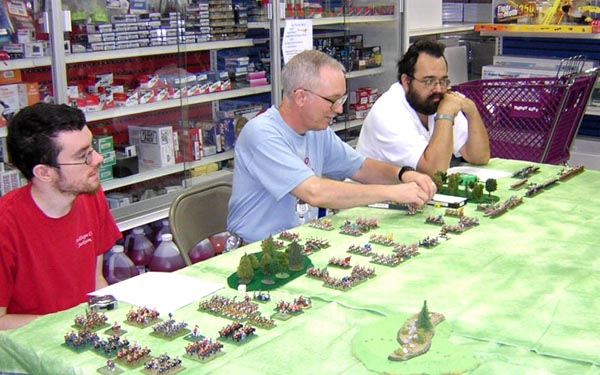
Photo by Ed Sansing
The British deploying their troops. The British selected a very conventional deployment, with Cavalry on both flanks and Infantry in the center. The French deployment was similar.

Photo by Ed Sansing
The French commanders, likewise deploying. Jay Stribling (in Checked Shirt) appears befuddled. This is dangerous since he was the game master and the supposed expert on the rules. Phil Young (in Red shirt) is precisely placing his units. Both sides advanced in column then deployed into line. Ed Sansin also fought on the French side, commanding the left flank. He is not shown, since he was the photographer.

Photo by Ed Sansing
Some of the French Brigades as deployed - the commands of Phil Young and Ed Sansing. Note the artillery set up on the hill. In this game, once deployed, artillery cannot move again, although it can pivot.
Most of the French battalions carry two flags, a colored one and a white one. This shows as a colorful confusion here.

Photo by Ed Sansing
Most of Ed Sansing's cavalry (the French 6th and 7th cavalry brigades) shown as deployed on the extreme left of the French line.

Photo by Ed Sansing
The cavalry brigades of Sean Pitts (British) and Ed Sansing (French) engage on the French left. The view is from the French rear. Note the French Dragoons on the right, uniformed in Green (Schomberg Dragoons) Red and Blue. Three regiments are shown complete and fragments of two more.
On the left, The Cuirassiers du Roi, pushed forward by a General in Red are shown, and on the extreme left, a "Brigade" of the Maison du Roi (the French Guard cavalry) can be partially seen. Various unidentified regiments of British Horse and dragoons oppose them.

Photo by Ed Sansing
The middle of the British/Hanoverian line, showing the gap between the armies. Our table at HOBBYTOWN is 6 feet (72 inches) wide. Both sides started in 24" from the table edge, so 24" separated the two armies. That took 3 or 4 turns to cross. Next time I will start the armies just out of musket-shot.
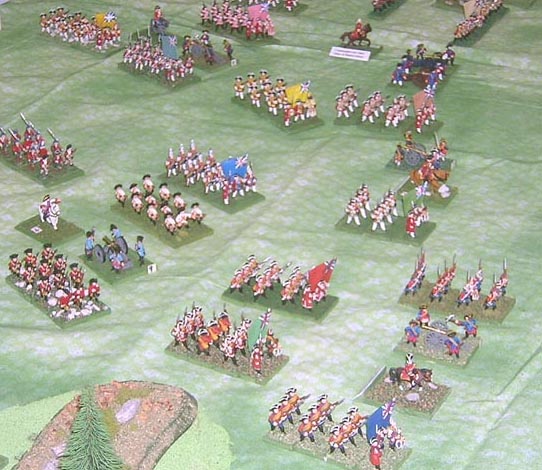
Photo by Ed Sansing
Another view of the British and Hanoverian forces advancing. The troops are in column (they can move 10" per turn). When they near the enemy, they will deploy into line (only 5 inches per turn).
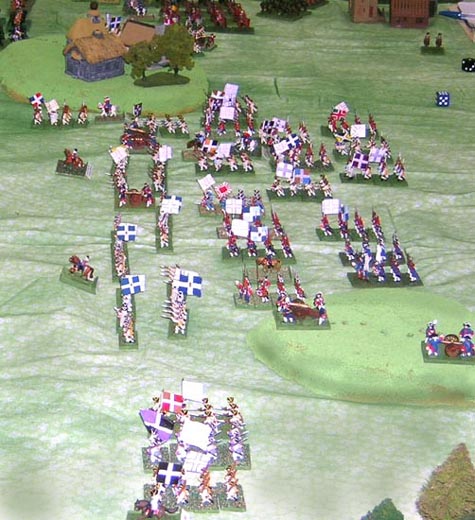
Photo by Ed Sansing
The middle of the French line moves forward to meet the enemy. Typically the French have the prettiest uniforms, but straggle badly. The first tier of forces have deployed into line, but the rear units are still in column, but have no where to go.

Photo by Ed Sansing
The cavalry fight on the other flank (the French Right Flank). This swayed back and forth but never broke through. The French had more units, but many fought in column, which is slightly worse in melee than the British/Hanoverian lines.

Photo by Ed Sansing
The massed light troops of the French army (4 units) hold the hill on the French Left flank. This provided a rock which would anchor the French line even if the Horse gave way. And the horse did give way to some extent, but not as badly as the British/Hanoverian horse did on the opposite flank.
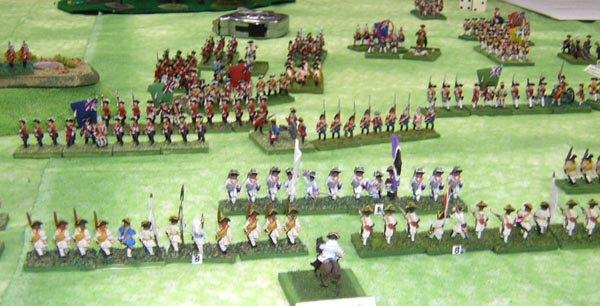
Photo by Ed Sansing
The center infantry units of both armies face each other and shoot it out.
This rules set does not have fire as many other rules sets do. Rather, the firing player points to the target unit, or places a marker on it, and thus being subject to fire, the unit must test it's morale. If the unit passes the morale test, the fire was obviously of little effect. If the unit does not pass the morale test, it loses a stand and falls back one move. It's stands are disarrayed to show that it is in disorder.

Photo by Ed Sansing
A look down the line. The British/Hanoverian forces are on the left and the French are on the right. The British left flank, on the far end of the table, has been turned by the massed horsemen of France.

Photo by Ed Sansing
A closer look at the collapse of the English left. The British/Hanoverian rear is at the top of the photo, and the French rear is at the bottom. The French infantry hold the hill in the foreground and the French cavalry swings around into the British rear.
The forces at the top center of the photo are two French cavalry units, attacking a British infantry unit in line. Just to the left and down a bit, you can make out a British gun which has had to be turned completely around to try to fire on the French horsement to the rear.
Who Won this Battle?
The French did. Their army was larger in both Infantry and Cavalry (the same in guns) and they were able to push back the enemy horse and get around the British/Hanoverian left flank and roll up the enemy infantry. It was a near-run thing. There were about 37 Battalions of Foot in the French army and about 25 regiments of horse. The British had about 33 Battalions of Foot and 23 regiments of horse. This game justified the concept of the "quick-play rules." This is a tremendous number of units with which to play a game in 4 hours using 6 players. Our previous rules set would not have allowed this.
There has been a third play-test of this game, with identical forces, played at Hurricon 2007 in Orlando Florida on September 23rd 2006. In that game, in spite of the hammer-blows of the French, the British/Hanoverians held and won the game.
I hope to have photos and a description of that game also.
Return to the Master Index of Photos and Games
Return to the Jackson Gamers' Homepage
Angelfire - Free Home Pages
Free Web Building Help
Angelfire HTML Library
htmlGEAR - free polls, guestbooks, and more!
Thank you for visiting The Jackson Gamers' pages at Angelfire. Please come back and visit again!