The Battle of Sutter's Mill
The British attack again - although they did not have to!

Photo by Jay Stribling
This is an image of the Brittanian forces crossing sutter's creek in our Sutter's Mill game. We played this on June 19, 2010 at Jay Stribling's home in Jackson Mississippi. Jay was the Game-Master for the game, providing the armies, terrain, victory conditions, and hot dogs for all the players at lunch time.
We used Larry Brom's rule set Disperse ye Damned Rebels with a few modifications of our own. Our armies are not organized as Larry sets out in his rules, but such is life, and we made do.
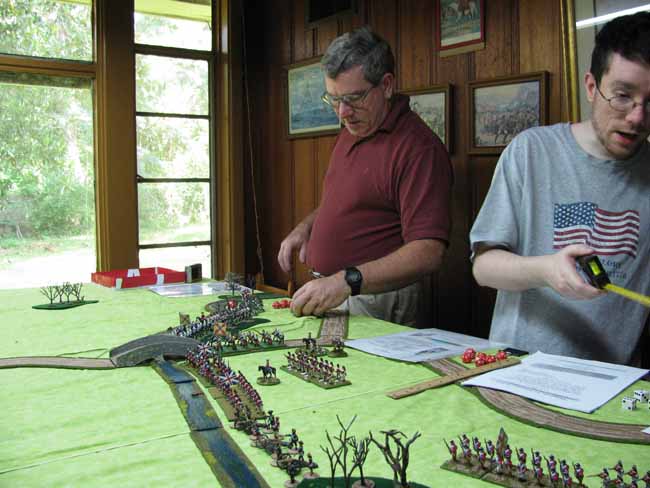
Photo by Jay Stribling
Sean Pitts, Brittanian commander-in-chief, gestures iperiously with his baton of rank - which looks suspiciously like a tape measure. Ed Sansing (in maroon shirt) prepares his movment dice. Ed commanded King Georgie's troops on the right flank during this battle.
At this point, a thin, tiny thought, a ghost of an alternate plan, drifted about in the minds of the Brittannian players. "What if we just fort up behind sutters stream and let the Patriots attack?" Alas, that thought drifted away, and the Brittannians crossed the stream to drive away the enemies of the king!

Photo by Jay Stribling
The center of the Patriot forces at set-up. They split their artillery, with Bill Hamilton taking two of the 4-lb guns and the third gun accompanying Jim Pitts on their left.
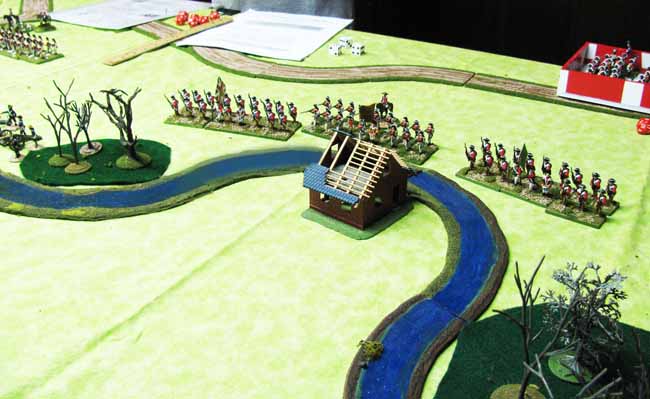
Photo by Jay Stribling
"Gentleman John" Murdaugh's Brittannian infantry brigade at the start of the battle. It is behind a loop of Sutters stream, near the ruined Sutter's mill.
Some background to the struggle
In 1775, the Britanian colonies known as Murica began their struggle for independance from the mother country Brittannia. We are in the midst of a long series of battles to resolve this struggle. Why Murica and not just "The American Revolution?"
Many gamers have an extensive background in the history, uniforms and organization of this period. Your Game-Master did not want to set up a historical battle and then hear complaints such as "the 42nd foot was not at this battle" or "you painted those snapsacks the wrong color for 1777!"
So, Murica and it's struggle for independance was born. The battles that we fight do not have to be totally historical, and if we want the British - sorry, I mean the Brittanians, - to cross the Delaware at midwinter, instead of the patriots, so be it!

Photo by Jay Stribling
The Patriot right flank, commanded by Phil Young. The front-line two units are riflemen, and the unit to the rear is a militia unit which will move out and form the extreme right flank of the army.
The Game-master rated the entire brigade as milita, and at one time, near the end of the game all three units were routed by Brittanian musketry, had they not rallied, the extra victory dice rolled for their loss might have swung the tide of the game against the Brittannians. However, Phil Young had, on this day, that thing that Napoleon valued more than skill - he had LUCK! All of the units rallied!
The Armies and their organization.
THE MURICAN FORCES
| Pennsylvania Brigade 1st Pennsylvania 3rd/6th Pennsylvania 9th Pennsylvania 12th Pennsylvania
Connecticut Brigade |
Massachusetts Brigade 1st Massachusetts 4th Massachusetts 13th Massachusetts 15th Massachusetts
Virginia Brigade |
New York Brigade 3rd New York Regiment 5th New York Regiment Henry's Light Battalion 1st/2nd Rhode Island
1st Continental Brigade |
| Unbrigaded Troops 3 guns, each with 2 gunners . | ||
Each of our infantry regiments are composed of six 3-man stands, so we have 18 soldiers per regiment each around 25mm tall. Our Cavalry regiments now have four 2-man stands but that may be increased in the future to 5 or 6 stands, depending on how recruiting goes.
Each side's artillery is organized into sections with one gun and four gunners. Sometimes two or three sections are grouped into batteries but there is not a lot of artillery in Murica. We found that the gunners we being killed off at quite a high rate, so in the next game, we will require two hits by musketry or artillery to kill a gunner!
THE BRITTANNIAN FORCES
| Grenadier Brigade Lieb Fusilier Regiment 1st Battalion Hessian Combined Grenadier Battalion British combined Grenadier battalion 1st Battalion New Jersey Volunteers
First Brigade |
Second Brigade 22nd Regiment of Foot 49th Regiment of Foot 54th Regiment of Foot . Third Brigade |
Fourth Brigade 1st Battalion DeLancey's Regiment 24th Regiment of Foot 35th Regiment of Foot . Non-Brigaded Troops |

Photo by Jay Stribling
Obviously the photographer was up a tree on the Brittanian side of the field. This is the at-start positions of the Brittanian center (nearest the camera) and right flanks, before the King's men began their advance.
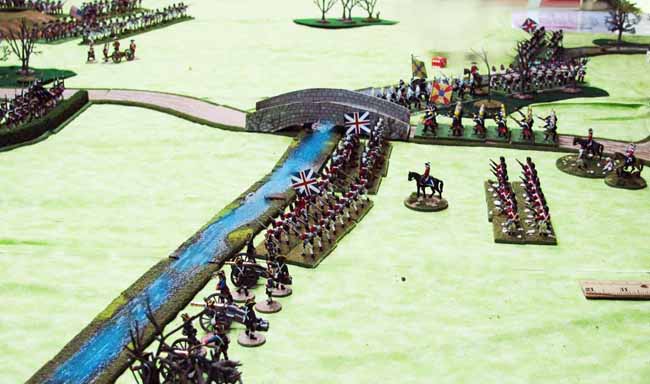
Photo by Jay Stribling
The forces in the center at the start of the game. This photo is a better view of the Brittannian center and right at the beginning of the battle.
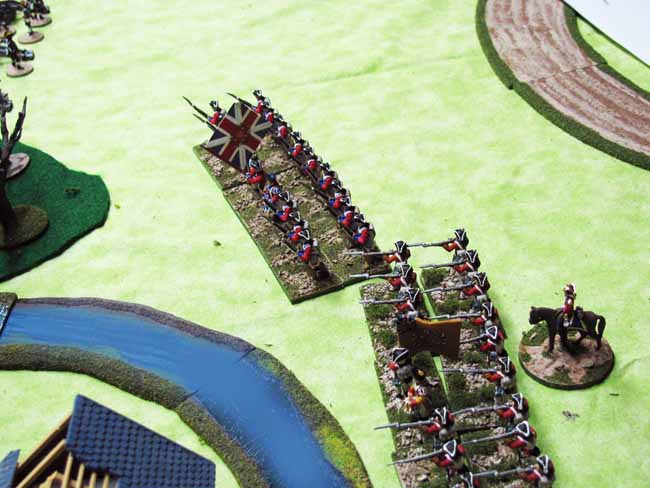
Photo by Jay Stribling
A close-up of Two of John Murdaugh't regiments as they prepare to cross the stream at Sutter's abandoned mill.
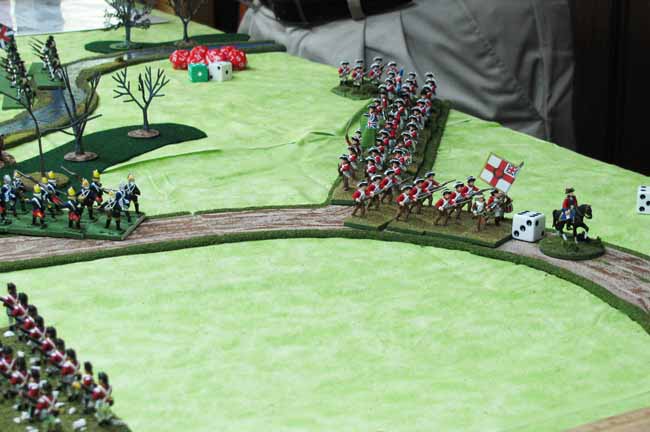
Photo by Jay Stribling
Brittannian reinforcements marching onto the battlefield. The forces turning towards the right in this image are a brigade that will go to "Gentleman John" Murdaugh on the Brittannian left flank. Behind them, another brigade will enter and turn the other way, as a reinforcement for Jim Pitts on the Brittannian right flank.
Who were the players for this game?
The Brittanians
Ed Sansing - Right wing commander
Sean Pitts - Commanding in the center (and overall Brittanian commander)
John Murdaugh - Commanding on the left
The Patriots
Phil Young - Right wing commander
Bill Hamilton - Commander in the center (Also overall Patriot leader)
Jim Pitts - Left wing commander

Photo by Jay Stribling
The Murican forces on their right flank (commanded by Phil Young) contained two rifle battalions. Here they give fire against the advancing Brittannians of John Murdaugh.

Photo by Jay Stribling
The Game-master (Jay Stribling) did not allow the usual "it takes two hits to remove an artillery figure" rule and as a result the patriot gunners had high casualties. A quickly devised rule allowing recruitment of nearby infantry as replacement gunners (must roll a "10" on a D10 to do so) did not help the Patriots, but did help Sean Pitts to keep his Royal Artillerymen near full strength.
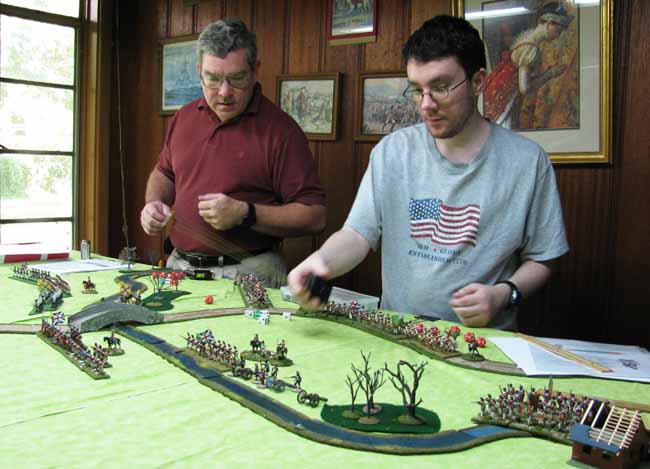
Photo by Jay Stribling
Sean Pitts (gray shirt) and Ed Sansing moving their men forward on turn one or two.

Photo by Jay Stribling
A slightly different view of the same action as in the previous image. Notice that one of the Brittannian guns has had its crew wiped out. This was done, either by Bill Hamilton's Patriot guns. or Phil Young's riflemen.

Photo by Jay Stribling
A view of the Murican center, showing only one gun left in action (out of two at the start of the battle) and that with only half a crew left.
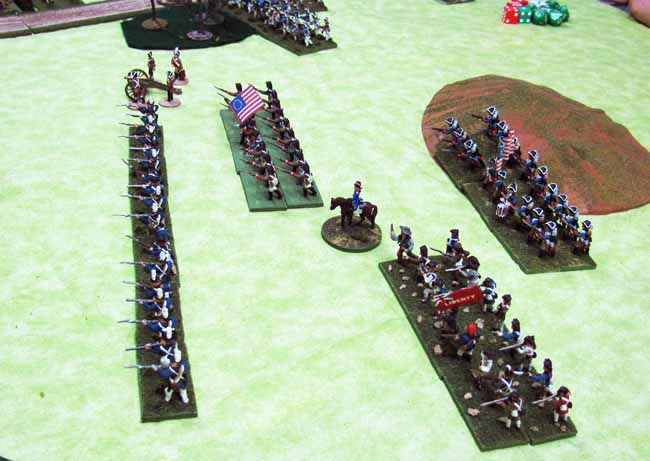
Photo by Jim Pitts
Jim Pitts command on the extreme Murican left flank. Jim had a 4-regiment brigade with one gun, shown here advancing, probably at the close of the first game turn. Henry's light battalion is out front. Jim later received another reinforcing brigade.
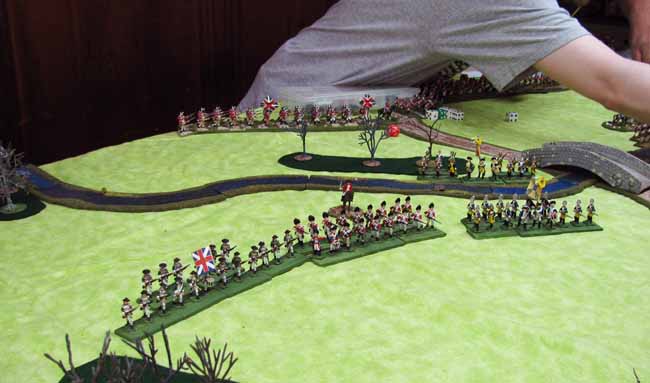
Photo by Jim Pitts
A view of Jim's opponenets, the Brittanian grenadier brigade, with one regiment of Loyalist light troops, two converged grenadier battalions, and a Hessian Fusilier regiment. All except the Loyalist unit counted as "Grenadier" quality.

Photo by Jim Pitts
In the center of the field, the Black Watch(closest to the camer) and the converged light infantry battalion march across an open field, trying to drive away Patriot millita. They paid dearly, losing half their number to musketry and a bit of Patriot cannister.
In the resultant melee, the patriots held, so the assault achieved nothing except casualties for the forces of the king.

Photo by Jim Pitts
The highlanders have halted from fire received and the Converged light battlion has fallen back across to the left of the image.

Photo by Jim Pitts
The remmnants of the Green-coated Loyalist unit duel three companies of Rebel light infantry in the small woods on the extreme Brittanian right/Patriot left.
The colored rings show morale status. Gold indicates 4 morale points - the best!. Blue shows three morale points - good! Green indicates two morale points - average at best. Red (deadly red) shows a morale rating of 1 point - terrible!

Photo by Jim Pitts
A close view of the extreme Brittanian right/Patriot left flank and then extending up into the center of the field. Note how few and small the Brittanian units are on the left side of the image, and how numerous and large the Rebel forces are on the right side of the photo.
The fire-fight did not favor the British on this end of the battlefield. Also, they lost many figures trying to close with the bayonet agains the rebels. While they were able to close on a few occasions, they did not win the resulting melees.

Photo by Jim Pitts
Almost at game's end, the Patriots are advancing in column, with Jim Pitts driving forward seven Patriot battalions, facing Ed Sansing battered Brittanian right with only one full strength battalion left and a few fragments.
The most cruel thing was that almost all of those advancing Rebel units still held their first volley!
So, who won this game?
The Patriots did - handily. The victory point total for the Rebels against the Brittannians was 34 to 24. Twelve victory point dice rolled vs. eight dice.
The Brittanians attacked, without waiting for all of their forces to arrive. Their first units were shot up before the second line of units got anywhere near the action. The Brittanians had two brigades of elite troops, while the Muricans were cursed with two complete brigades of milita quality troops and only one of elites.
In addition, all of the Brittanian and Hessian units had bayonets, which only the one elite Patriot brigade had. Also, every foot unit of the King's forces received a +1 to each dice when firing, and a +1 to all morale rolls. Sadly, it was just not enough to ensure victory.
Your game-master has two more brigades (6 battalions) loyal to good King Georgie - merely awaiting paint. When completed, these will rebalance future games in favor of the Brittanians. Unfortunately for the forces of the King, he also two more brigades (6 battalions) of Patriots, similarly awaiting completion.
Go to MORE PHOTOS of this game.
Return to the Master Index of Photos and Games
Return to the Jackson Gamers' Homepage
Angelfire - Free Home Pages
Free Web Building Help
Angelfire HTML Library
htmlGEAR - free polls, guestbooks, and more!
Thank you for visiting The Jackson Gamers' pages at Angelfire. Please come back and visit again!