The Murican Revolution
The beginning
In 1775, the Britanian colonies known as Murica began their struggle for independance from the mother country Brittannia. We plan a long series of battles to resolve this struggle.
Each of our infantry regiments are composed of siz 3-man stands, so we have 18 little 25mm men per regiment. Our Cavalry regiments now have four 2-man stands but that may be increased in the future to 5 or 6 stands, depending on how recruiting goes. Each side's artillery is organized into sections withone gun and two gunners. Sometimes two or three sections are grouped into batteries but there is not a lot of artillery in Murica.
So now we commence A Murican revolution!

Photo by Jim Pitts
Brittanian 16th Light Dragoons deployed to protect left flank of Brittanian force. In background are the three 4-lbr guns the Brittanians had in support.
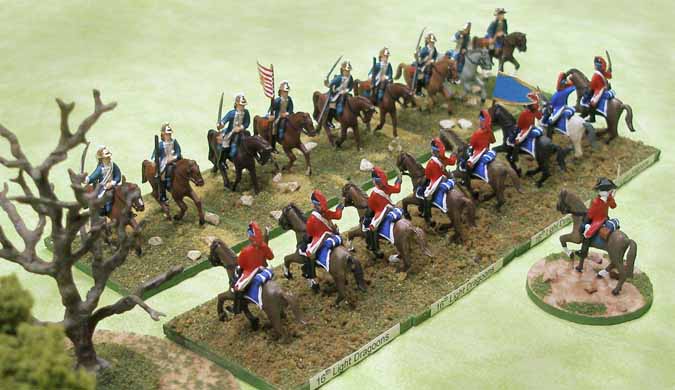
Photo by Jim Pitts
The 16th Light Dragoons clash with the Murican 2nd Dragoons. The Brittanians prevailed.
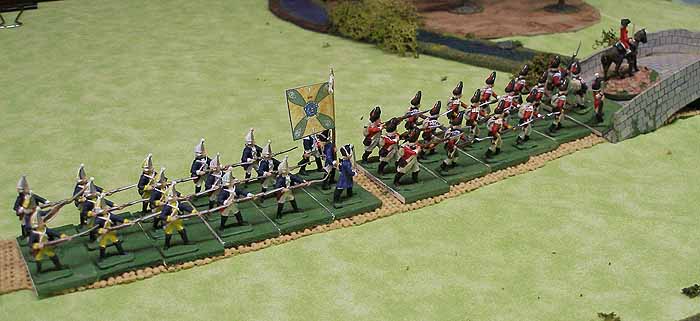
Photo by Jim Pitts
The lead battalions (combined Brittanian and Germanian grenadier battalions) of Jim Pitts' Brittanian division as it slogs through the muddy road to fall on the flank of the Muricans. Low die rolls in the Brittanian approach march were clearly the result of the muddy road and NOT the rolling of them by Jim.
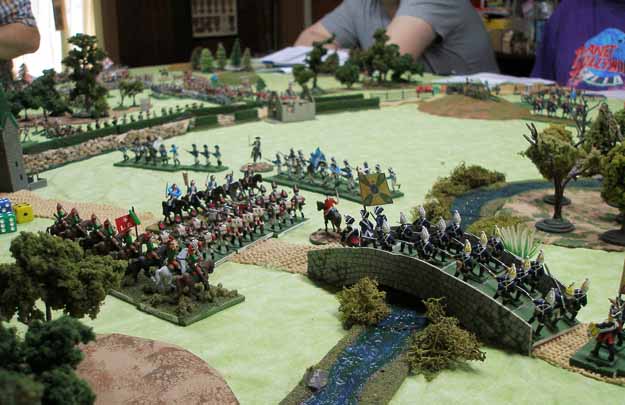
Photo by Jim Pitts
Jim's Brittanian grenadiers have deployed on the far side of the stream and are attacked by Murican infantry and cavalry, which they handily repulse, though not without a few casualties. The Germanian grenadier battalion crosses the bridge, followed by the Germanian fusilier battalion.
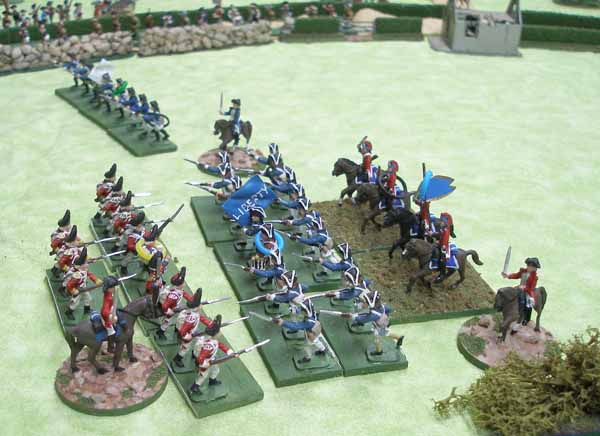
Photo by Jim Pitts
The Brittanian grenadiers engage a Murican infantry battalion while the Brittanian 16th Light Dragoons attack the Muricans from the rear. All the Muricans were captured after they lost the melee.
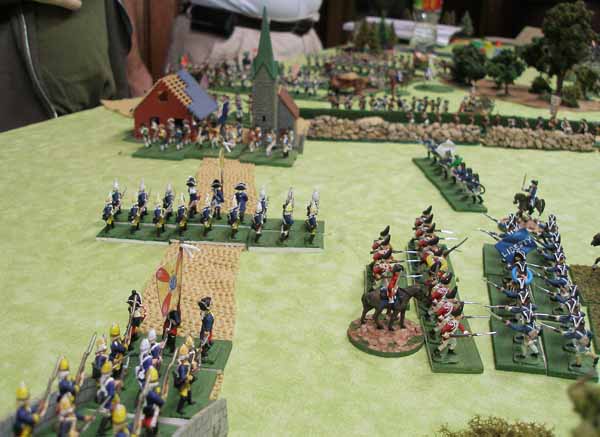
Photo by Jim Pitts
While that fight was happening, the Germanian grenadiers continued the advance to cut the Muricans line of communications and the Germanian fusiliers march across the bridge. The ground on the Murican side of the stream was drier than the road leading around the Murican right flank, allowing quicker tactical movement once the bridge had been crossed.
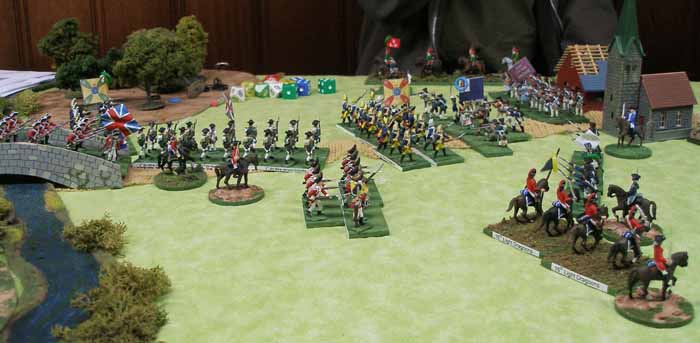
Photo by Jim Pitts
After the Germanian grenadiers were forced to withdraw by the fierce Murican defense, the Germanian fusiliers advance into combat. The Tory 1st Battalion, New Jersey Volunteers, that was part of the lead brigade, deploys to march to the left flank of the fusiliers.
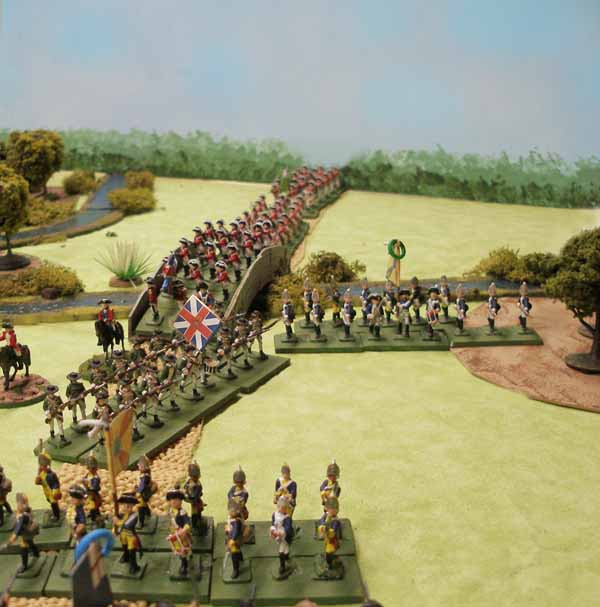
Photo by Jim Pitts
The Brittanian flank force's second brigade is still marching up the muddy road as the battalions of the first brigade are deploying for combat.
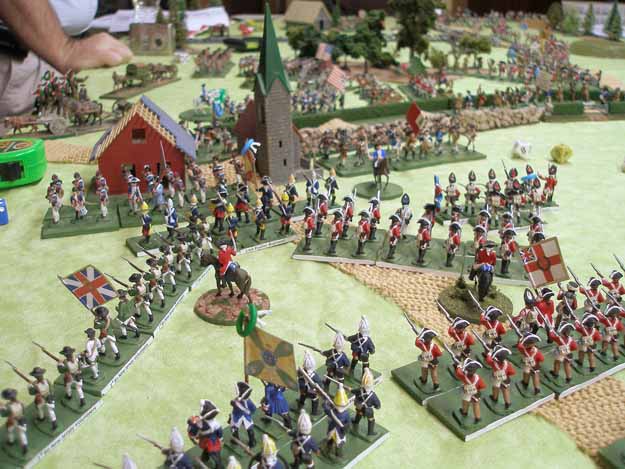
Photo by Jim Pitts
More Brittanian troops march to the battle as the pressure forces the Muricans to fall back to the outskirts of the village.
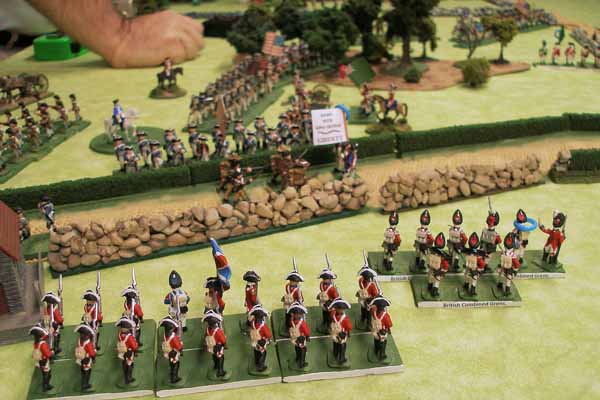
Photo by Jim Pitts
Brittanian grenadiers and foot infantry fire into a Murican column on the road, seriously hurting them. But more Muricans are moving towards the fighting on their right flank as they try to keep the road open for their foraging wagons.

Photo by Jim Pitts
The fully deployed Brittanian division advances across the open fields toward the town while the Muricans react to shore up their right flank. Murican foraging wagons can be seen moving as fast as they can to escape the clutches of the Brittanians and their Germanian allies.
What were the Patriot Objectives?
There were six supply wagons on the battlefield that had been foraging. Each of these was 10 points to the patriot cause if they could get them off the rear edge of the battlefield. Points were also awarded for each Brittanian unit destroyed or driven from the field and each enemy officer killed.

Photo by Ed Sansing
Bill Hamilton's command on the right flank of the Britainians.

Photo by Ed Sansing
The center and right flank of the 'Mericans. Sean's command (infantry and artillery) in the foreground, Clay James' command (cavalry and infantry) in the background.

Photo by Ed Sansing
The lead elements of the Britainian reinforcements arriving on the 'Merican flank.
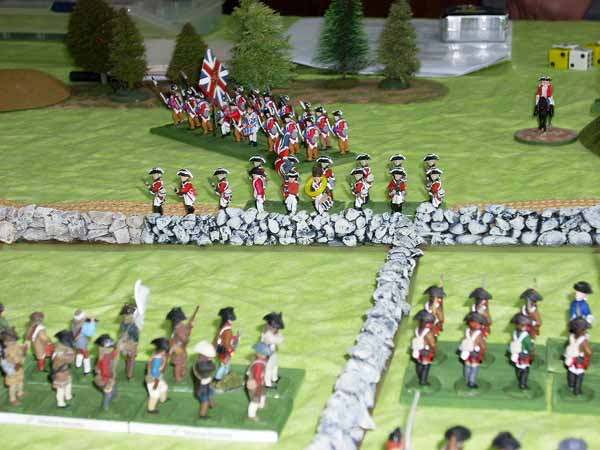
Photo by Ed Sansing
Bill Hamilton's Britainians fight against Phil Young's Patriots (on the left) and Ed Sansing's Muricans (on the right).
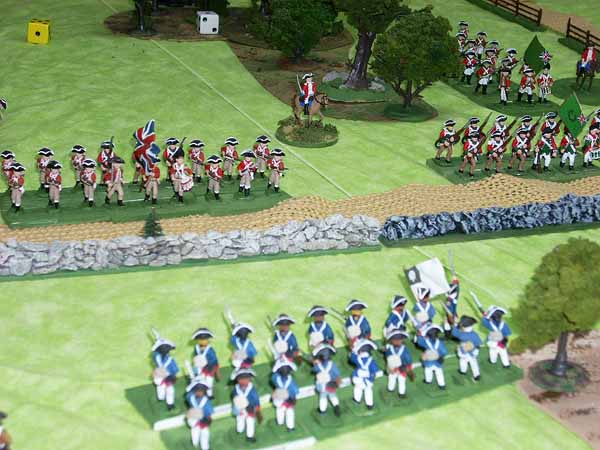
Photo by Ed Sansing
One of Ed's regiments face one of Mark Stevens' units
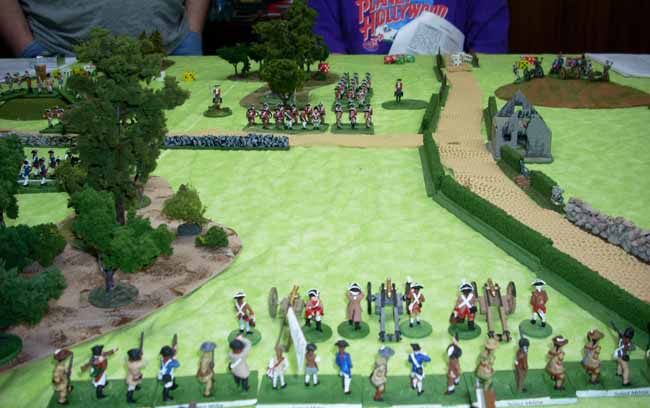
Photo by Ed Sansing
Sean Pitts' Murican artillery face the other regiments in Mark's Stevens Brittannian brigade
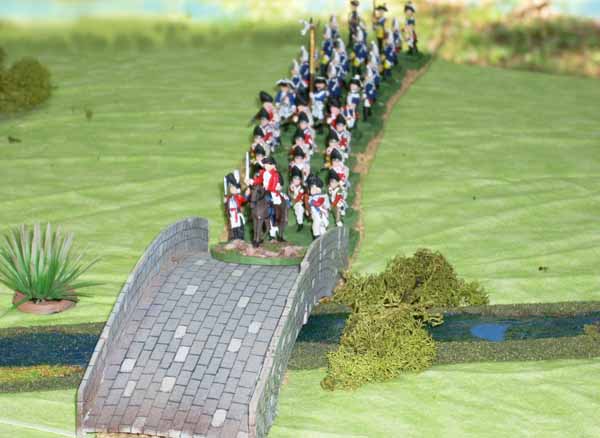
Photo by Ed Sansing
The Brittainnian reinforcements continue to enter. Low movement dice slowed their progress considerably for 2-3 turns
What were the Brittannian objectives
The Brittannians began the action as a raid to snap up the foraging parties and supply wagons of the Muricans. As more and more Murican brigades came onto the field, the Brittanians were seriously outnumbered.
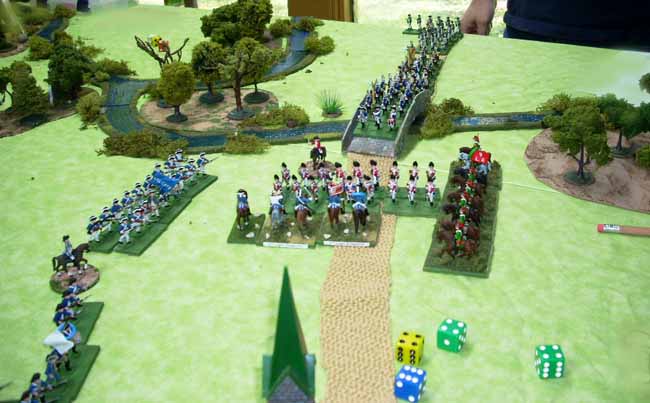
Photo by Ed Sansing
Their reinforcements finally make it across the bridge and start to deploy. Sean Pitts' men have had time to redeploy and meet them on our side of the bridge.

Photo by Ed Sansing
Mark Steven's and Bill Hamilton's units trade fire with Ed Sansing's Murican brigade. Bill's Britainian unit on the other side of the opening in the rock wall had terrible aim. Ed Sansing remembers: In 3 turns of firing I think they inflicted 1 casualty.

Photo by Ed Sansing
A view of Mark Stevens's Brittannian brigade.
Who were the players in this game?
The Murican players were Clay James, Sean Pitts, Ed Sansing (commander in chief) and Phil Young.
The Brittannian players were Jim Pitts, Mark Stevens (army commander) and Bill Hamilton.
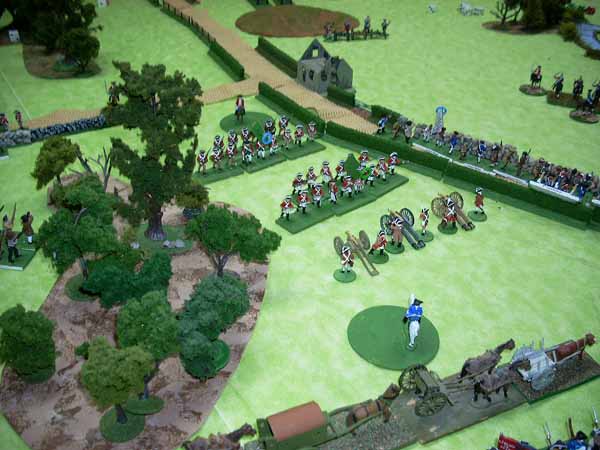
Photo by Ed Sansing
Two of Mark Stevens' regiments tried to close with Sean Pitts' guns. They were unable to get good enough die rolls. At the bottom of the picture you can see the Murican supply wagons heading to the road to the rear.

Photo by Ed Sansing
The pressure on the Murican flank increases. Sean was able to kill a stand of grenadiers and they fell back.
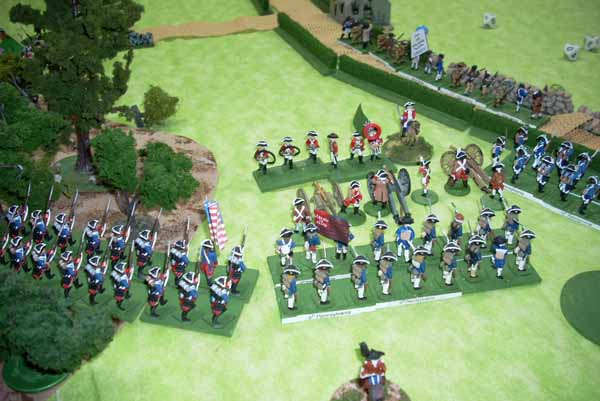
Photo by Ed Sansing
Merican reinforcements move up to support Sean Pitts' guns. The guns were able reduce and finally destroy Mark's Brittannians because they would not close into melee.

Photo by Ed Sansing
Even though the Britainians on the flank were pushing toward the road, the Mericans held it long enough to get 2 supply wagons off. If the game would have gone on longer the Muricans probably would have gotten all the supplies in thier wagons off the board.
So, Who won this battle?
The Brittannians found themselves outnumbered and in this case, the superior quality of most of their units was not superior enough. The flanking party which came in from the left was boxed in with little room for deployment and on the rest of the field they were outnumbered.
The Muricans won with 55 points to the Brittannian's 38 victory points. Reinforcements would be needed from the home islands for Brittannia to do better.
Return to the Master Index of Photos and Games
Return to the Jackson Gamers' Homepage
Angelfire - Free Home Pages
Free Web Building Help
Angelfire HTML Library
htmlGEAR - free polls, guestbooks, and more!
Thank you for visiting The Jackson Gamers' pages at Angelfire. Please come back and visit again!