A game in our 2009 Mini-Campaign game series
The Red Desert
Part III - Search for the Lost Lamb

Photo by John Murdaugh
The Mahdist gun crew has wheeled their gun from it's hiding place "down" in the wahdi that streched across the game table. They are about to open fire. We had rocks along the edges of the "wahdi" but there are only a few shown here.
This was our third game for the year 2009. We played this at The Dragons's Lair in Pearl Mississippi on January 31st. Our rules were The Sword and the Flame by former Jackson Gamer Larry Brom. This is the third and final game of a trio of games, all using the same rules and all set in the 1885-9 (or so) period when the British and Egyptians were attempting to reclaim areas that had fallen to the followers of the Mahdi a prophet of the Muslim Religion who preached rebellion against the Egyptian government.
Intelligence Agents report that the Mahdists are holding a white man hostage. Could this be the new Lieutenant who came up missing from a patrol one week ago? And was his name Rigby or Figby? New man, had just joined the regiment, no one knew him well as of yet...
This is one of the scenarios from the TSATF Scenario Portfolio, published by the same people who brought you The Sword and the Flame rules themselves.
The Imperial players with a mix of Egyptian, Indian, and British units would sweep the board, looking for Rigby-Figby. The Mahdists wished to retain him as a guest. Thus the collision of the two armies. There were two small miserable villages on the game table. Could Rigby-Figby be held in one of those?

Photo by John Murdaugh
On the first game turn, various Mahdist units were "discovered" on the battlefield by the advancing Imperial players. These newly visible units are being placed on the table.
From left: Sean Pitts (red shirt), John Switzer, Jim Pitts, Bill Hamilton, Larry Warnock (leaning over table with troop-tray in hand) and Ed Sansing (only partly visible).
|
Ed Sansing described the game thusly: We played our latest game Saturday, Jan. 31st at The Dragon's Lair. It
was the 3rd game of the Red Desert Campaign. Playing the British and their allies were: Phil Young, Sean Pitts, Jim
Pitts and Bill Hamilton.
The Mahdist forces were: John Murdaugh, John Switzer, Fred Diamond, Ed Sansing, John Hesselberg and Lawrence Warnock. Jay Stribling was our gamemaster. The Mahdist forces had captured a British officer and were rumored to be holding Lt. Rigby somewhere on the board. The British had to enter the table and search 2 villages and several wadis to try and locate the lieutenant. As the British moved on the table they discovered units hidden in areas of rough terrain and several new Mahdist units arrived from the table edge. At the end of the game two cavalry troops and an infantry unit from the British closed on the last village, hoping to find Lt. Rigby. But this rescue force was surrounded by at least seven Mahdist units. The gamemaster declared that if the British could win this melee they would be able to get off the table and win the game. Two or three of the Mahdist units failed to close. One huge melee was fought and at the end it came down to 1 die roll between the opposing commanders-in-chief. And the Mahdist won that die roll, and the game." |
This was our last game to be held at the Dragon's Lair because it has now closed. We are actively pursuing other locations for our games.

Photo by John Murdaugh
The Egyptian camelry arrives at the 'first village' to search for the missing lieutenant. The gamemaster would not allow a mounted search, he made the Egyptians dismount at least one man to search each building. They found nothing.
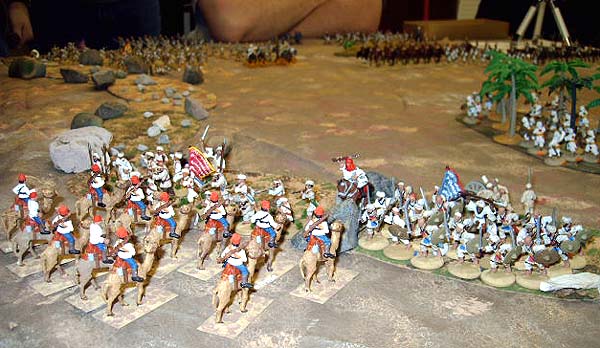
Photo by John Murdaugh
Egyptian Camelry ridge to edge of the wahdi and are surprised to find it packed with dervishes!

Photo by John Murdaugh
Another view of the Egyptian Camel Corps at the edge of the wahdi. In the distance more dervishes have erupted from the wahdi and are attacking the British infantry.
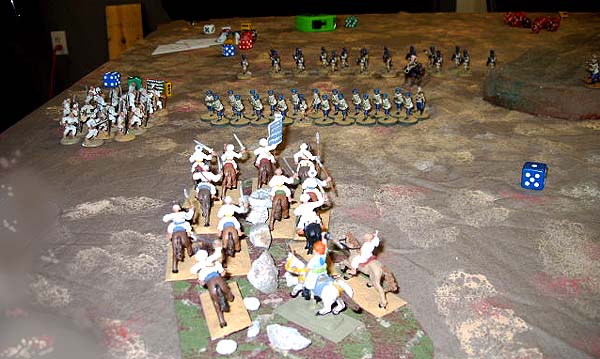
Photo by John Murdaugh
On the extreme southern edge of the battlefield, dervish cavalry erupt from a rocky depression and head for Indian Sepoys while another unit of dervishes comes on from the table edge.
The group coming on from the edge could not CHARGE on because of the rules. Since they had no firearms, they had to wait patiently under fire till the next turn.

Photo by John Murdaugh
Jim Pitts (leaning back on left of image in dark shirt) waits while various dervish players move their troops forward. Larry Warnock (center) and Ed Sansing (right) are the Mahdist movers.
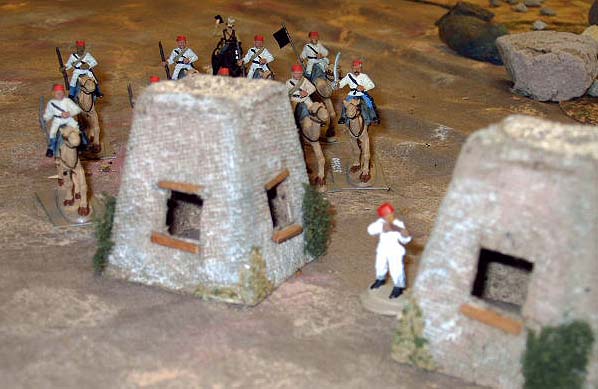
Photo by John Murdaugh
A slightly blurry close-up of the search of the southernmost 'first village'. The Imperial players only knew that the person whom they were searching for was "somewhere on the table." In actuality he had been placed by the Mahdist commander (Fred Diamond) in the northern village (because it was farther away from the Imperials' starting positions, in the hut that was the most far away.
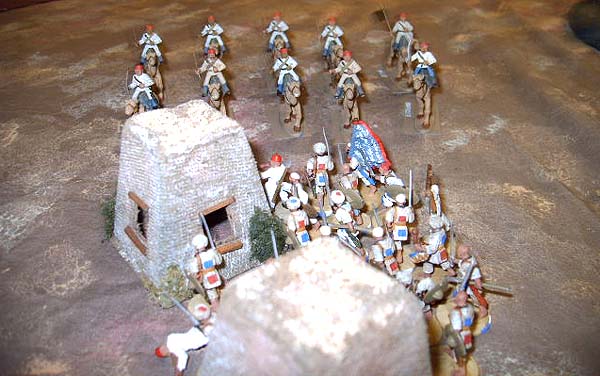
Photo by John Murdaugh
Dervishes come out of the wahdi and charge the Egyptian camelry searching the small village. The rules do not allow infantry to charge mounted units so we backed the camel riders away as the Mahdists closed. They cut up the two dismounted men in the village - you can see that one is "down" already.
Actually, the figure just fell over, but it looks good in the photo!
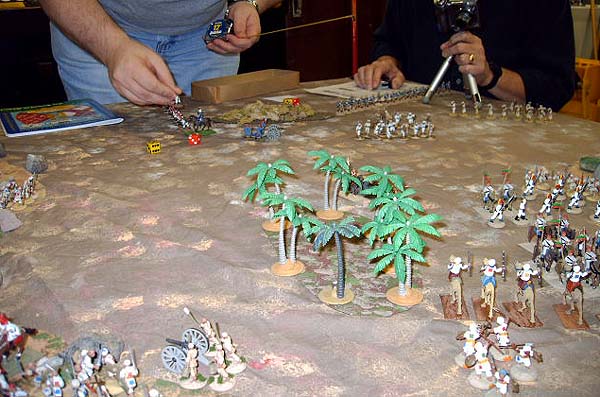
Photo by John Murdaugh
The scene on the northern flank was more chaotic as some dervishes had entered behind the advancing Anglo-Egyptian troops. After a turn or two of work (fighting) this was sorted out.
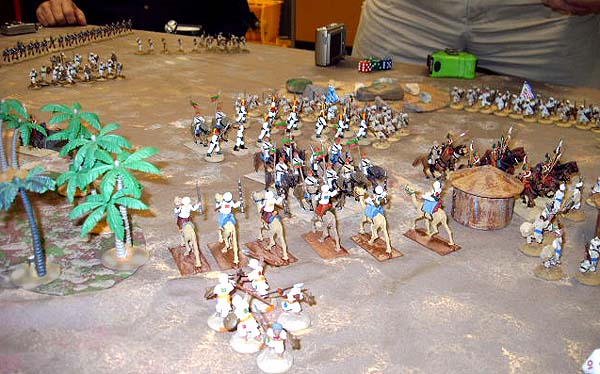
Photo by John Murdaugh
This is the last 'regular' turn of movement. The Imperial commander has pushed his lancers out to the northern village. The Imperial troops had searched the other village and every wahdi, rocky depression and hiding place that he could get to. By elimination, it seemed that the missing Rigby-Figby had to be in this village.
However, the cavalry used all of it's movement to get to the village. None was left to dismount a search party.
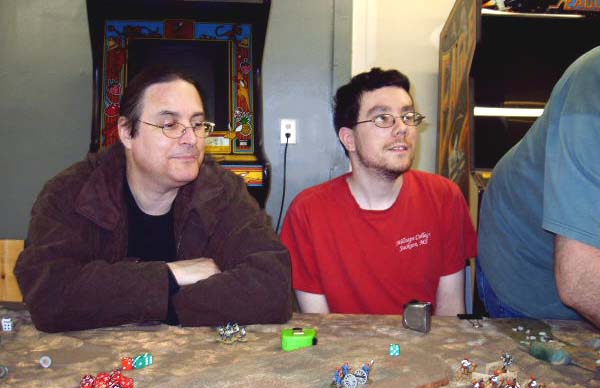
Photo by John Murdaugh
Phil Young (left) and Sean Pitts (center) seem to be watching Bill Hamilton with an attitude of "you're gonna be sorree..."
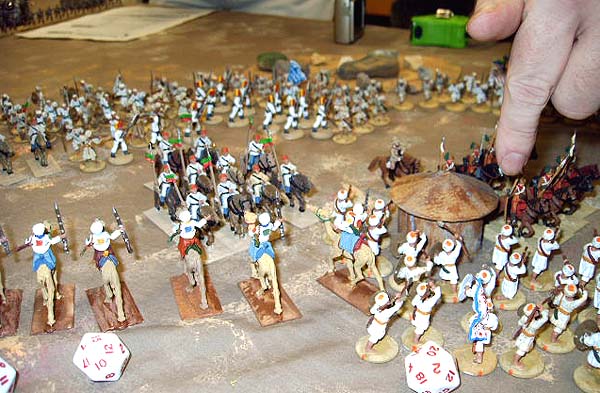
Photo by John Murdaugh
A titanic finger adjusts the position of the Australian lancers. You can see that Mahdists of all types, mounted and on foot are moving towards the village, to trap the Imperial intruders.
A unit of Egyptian infantry, in white with red fezzes, is attempting to keep the dervishes off the rear of the cavalry.
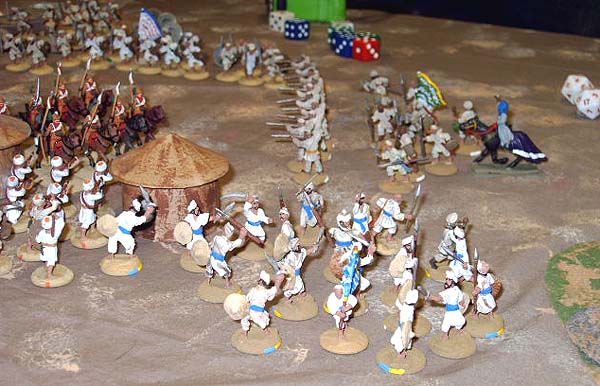
Photo by John Murdaugh
Another view of the same turn. The Australian lancers is Khaki are Scruby (Tom Cox) figures, painted years ago by Mark Stevens. They are mounted on Ral Partha horses. The dervishes in the center with blue sashes are a mixture of figures, including a good many home cast by Jay Stribling from original molds designed (your author beleives) by Joel Haas. The mounted Emir on the black horse is a Falcon figue.

Photo by John Murdaugh
At the end of the game, the final close combat!
So, Who won this battle?
The Mahdist forces won the battle - by a single die roll!. At the end of the game, after it had gone more than an hour past our normal 'quittin time' we moved all of the units of both sides that were within a normal move (eight inches) of the second village into contact. We allowed fire, tested morale "to close" and "to stand" then fought it out, in the order that the units had made contact.
The Imperial forces consisted of part of an Egyptian infantry unit, an egyptian cavalry unit and an Australian colonial cavalry unit. The Mahdists had parts of five infantry units that passed morale. The Imperial forces did well at first, then the dervishes. The pendulum swung back and forth as to which side was "ahead" or "behind" in winning the opposed die rolls that TSATF uses.
Both sides had thrown all available officers into the fight and at last, it came down to one figure on each side. The Anglo-Egyptian commander vs the Highest Dervish Emir. The dice were cast - and the Emir won! The prisoner, if he was alive, if he even WAS the mysterious Rigby-Figby was NOT recovered by the imperial forces.
Go to the first game in this series of three.
Go to the second game in this series of three.
Go to the second part of this battle report
Return to the Master Index of Photos and Games
Return to the Jackson Gamers' Homepage
Angelfire - Free Home Pages
Free Web Building Help
Angelfire HTML Library
htmlGEAR - free polls, guestbooks, and more!
Thank you for visiting The Jackson Gamers' pages at Angelfire. Please come back and visit again!