Generally the format for DC audio is in ADX although there are more than a few titles with .wav format music. Below are instructions I put together for ripping and replacing ADX sound files for MvC2, but will work on any .ADX music DC title. This enables you to make your own custom music remix for any game.
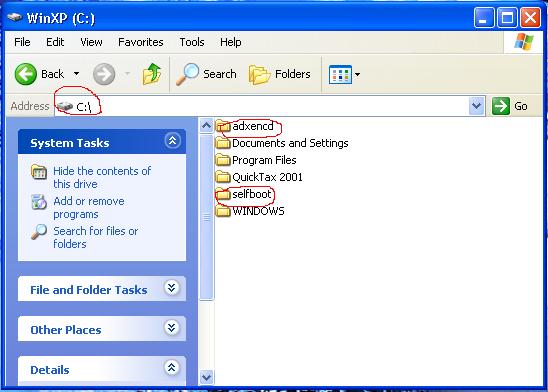
For simplicity sake make two folders (selfboot and adxencd)in the root directory of C:\ of your hard drive that look like this:
The "selfboot" folder should contain the Echelon Kit, ie. a "data" folder, IPINS.EXE, binhack.exe, cdrecord etc.
Step 1
Insert the Backup disc for the game into your CDR/W drive to find out which files you are going to edit (most of the time the music files will have a .ADX extension). Open up Isobuster and extract the 2nd session of the disc (if selfboot), otherwise extract the first into C:/selfboot/data/.
For MvC2 the music files are labeled ADX_SXXX.BIN (XXX is a combination of numbers representing the stage ie. 020). This is usually a bit different with every game, ie. In PowerStone the stage music files were labeled ST_SXX.ADX (XX represents the stage number ie. 0A)... right now I am working on Heavy Metal Geomatrix, the files have the actual song names ie. MOTOPSYCHO.ADX.
If Cinepack does not work with your OS (for listening to .adx files) download adx2wav and convert .ADX files to .WAV files to listen to them (you need a newer ver of winrar to extract the adx2wav.lzh file). To convert your .ADX files to .WAV format right click on the selected .ADX file and select open with ---> adx2wav (you will have to browse to find adx2wav).
here is a list for the stages in MvC2:
ADX_Sxxx.BIN <-- the xxx are for the numbers below.
another Capcom note... the player select and stage select is usually abreviated w/ a SELC.ADX or .BIN ie. ADX_SELC.BIN or P_SELE.ADX or other variations.
OK, so now select the music that you want to have for the bg music... get it into .wav format (however you want). I use convert with musicmatch.
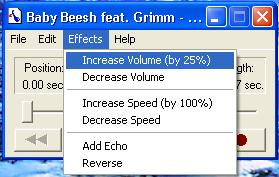
Increase the volume of the music using soundrecorder which should already be on your OS. Just go to:
start ---> programs ---> accessories ---> entertainment ---> sound recorder.
Open your .wav file up and then hit effects and increase vol by 25%. I usually increase mine twice then save it.
Change the name of all of the files so that they match the name of the bg music files you want to replace. ie. Blade - bloodrave.wav becomes ADX_S010.wav etc.... (rename the .wavs for the stage that you want). The name must be all in CAPS and notice the 0 <-- zeros not O's.
Put all your .wav files into the C:\adxencd\ folder on your hard drive.
Step 2
To change the .wav files to .adx you need to use adxencd which it is not designed for Windows, you need to use MS DOS prompt.
To get to DOS prompt read the following:
Press the Start button, go to Programs, Accesories, MS-DOS. A window will pop, it will say C:\WINDOWS or something, now type "cd C:\adxencd" and press return (without quotations). It should now say "C:\adxencd\" to the left of the cursor, if not, the folder "adxencd" is not in the proper location on your hard drive, Click Here.
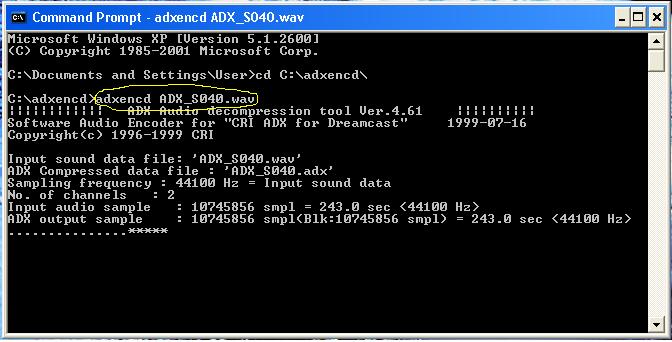
Now with the C:\adxencd on screen, its time to convert the .WAVs. To do that you need to type "adxencd" and the name of the wav, hit return.
Example:
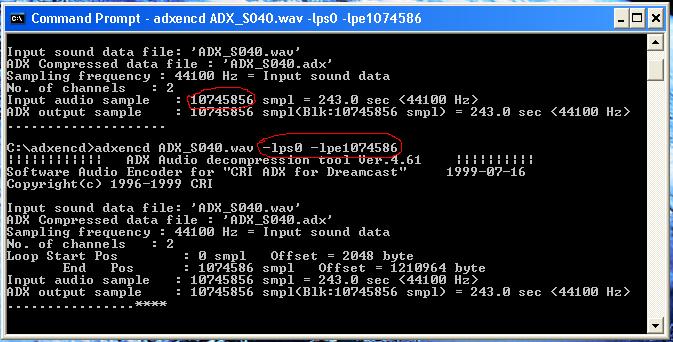
C:\adxencd>adxencd ADX_S040.wav
Now check the "adxencd" folder to see your brand new adx file. Now loop the track (next step) or do the same with the rest of the songs you want to convert.
Note: To Loop Tracks, READ the following:
ExtraStep: Looping .ADX Tracks (Recomended)
When a song ends on a stage you will hear silence. If you want the song to repeat you need to check the number of bytes that appear whne you are converting. (ie. 1074586)
Take note of that number, because you will be entering it in the next command.
Now repeat the wav to adx command line but this time add: -lps0 -lpe_______ (Replace the line with the number you got)
(and yes those l's are L's, as in loop not I's or 1's)
Do the same with all .WAVs.
--------------------------
Before going any further, you might want to check if your .ADX files work or not, use Cinepack to play. Unfortunately Cinepack doesn't work on all OS (at least not XP professional) so you may want to convert your .ADX back to .WAV just to check. The conversion from .WAV to .ADX is pretty seemless so you can probably take your chances and not check.
--------------------------
Step 3
Now you have your all of your adx files, so you can delete the wavs. For MvC2 you will need to change the extension from .ADX to .BIN.
Make sure you do it correctly or the songs will not play. Open the "adxencd" folder to see your adx files. Now open your Control Panel (start ---> settings ---> control pannel) and go to the folder options. Click the "View" tab and make sure the box that says "Hide file extensions for known file types" is unchecked. After it's unchecked, the extensions of all files will be shown in the folder.
Go to "C:/adxencd" and rename the file extensions such that the .adx becomes .BIN for all of your stage music. Ignore the rename warning.
Warning: If you renamed the files incorrectly they will NOT play.
Step 4
If there isn't already a folder in selfboot called "data" create it.
Open ISOBUSTER and extract the whole 2nd session from your selfboot game (or 1st session from a bootdisc version) into C:\selfboot\data. You will need to highlight all of the files in the 2nd session, right click and select extract files. If you get a PV read error get a newer version on ISOBUSTER.
Add up the size of all of your .ADX music files combined and add up the size of the .ADX music files you are going to replace. Subtract the total of the original .ADX files from the new .ADX files... this is to see how much more space they are going to take up in the Iso image which you will soon create.
You may have to adjust the size of the dummy file if there is one present (make is smaller or bigger). Dummy files usually look something like 00.DUMMY.DAT so create your dummy file with Dummyfile.exe and name it 000.DUMMY.DAT and erase the old dummy file in the data directory.
Copy and paste your new stage music tracks (.ADX or .BIN) from C:\adxencd to C:\selfboot\data and replace the files.
Step 5
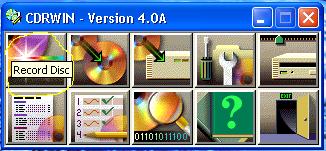
It's now time to burn your 1st session track audio track. Fire up CDRWIN and select the first option "Record Disc".
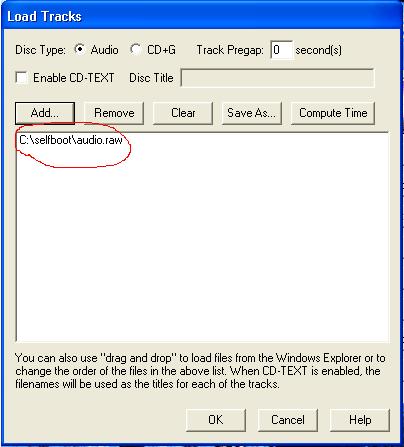
Click "Load Tracks", then click Add. Change the type of file option so it should say something like this All files *.*, so now browse until you get to your selfbootdirectory and select the AUDIO.RAW file. Click OK.
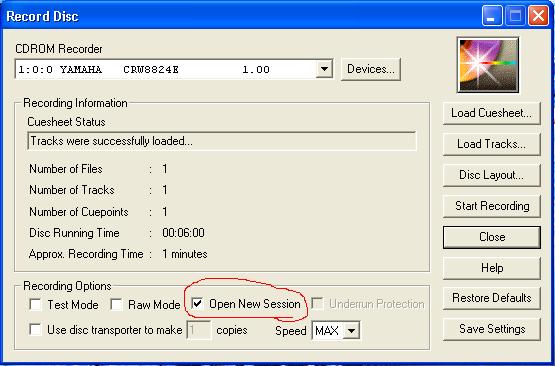
Before hitting the START RECORDING button be sure that the box Open New Session is checked.
Otherwise you will waste a CDR on a 6 second audio track. Once your checked "Open New Session" hit "START RECORDING" and wait till it's finished. Leave the cd in the tray for the following steps.
Step 6
Once the cd is done you need to find out your SCSI Bus ID# of your CD-W.
Open a MSDOS window and change it to the selfboot directory:
cd C:\selfboot
Now run this:
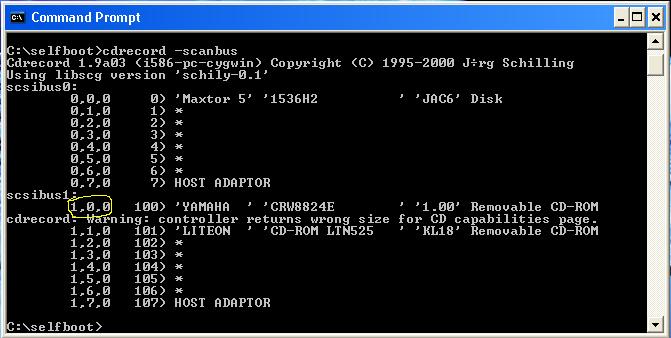
cdrecord -scanbus
It should pop your CD-W info and some values. Write down the values cause you'll be needing them.
Now, run this:
cdrecord -dev=x,x,x -msinfo
Replace the "x,x,x" with the values the scanbus gave you, for example:
Scan bus gave you these: 1,0,0 <-- so you put these instead of the "x,x,x". The values differ so be sure to be sure of this, or it won't work. I'll refer them as "x,x,x" from now on.
After that command is done it will pop another number, write them down. (Be sure that the CD with the 1st session burned is still in your CD-W). Example:
0,11700 <-- write these, you'll need them later.(the second one is your msinfo value)
Step 7
Time to do some cutting and pasting.
Cut the following files from the data folder and put them in the root directory (C:\selfboot):
1ST_READ.BIN
IP.BIN
So you should have all of the Echelon Kit applications plus a 1ST_READ.BIN and IP.BIN files in the selfboot directory. If there is no IP.BIN in the data directory you can extract any other IP.BIN from a ripped DC game, usually bootdisc games have IP.BINs. DON'T use IP.BINs from games that have CDDA tracks.
Note:
You must remove them from the data directory, they should only be in the selfboot directory.
Open a MSDOS command window and go to C:\selfboot:
cd C:\selfboot
Now type this:
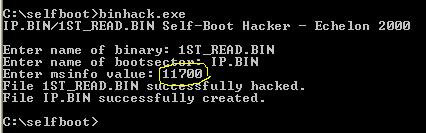
binhack.exe
It will prompt you for the name of binary, so type: 1ST_READ.BIN, now it will ask for the name of the boot sector so type: IP.BIN. After that it will ask for the MSINFO value so type only the 2nd number msinfo gave you, for example:
Once it's finished, copy your new 1ST_READ.BIN to the data directory (where all game files are).
NOTE: You only need the 1ST_READ.BIN file in the data dir, leave the IP.BIN where it is.
Step 8
Now, time to make your iso!!! In the MSDOS window type:
mkisofs -C x,y -V ECHELON -l -o data.iso data
"x,y" <<--- are your MSINFO values.
Example:
Wait for your ISO to be created.
Step 9
Once its done the data.iso will be sitting in your selfboot directory. Time to hack it.
In a MSDOS windows run:
IPINS.EXE
It will prompt you for the Bootsector filename, so choose: IP.BIN. It will now ask for the ISO filename, so type data.iso. It will patch the IP.BIN as the bootsector in data.iso
Step 10
Time to burn.
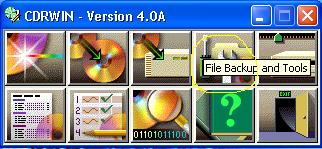
Fire up CDRWIN again and choose File Backup and Tools.
Now select Record an ISO9660 Image File. For Image Filename choose data.iso in your selfboot directory. For recording options select these:
Disc Type: CDROM-XA
Track Mode: MODE 2
Speed: any
Finalize/Close Session: Yes
Write Postgap: Yes
Open New Session: No
Test Mode: No
Verify Recorded Image: No
see below:
Click the Start button and wait.
Once it's finished, eject the CD and try it in your DC.