 Creating
a Web Page
Creating
a Web PageNetscape
Communicator
Version
7.x
Note: It's no longer possible to download the 4.7 or 4.8 versions of Netscape Communicator from the Netscape web site. If you happen to have the older version, you may click here for help with the older versions.
The Netscape Composer portion of Netscape Communicator makes it easy to put together and publish Web pages. You don't need to know HTML--the code used to make Web pages. Creating Web pages is as simple as using a word processor. You just type what you want to see right onto the page, then you can use a few of Netscape Composer's many tools (on the toolbar) to change fonts, styles, add tables, links, and images.
If you don't have Netscape on your home computer, you can download a free copy from the Netscape home page: Just go to the download section on the right hand side and you will click on a link that will take you to: http://channels.netscape.com/ns/browsers/download.jsp
"Download" means that the software is being transferred from the Netscape site, through your Internet connection to your computer. For large software packages, this process can take quite some time with a dial up connection, possibly hours. It's faster during off peak times, such as during the middle of the night. If you have a cable connection, the downloading process will only take a few minutes.
If you are given a choice,
have the downloading file placed on your desktop. This way, it will be
easy for you to find and later to delete the set up files once you have
installed Netscape on your computer. Just follow the directions on the
Netscape site about your download.
Netscape
7.x does not have quite the same look to it as older versions of Netscape.
If you wish to change the look to something that you are more familiar
with, go to the menu and choose "View" then go down and choose "Apply Theme."
Choose "Classic" and your Netscape window will look more like older versions
of Netscape. It won't be exactly the same, but sort of...........
Creating Your Web Pages
1. Use your imagination and choose a topic for your Web Site.
2. Plan the basic elements of your Web Site. Surf the net looking for appropriate ideas and graphics.

3. Start saving graphics
that you might like to use on your webpage. You can place them in a folder
titled "graphics." Remember: You must move all graphics into the folder
where you html files will reside, before you place them on your web pages.

4. Bookmark in Netscape or copy and paste important urls to Notepad or Word. Save your file with a name that you will remember, such as "links." Don't forget to copy and paste or type title of page above each address. You may even want to type in a description, so that you can recall what the page was all about. When you place the link on your Web page, you will want to know at least the name and correct url of the site.
5. Sketch out design for web page or use post it notes. (links, numbered lists, bullet lists, tables, placement of text, placement of graphics, etc.)
Utilizing Netscape Communicator
1. On the desktop of
your computer, make a new folder for all the html files and graphics for
your web page. Name the folder "webpage." Remember what you named
the folder, so that you can find it when needed. Later you can move the
contents that you wish to keep, into the folder titled "webpage" on your
floppy. Move the graphics that you have already decided to use into
your webpage folder. You can add more later. (Keep a list of which graphics,
etc. that you actually end up utilizing for you page(s). When it comes
time to load them to the Web, you'll know which ones that you used and
won't load too many or too few.)
2. Open Netscape Communicator. You don't have to be on-line to use Composer. You can do this three different ways:
1.
Launch Netscape under the Window menu, select Composer.
A new page will automatically open for you:

2. Click on the Composer
icon in the lower-left corner of any Netscape Window.

3.Open the File menu, choose
New, and then Composer Page. A blank composer will open up:

3. Netscape Toolbars.
Netscape Composer has two toolbars to help you put together your pages. The Composition toolbar contains buttons for manipulating the body and contents of the Web page. The Formatting toolbar contains buttons for altering format, including fonts, styles and alignment.

4. Netscape Menus:
The File menu provides all of the important functions related to Composer, such as opening new files, saving files, etc.
The edit menu allows you to make corrections to your Composer pages, as well as check your spelling.
The view menu lets you decide what your toolbar shows. It also allows you access to your page's HTML source.

The insert menu allows you to insert various elements into your page.
The format menu contains all of the options available for working with your text, as well as your page colors and backgrounds. This is the menu that you use to give your page a title, also.
The table menu allows you to work with tables on your web page.
5. Working with text.
When Composer is set on body text, your text is set in the default font and style for regular text. If you pull down the menu you will see the following options:

Choose a color for your
text.
Using the toolbar you can
select the color of text and the color of the background page you desire.
On the toolbar the top color is the text color, and the bottom color is
your background color. ![]() This
example shows black text over a white background.
This
example shows black text over a white background.
A new window will pop up showing you a variety of different colors. Click on the color you want to use and then click OK.

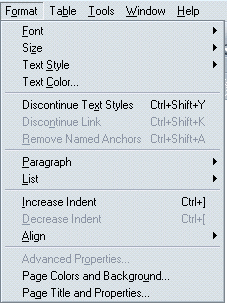
You can also access these options also by clicking on Format then Text Color and Page Colors and Backgrounds .

Changing Font
If you want to change the font, you have to use the Format menu from the top of the window. If you click on Format, the first option listed is Font, if you select that and move over to the side menu you will see options such as Variable Width and Fixed Width as well as Font names. There are not very many choices in version 7.x.Style your text: bold, italics, underlinedIf you wish to use different fonts, you will have to learn to edit the html by hand.
(See the very end of this set of lessons for how to get started on doing that.)If you select Variable Width or Fixed Width, it means that when someone views your webpage, their default font in either category will be used; Times New Roman is a variable width font and Courier is a fixed width one.
Your toolbar has basic style components such as bold, italics and underline.
Be sure to highlight any text that you wish to change the style of.
If you would like to use other style components, click on Format, then Text Styles.

Indenting your text.
The toolbar offers a feature that allows you to indent your text in small increments. Once text has been indented it can also be moved back to the original position by clicking on the "left" icon
You can also find this feature under Format, "Increase Indent" or "Decrease Indent."
Aligning text:
The toolbar makes it simple to align your text. The four choices available are left justified, center justified, right justified or align justified, which most resembles a newspaper and how text is justified to fit the space provided.
![]()
1. Highlight and center your title using the alignment buttons in the toolbar. Press return, 2 - 3 times
2. Type some more text, highlight it and align it to the left. While you have the text highlighted, choose a color and style for your text. Type some more text and indent it.
3. Practice saving your page.
Be sure to give your page a title.

You may change your page
title at any time by going to the Format menu and selecting Page Title
and Properties.
After this, use the save
button.
![]()
6. Lists: Bullets and Numbers ![]()
You can change the way your bullets and numbers look by going to Format, then List Properties.

Under Format, then List,
are the options of term and definition. The two styles work together to
create a "glossary-style" appearance. Use the "term" feature for the word
being defined, and the "definition" feature for the definition. The Term
text appears left aligned, and the Definition text appears indented.
7. Formatting the Background,
page properties, changing the title:
Set the background page color, page properties, title that will show up when loaded to web, author, etc.

Using an Image as a Background


8. Graphics
To add an image to your Web
page, click the your mouse pointer where you want the image to appear in
the document, then click the Image button on the toolbar.
This opens the Image Properties window.

In this window, you click Choose File to include an image that is currently in your web page folder.
You can also use the Image Properties window to set the image's postition relative to the surrounding text, as well as add blank space around it, add ALT text, and even add a low-resolution pre-loading image.
Create a list of links for your page.
To create a link in your Web page, first highlight the word(s) you want to form your link, then click the Link button on the toolbar.

This will open the Link Properties window.

Type in the complete URL of the Web page you want to link to, or click "Choose File" to link to a page that is currently in your Web page folder.
If you're linking to a page on the Web, and it isn't in the same directory (and folder) that you're publishing your Web page to, you need to include the complete URL ---- For example: http://www.sumter17.k12.sc.us ------- Be sure to include the http://
If you are linking to a page that is part of your Web page suite of files, within the same folder, you can just type the file name, such as "page2.html" instead of clicking on "Choose File."
You can:
Continue to save your page every 5-10 minutes while you are working.
10. You really should put your e-mail address on your web page, as a hyperlink. It's very simple to set your e-mail address up as a hyperlink on your pages.
 just as you would for a regular hyperlink
11. To create a table
for your Web page:
Place your cursor where you would like your table to appear on your web page.Click on the table icon button.

or You can choose a background image for your table. Tables also allow you
to be more precise in the placement of graphics on your pages. The graphic
to the right, as well as this text, are both inside of a table. Setting
the border line widths to 0 pixels, gives you an invisible table, like
this one.
|

Notice that you can align your table left, center, or right. Aligning a table to the right often helps when using left border background graphics. It also helps to change the table width when using borders. If you are using a left
hand border graphic, be sure to uncheck, "Equal column width."
If you wish to edit your
table, remember to use your right mouse button to add rows, cells, delete
the table, etc.
Merging Cells To merge (or join) a cell
with a cell on its right, click inside the cell to the left, open the table
menu and choose
To merge (or join) adjacent
cells, select adjacent cells by dragging over them, open the table menu
and choose
Finally, to split a merged
cell into two or more separate cells, click inside the joined cells, open
the table menu and choose
|
A target is just like a hyperlink -- but instead of sending people to another Web page, you are sending them to another spot on your page. You have probably noticed targets on web pages that say something like: "click here return to the top"
First, you need to set up the target, which will be the area of the page that you want the click to send your visitor to.

Now, set up the hyperlink that people will click to go to the target.
You will get the same dialogue box you got for a regular link.One of the simplest features you can put on your page is a horizontal line. The width and thickness of horizontal can adjusted. Horizontal lines sort of take on the color of the background of your page.
To place a horizontal line on your page:
Go to the "insert" pull-down menu and
click "horizontal line."
This is what it looks like:
You can adjust the horizontal line is with the right mouse button:
13. Editing page source.
Once you are more experienced in making web pages using Composer, you may want to get into adding special effects or elements to your web site that cannot be done with Composer. Examples are adding sound, a counter, frames, java code, dhmtl code, etc. will can result in a number of special effects for your web page.
In order to add these special effects, you will have to manually add HTML coding to the source code of your web page. This can be done using Composer.
1. First, do a search on the web for some special effects that you might want on your page(s). There are many web sites offering free web page code. You just follow their directions and paste the code directly into the source of your web page and then save what you have done.
Here are some links to sites with free coding for web pages. There are many more.
2. Second, once you have
found the code that you wish to use, you'll have to copy and paste it from
the web into your web page. Remember that if you are going to use any sound
files, that sound has to be placed inside of your folder. Please, use only
public domain music on your site.
Here are the steps for editing
the source code of a web page in Composer.
To add HTML attributes and JavaScript to objects such as tables, images, and horizontal lines, you can use the Advanced Property Editor.
Note: Unless you clearly understand how to add, delete, or modify HTML attributes and their associated values, it's best not to do so.
If you are not currently viewing the Advanced Property Editor dialog box, follow these steps:
1. From the
View menu (or the Edit Mode toolbar), choose Show All Tags.
2. Double-click
the object that you want to modify to open its Properties dialog box.
3. Click Advanced
Edit to open the object's Advanced Property Editor.
The Advanced Property Editor has three tabs, each of which lists the current properties for the selected object:
Note: Required attributes are highlighted in the Attribute list.
5. Click OK
to apply your changes to the Advanced Property Editor dialog box.
6. Click OK
again to exit the Properties dialog box.
Composer automatically places
quotation marks around any attribute text.
Composer always checks the spelling starting from the beginning of your document, regardless of where you place the insertion point.
To check the spelling of your page:
1. Click the Spell button
on the toolbar, or open the Edit menu and choose Check Spelling.
2. Use the Check Spelling
dialog box to correct misspellings and to edit or add words to the current
spelling User Dictionary. Click Close when you are done.
3. Recheck Page: Click to
reset the spell checker and recheck words. Recheck Page is primarily useful
if you switch languages and then want to re-check the document's spelling.
4. Check Word: Click
to check the spelling of any word you type in the "Change to" field.
5. Replace and Replace
All: Click to replace the word, or all occurrences of the word.
6. Ignore and Ignore
All: Click to continue checking without changing the word, or all occurrences
of the word.
7. Add Word:
Click to add the word to your Personal Dictionary, so that Composer recognizes
the word instead of highlighting it as a misspelled word.
8. Edit: Click to add, replace,
and remove words from the User Dictionary.
9. Language: Choose the
language that you want the spell checker to use.
15. Previewing
Your Page 
To see how your page will look in a browser after you save it, click the Browse Button on the menu bar . (If you are used to a 4.x version of Composer, you are familiar with the Preview button. In version 7.x, it's known as the Browse button.)
This allows you to open a temporary file in the Navigator web browser that you will then close to get back to your Composer page. Previewing your page will only show you how it will look when published; it will not allow you to edit your page
![]()


