Preparations:
You will need, Paint Shop
Pro the plugin FM
Tiles Tool , The Plugin,"Texturizer"
(optional) and a Picture
Tube
If the Plugin is not working, you more than likly need
drivers.Click "Here"
for help
1. Open Paint Shop Pro 7
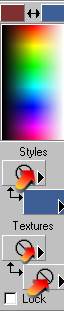
2.View\Toolbars.. Check the following settings:

3. File\New use the following settings:

4. Select the "Text"
tool ![]() . On the "Color"
pallet, select the color of your Choice for your text. I will use
the color "Blue":
. On the "Color"
pallet, select the color of your Choice for your text. I will use
the color "Blue":
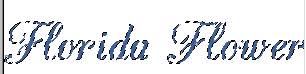
5. Image\Rotate Direction: LEFT Free: 45 Click,"OK". This will rotate the text for you.leave the "Marching ants" around the text
- Click on the "Background color box, and left click on the color
- All other setting need to be set on "Null"
- Left click on the far left side of the new White image to open the Text window.
- Type your name in the Text window
- Hightlight the text and select the "Font" and "Size". Click on the arrow to preview your text. Use the following Settings:
- If the text looks too large in the "Preview", decrease the size of the font.
- Click "OK" to Apply the text BUT leave the "Marching ants" around the text (image resized for web page)
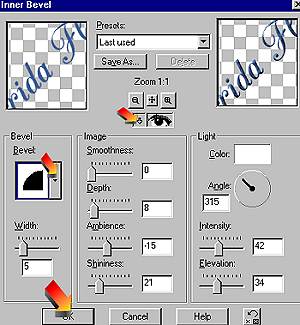
6. If you have the plugin, Blade Pro, you can use it to apply an effect to the text while the text is selected (marching ants around the text) If not, go to "Effects\3D\Inner Bevel". Click on the down Arrow by "Bevel" to select the Bevel type of your choice. Again, by clicking on the arrow, you will see the "Preview in the Window on the right to show how the effect will look on your text.
7. While the "Marching ants are around the text,
you can use the "Mover" tool to reposition the Text ![]() Once you are satisfied with the text and the position, go to SELECTIONS\Select
NONE to remove the "Marching Ants"
Once you are satisfied with the text and the position, go to SELECTIONS\Select
NONE to remove the "Marching Ants"
8. Layers\New Raster Layer.. Click "OK"
9. Select the "Picture Tube Tool" ![]() .
On the "Tools Options-Picture Tube"palette, click on the down arrow to
locate the Tube of your choice.
.
On the "Tools Options-Picture Tube"palette, click on the down arrow to
locate the Tube of your choice. 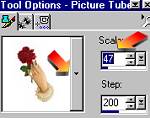 LEFT click on the White image with your text, to Apply the Picture tube.
If the tube is too large, go to Edit\Undo and decrease the Scale on the
"Tools-Options Picture Tube" pallet. You can use the "Mover" tool
LEFT click on the White image with your text, to Apply the Picture tube.
If the tube is too large, go to Edit\Undo and decrease the Scale on the
"Tools-Options Picture Tube" pallet. You can use the "Mover" tool ![]() to reposition the picture tube BECAUSE we added it to a new layer :-)
to reposition the picture tube BECAUSE we added it to a new layer :-)
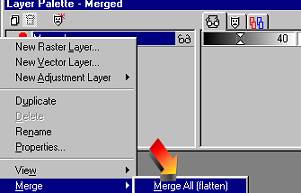
10. Layers\Merge Merge all (Flatten)
11. Set the Foreground and Background colors to the color
"White" ![]()
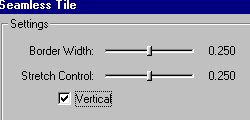
12. Effects\Plugins\FM TILES Select, "Seamless Tiles" Use these settings UNCHECK " VERTICAL"

13.Effects\Plugins\FM TILES Select, "Seamless Tiles" Use these settings and put a Check on " VERTICAL"
14. Layers\New Raster Layer...Opacity 40
Click "OK" 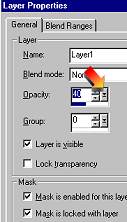
15. Select the Flood Fill Tool ![]() .
Make Sure the Foreground and Background colors are set to the color "White"
.
Make Sure the Foreground and Background colors are set to the color "White" ![]() and the "Tools Options_Flood Fill"
pallet has these settings
and the "Tools Options_Flood Fill"
pallet has these settings 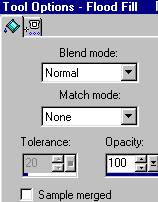 Left click on the Image to flood fill with the "White" Color. The image
will ONLY be very light at this point but hang in there, cause "It ain't
over til the fat lady sings and I ain't singing yet :-)
Left click on the Image to flood fill with the "White" Color. The image
will ONLY be very light at this point but hang in there, cause "It ain't
over til the fat lady sings and I ain't singing yet :-)
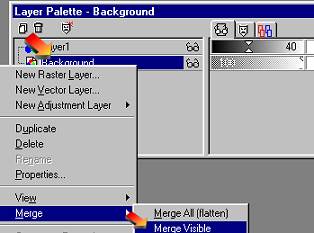
16. RIGHT click on the Background layer on the "Layers-Pallet" select "Merge\Merge VISIBLE"
17. Now you will see one "Merged" layer on your "Layers-palette". Move the "Opacity Slider" to the left until you have "40"

18. Right click on the "Merged" layer of the "Layers-palette" and select "Merge\Merge all Flatten"
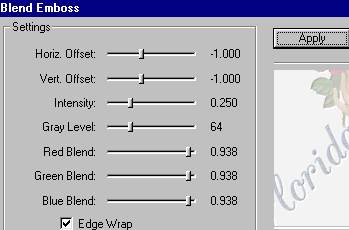
19. Effects\Plugins\FM Tiles select "Blend Emboss".
Use the following Settings then Click APPLY (you can also repeat this step
if you want a deeper Embossed image)
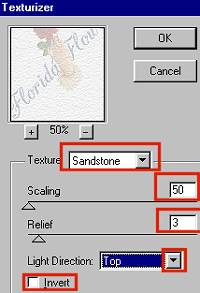
20. Effexts\Plugins\Texture\Texturizer.. Use
the Following Settings:
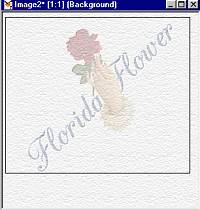
21. You can use the "Crop" tool ![]() to crop the image
to crop the image
22. File\Save as.. Click on "Options" to set the "Compression" ..Click "OK"