Here is the clean, freshly bored/honed B20 Block. It is a good idea to coat all of the insides of the block with WD-40 at this point.
Wiesco forged pistons, Eagle H-Beam forged rods, and a reworked CR-V oil pump.
Factory HONDA bottomend gasket kit, All new rod and main bearings, and new thrust washers.
Here's a close up of the color code system that honda uses so you can tell each bearing thickness apart. Each color is a different thickness.
Main bearings installed into the block and caps. Crank is set into place and ready for the caps and bolts to be installed/torqued to factory HONDA spec.
Me tightening down the last main bolt.
Here you can see the crankshaft is fully torqued into place. Time to install the pistons/rods.
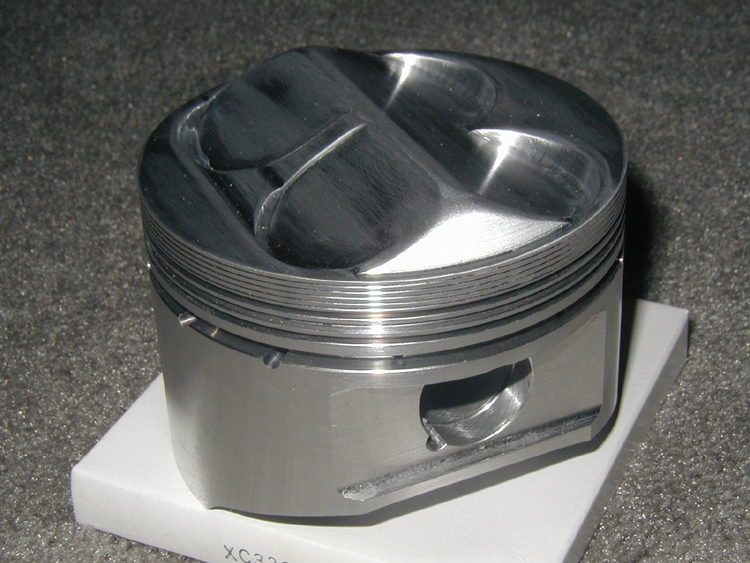
Closeup of the 12 to 1 Wiesco forged pistons.
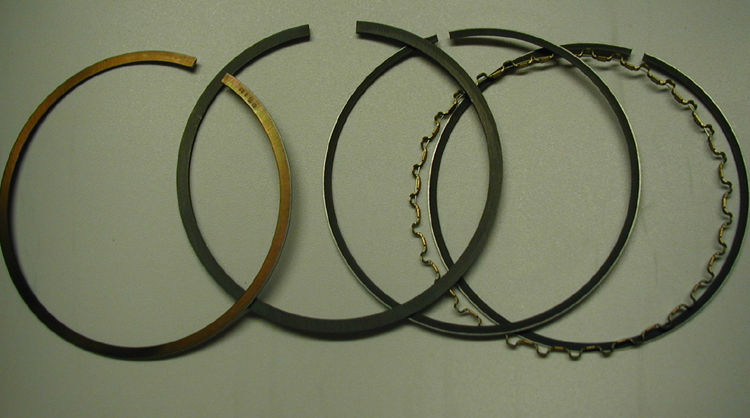
First I had to install the rings onto the piston. They are layed out in the appropriate order in the picture. There are 2 compression rings, 2 oil scrapers, and a spacer between the oil scrapers. Its a good idea to install them using a piston ring pliers, because without even pressure, they can snap pretty easy. Dont forget to gap them.
Now it was time to install the pistons on the rods. This is done with what is called a floating dowel pin. It slides freely in the piston and the rod, there is no need to press it into place. In order to prevent them from sliding out the side of the piston into the cylinder wall, you must install a retaining clip on each side, it is basically an internal snap ring, it snaps into the piston. Be sure and get the gap in the ring to line up with the groove in the piston, otherwise, you wont get sufficient oil flow.
Here is a shot of all 4 piston/rod assemblies with pins and rings installed.
Now you need to compress the rings so that you can install the piston without cracking the rings. At this time you need to double check that your gaps are in the appropriate places with regards to the dowel pin. If youve got them in the wrong place, or if they all line up, you will lose compression and leak oil.
Now that the rings are compressed, you can place the piston and compressor over the cylinder. Now, just make sure that you get the skirt of the piston inserted into the cylinder to assure everything is aligned properly. Now tap the dome of the piston with the wooden handle of a hammer to slide the piston from the compressor into the cylinder.
All 4 piston/rod assemblies installed into the block. Notice that the ridge on the dome of the piston between the valve reliefs goes towards the exhaust side, while the smooth side goes towards the intake side.
Now flip the block over, install your rod bearings, slide the rods into place on their journals on the crank. Now make sure and use some arp moly lube on the threads of the arp 8mm rod bolts to ensure a proper torque spec. Torque them as per ARPs spec. Dont forget to use some assembly lube on the bearing surfaces.
Closeup of the rods bolted up to the crank.
Next I installed the end cap with the new seal.
Now its time for the reworked oil pump.
Baffle plate and oil pickup are now bolted into place.
Oil pan gasket in place.
Now you can install the oil pan. Follow the torque specs as per HONDA closely. They are easy to strip, and dont require much torque at all.
Here is a shot of the built shortblock with waterpump, mount, and timing gear pulleys installed. Time for top-end assembly.
|