
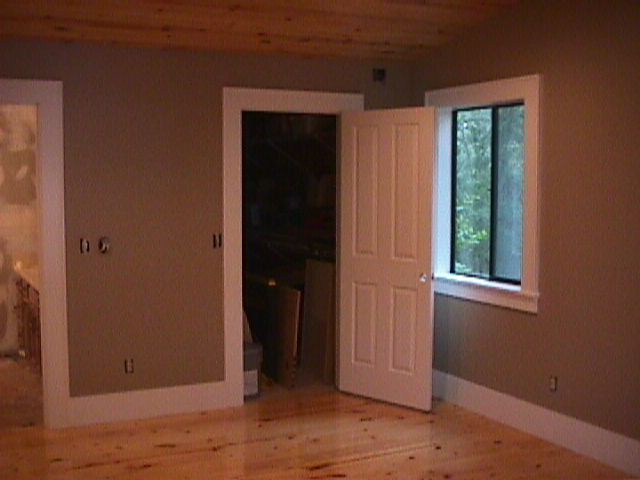
Some Finish Details. – The work on the house in the woods has progressed slowly. There are times when I think it will never end – but they have moved in for the summer so I am not working there full time, any more. As it has gotten to the trim out stage, some of the details are interesting. The first step was to install the new doors. The doors are four panel smooth Masonite units (no fake wood grain) that I had mounted in solid flat jambs with no casing. The doors on the bedrooms and bathrooms are a foam core which helps reduce sound transmission. The closet doors are hollow. I was able to widen the openings for both bathrooms so that a 2-6 door could be used. Although this is not as wide as current code requires for wheel chair access, it was all that we could manage. And they look better that the original 2-0 doors. We made up the door casing using a 1X6 – we ripped a 1 inch strip off the 1X6 and turned it 90 degrees to the casing to make a “back band” molding. We did not miter the casing corners – the header piece sits on top of the side pieces – but we did miter the corners of the back band.
The baseboard is a simple 1X8 – no frills – in keeping with the doors. Where necessary the baseboard was scribed and ripped to match any high or low places in the flooring. I did not want to use shoe molding – the baseboard to floor joint was caulked.
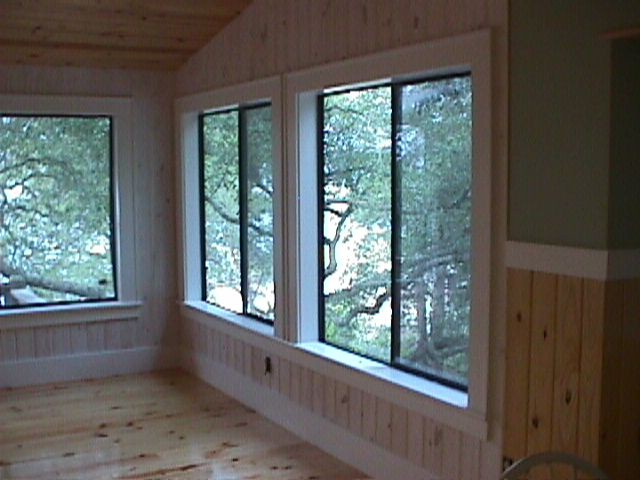
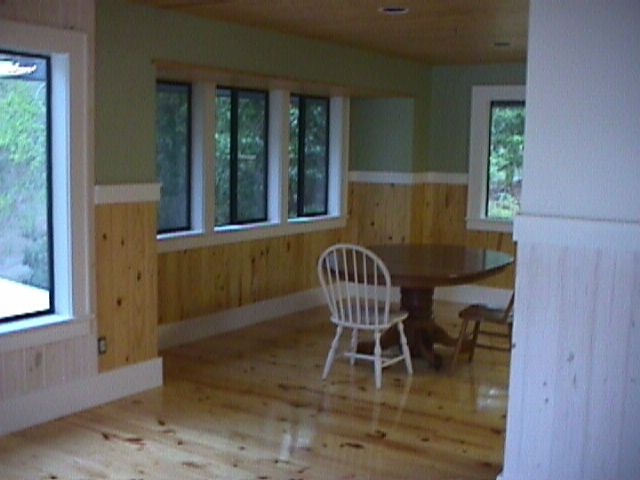
This is a view of the “Keep” area of the kitchen. It shows the wainscot, which is the same 1X6 Vee groove pine that was used on the high ceilings. In the Kitchen and Keep it is finished with satin Polyurethane varnish. In the great room and hallways it was finished with a Whitewash and then clear water base Polyurethane. The end and back wall of the great room have the whitewash paneling from floor to ceiling. The window casings were done in the same manner as the doors – a flat 1X with a back band made from a ripping. Since the wainscot is 3/4" thick and the sheet rock above it is only 1/2" thick, we were able to make an adjustment in the width of the back band to compensate. The window on the front wall (opposite the chair in the above picture is completely new – it was not there before. The next picture shows the corner of the great room.
The cap on the wainscot is a 1X4 that is rabbited on the bottom to set down over the top of the thicker boards and then a 1" ripping was turned flat on the top. The window sills were made up by glueing a half inch thick board to the underside of a 1X6 and rounding it over – top and bottom with a 1/2" round over router bit.
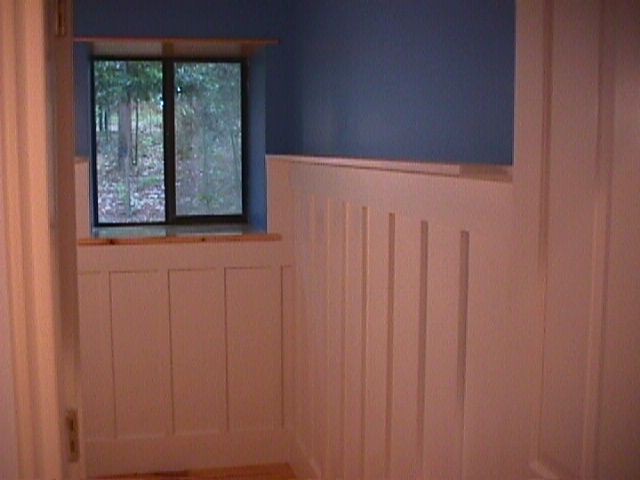
The wainscot in the hall or guest (half) bathroom was somewhat different – it is a board and batten system made up of 10 inch wide strips of ½” plywood with a 3/4 by 1½” batten. The cap on top of the wainscot is wider that in the rest of the house and is intended to have hooks spaced along it for hanging towels and clothing for those who take advantage of the lake for swimming. It also has a wider shelf across the top – again to place watches and glasses and things such as that while swimming. This bathroom will get a custom designed table for a vanity – it will be fitted into the batten system. It is still in the design stage and will be presented in a later page.
The master bathroom is still a work in progress, as is the fire place/hearth/mantle, and will be shown in later pages. The master bathroom was a piece of work because we swapped places with the shower and toilet. The room may be too small to get effective pictures.
