
Making a Tube from a Graphic
We have searched the Bookstores and we can NOT find a book with information on making tubes. The Jasc Software site does have a small Tutorial of their own you can check out.
Download a sample Graphic
Using the Browse Feature bring into PSP the Graphic you will be working with. Go to IMAGE>CANVAS and check the size of your graphic. Remember to click on CANCEL..we are only checking for the size of the graphic.
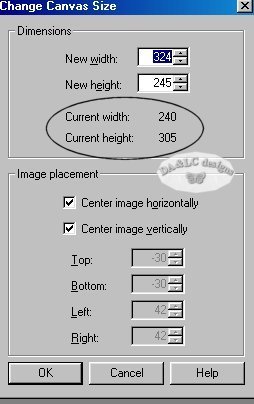
Go to file new and create a new transparent background Width at 240 and Height at 305...Make active your Graphic EDIT>COPY, Make Active your Transparent Background EDIT>PASTE AS NEW LAYER
Close out your old Graphic to make room on your PSP Desktop.
Up until now the process has been the same for both ways of making a Tube. Because we have a busy background on this graphic we can't use our "Magic Wand" tool, it only works on areas of solid color.
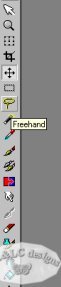
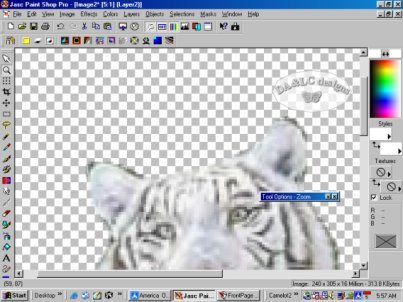
Left Click to select your "Magnifying (Zoom) Tool"
![]()
Left click 1 time on your graphic to make your image appear larger. You will know the tool is active when you place your cursor on your Graphic and it looks like a Magnifying Glass.
Now left Click to select your "Lasso (Freehand) Tool"
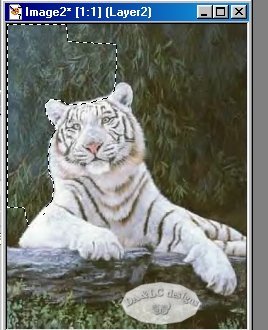
Hold your Left Mouse button down and draw around the outside of your picture. (I do this process in sections at a time bringing the end of my "Marching Ants" line to the beginning. The reason I do this is because once you let up on the mouse button the end will connect to the beginning and it may take part of the Graphic that you want to use as a Tube with it.) Once you have the section you want go to EDIT>CUT.
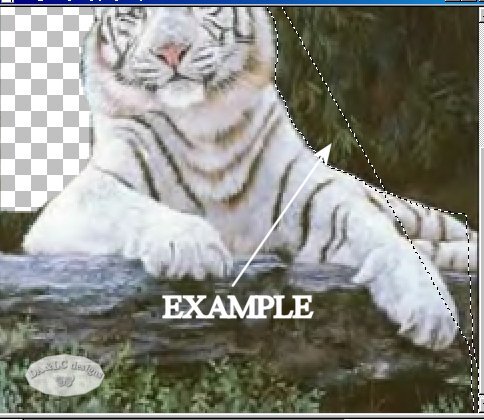
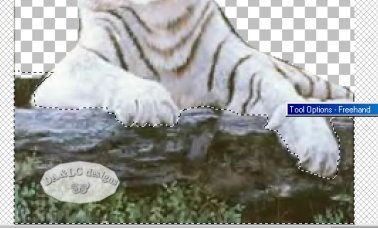
See how I run my "Lasso (Freehand) Tool" around the outside edges. Don't be afraid to play with this tool...you always have EDIT>UNDO
Repeat this process until the whole Background is gone.
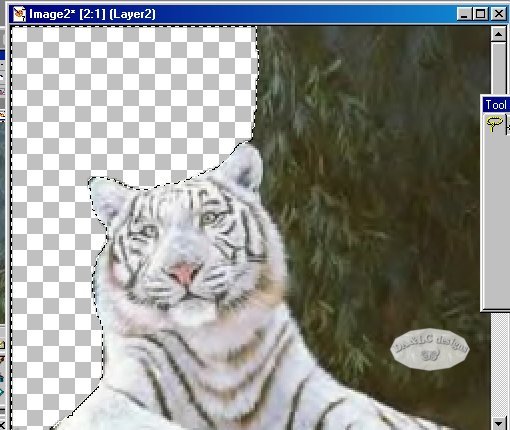
Once you have all the Background gone go back to your Magnifying Glass and enlarge your image more to look for any areas you need to do a better job on.
If everything looks good go to VIEW>NORMAL. Now your Graphic is at its normal size. Notice on your Graphic that the last area you worked on still has the "Marching Ants". We need to SELECTIONS>NONE to make those UN-active otherwise you will only be merging Layers on the area inside the "Marching Ants" because that will be the only area you have selected.

Once you have SELECTIONS>NONE go to LAYERS>MERGE>VISIBLE
Remember if your background turns white you have LAYERS>MERGE ALL (FLATTEN) and you need to EDIT>UNDO and remerge VISIBLE.
Go to EDIT>EXPORT>PICTURE TUBE
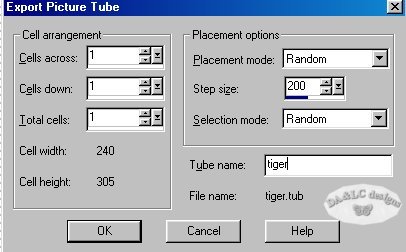
SAVE AS a name of your choice with NO extension. And you are now ready to use your new Tube with the "Tube Tool".


All Tutorials and Graphics on this site ©byDiana/Laura 2000 do not use without permission.
