
Page Curl Christmas Card
Download for this Tutorial
With this tutorial I have added a pattern for you to use called "D_Foil gold". You will need to move this pattern to your Jasc Paint Shop Pro 7 Pattern file folder. The Plug-in for this Tutorial is copywritten and we can not give it to you for personal use.
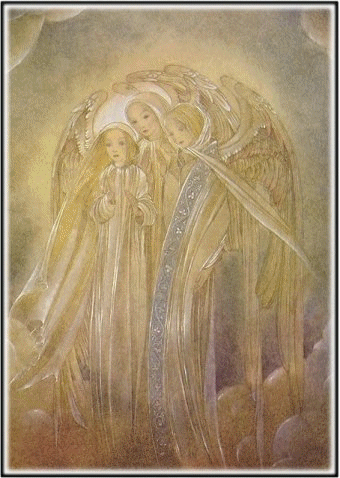
Browse to the graphic you would like to use for this project. Use the EYE DROP tool to pick the colors you will want to make your bottom IMAGE for this Tutorial. Go to IMAGE>CANVAS Size and find the size of your main graphic and EDIT>NEW IMAGE the same exact size.
Add any graphics or writing on your new background Image.
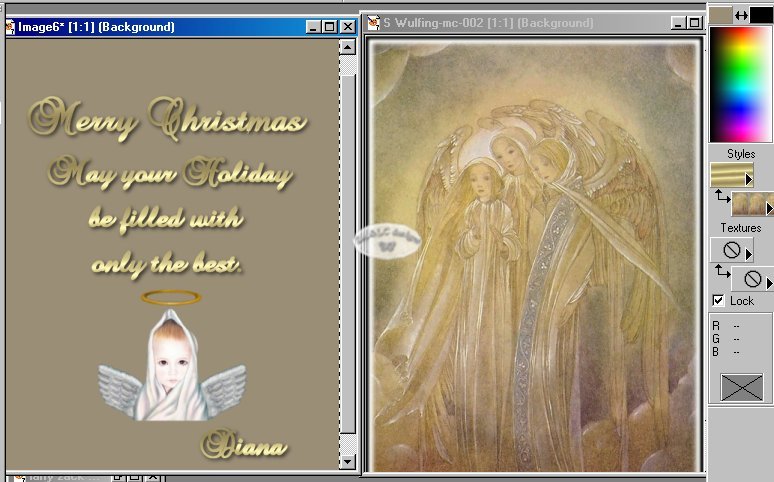
Once you are done SELECTIONS>NONE, MERGE LAYERS>ALL FLATTEN and your are done with the first section of your card. Make a new image of your background when it is done and minimize it to use later.
Make ACTIVE your Main Graphic EDIT>COPY, Make ACTIVE your Background Image and EDIT>PASTE AS NEW LAYER. Minimize your Main Graphic you will need it later.
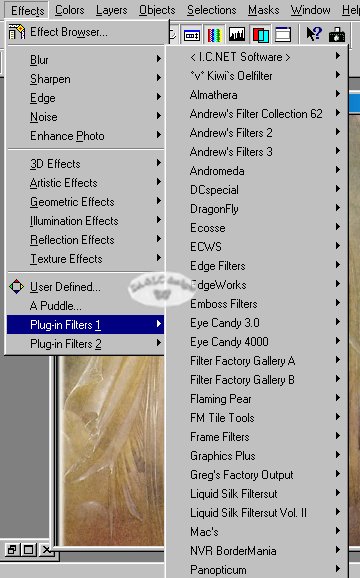
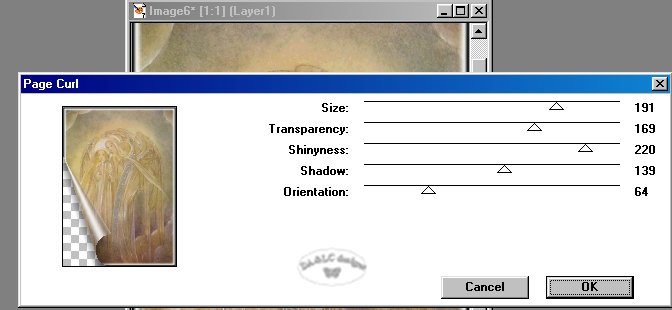
Go to EFFECTS>PLUG-IN FILTERS 1 Browse to your Page Curl Plug-in and apply.
With this Plug-in a box will pop up and we will need to play with the sliders until we have the curl in the area and size we want.
Once done hit OK and go to your Main Image and LAYERS>MERGE FLATTEN, EDIT>COPY, EDIT>PASTE as NEW IMAGE.
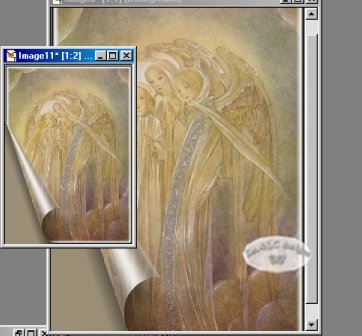
Shrink down your new Image and go back to the original Image you did the Page Curl on. EDIT>UNDO MERGE LAYERS, EDIT UNDO>PAGE CURL. The reason we are un-doing all the original changes we made is because we don't want to take any chances with any difference in our Animation Frames. Repeat this process 4 times making the curl bigger until only a small corner has the curl in it.
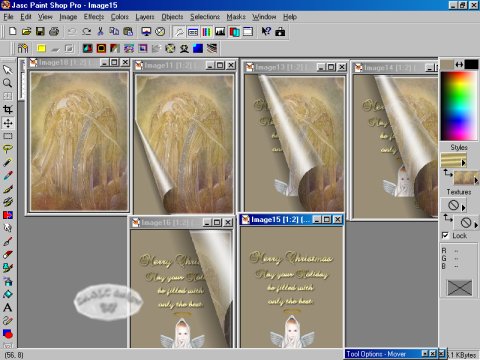
Your Desktop should look like this when your done.
Launch Animation Shop and Open Wizard. We will use Wizard as normal with all the same settings. When adding your image start with your main graphic...then add the page curls in order of least curl to most..add your bottom graphic last and we want to make this part of our animation last longer so add it an extra time. Then reverse the order going from last to first and click on NEXT. Write down the Image numbers or names if you want...mine are 18-11-13-14-16-15-15-15-16-13-11-18 in that order.

Adjust your speed and SAVE AS the name of your choice.
All Tutorials and Graphics on this site ©byDiana/Laura 2000 do not use without permission.
