******************

(photograph by James Mittner)
*********
In 1943 the PRR found itself short of cabin cars (cabooses) and with war restrictions applied to the railroads, constructing "new" equipment was out of the question. Like many railroads the PRR decided to take older equipment and upgrade them for emergency use. 75 cars of the aging circa 1912 X23 outside braced box car fleet were chosen to go through a program converting them to useable cabin cars. From May 1943 through the early part of 1944 the conversions were completed in the home shops at Altoona, Pa. They were assigned car numbers 478520-478594. By the late 1940's only 40 were still assigned to cabin car service. The remainder were transfered to the work equipment roster or a few were sold to the Long Island Rail Road and the Western Allegheny Railroad. By 1957 only 12 remained as cabin cars on the PRR. By the mid-late 1960's I believe most were either gone, still in MoW service or sat somewhere rotting away. Today there are several examples that survive in museums and displays.
I like PRR cabin cars and since I already built the classes of the N5b, N6b and the more modern N5c and the N8 in 1:29th scale, I figured I would try and add the NX23 to the roster as well. This model will differ slightly as I am using a mixture of construction materials. All previous models were made from styrene for the superstructure. This NX23 will include scribed V groove wood sheathing to represent the wood sides found on the prototype. This is new material for me so hope all goes well. I will show the progress of the model thru photos mostly and text where needed. So, hopefully in several months, I will end up with a decent rendition of this war emergency PRR NX23 Cabin Car.
***************
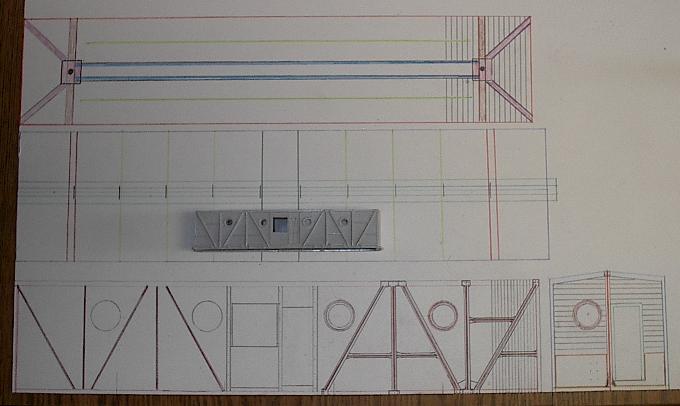
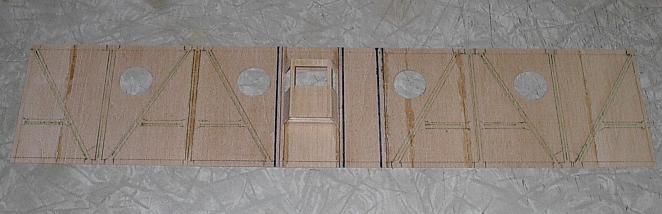
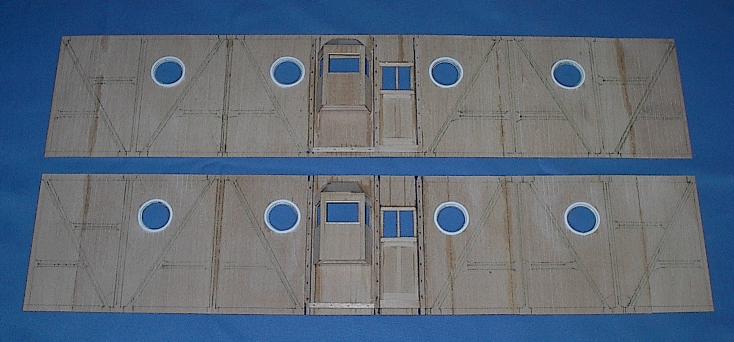
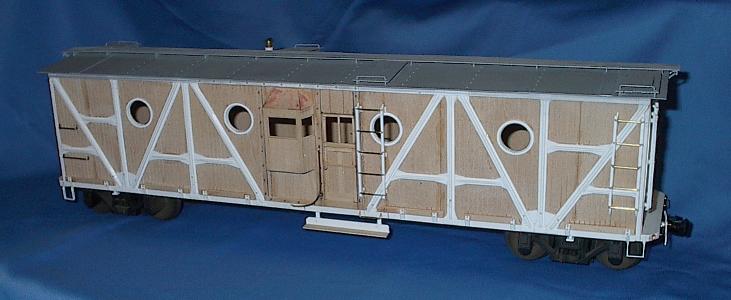
The Sides
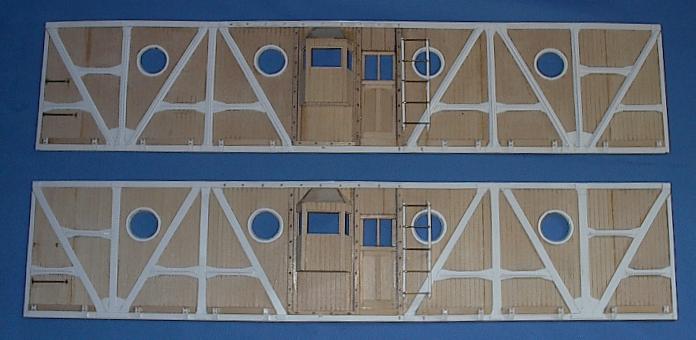
Construction begins with the basic drawing with measurements taken from HO scale model NX23. Then the sides were put togther and measurments transfered to it for guidelines in future placement of details. NX23's could be found with either horizontal or vertical side sheathing. I chose the vertical sides for my model.
 **
** **
**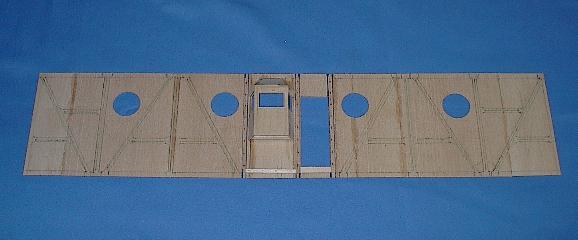
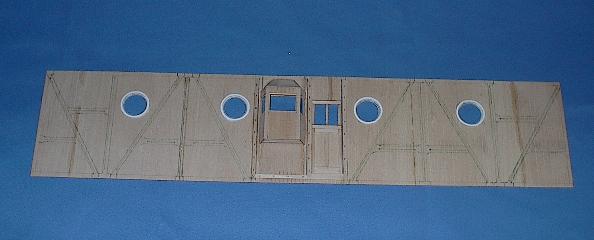
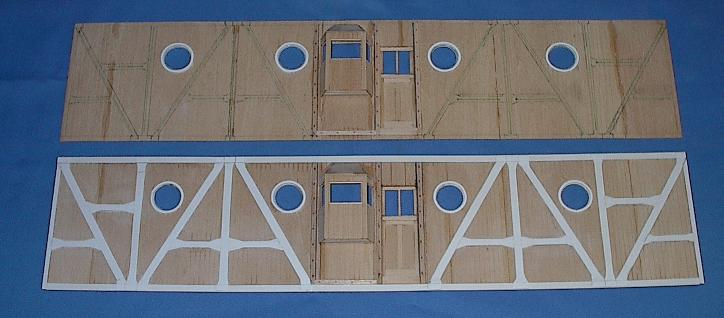
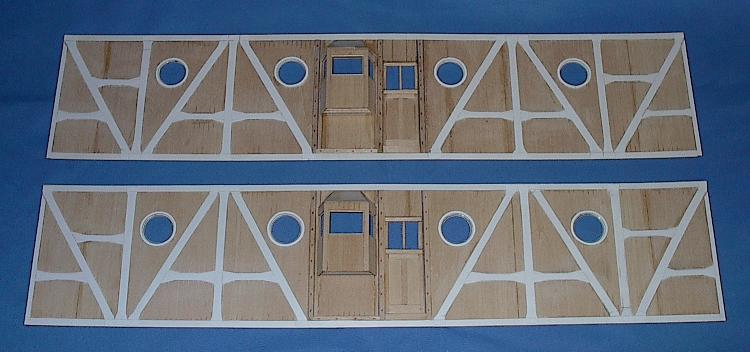
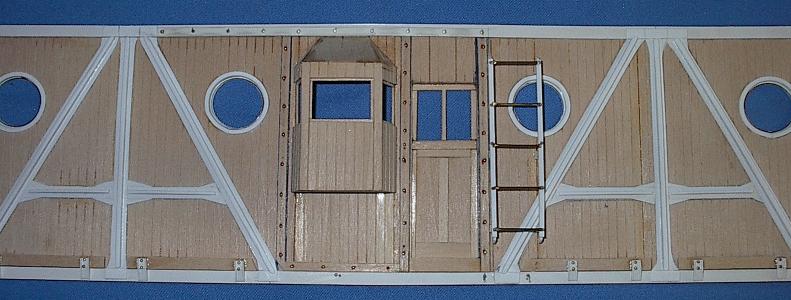
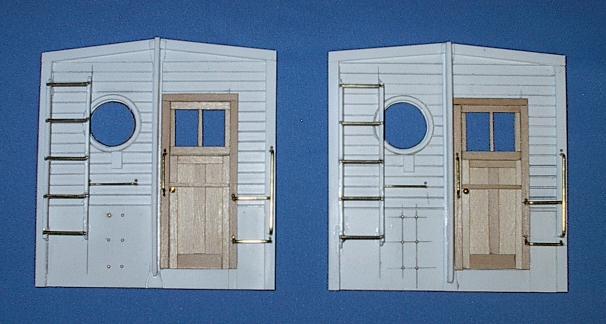
More detail added such as the windows cut out, frames added and the small bay window insalled.
 **
** **
**
To represent each of the pressed steel vertical and diangonal bracings, I first layed and glued a thin strip of styrene on the wood sides of the correct size and shape. Then I laid a strip of styrene on edge on top of that to get the basic brace look. I then sanded to shape. Looks pretty convincing. The shorter horizontal braces were constructed the same way but using smaller dimensional styrene strips.
 **
** **
**
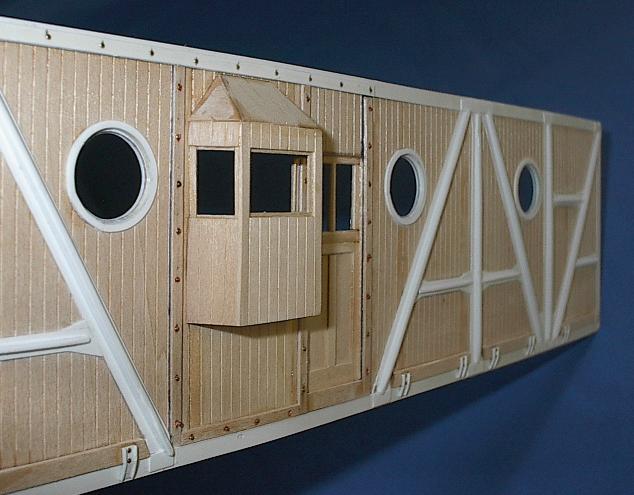
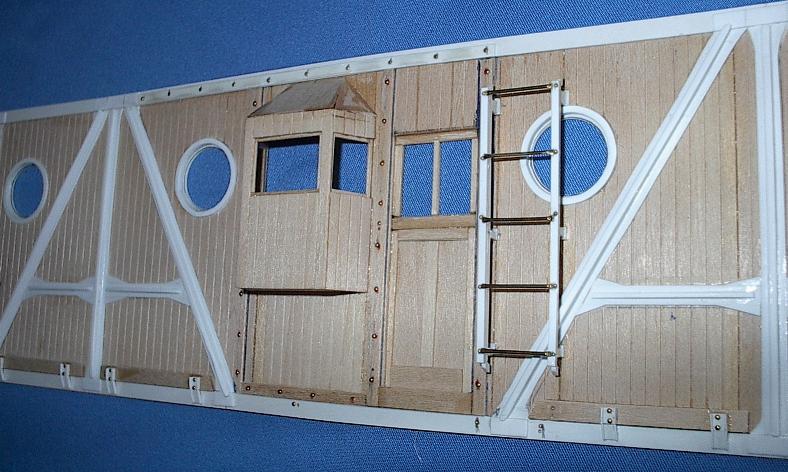
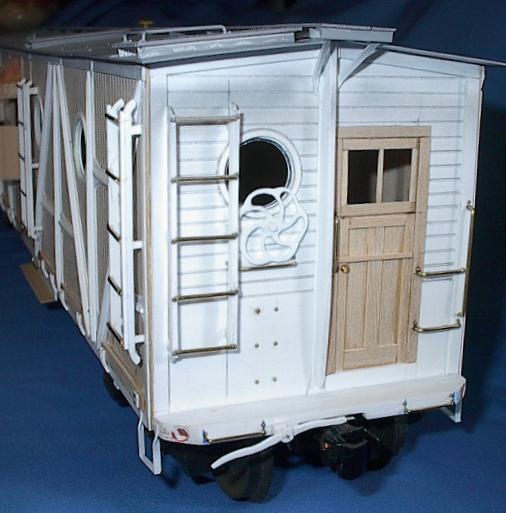
Still more details added. Rivets, hand grabs, ladders and the small steel fittings found near the base of the sides. I believe these are reinforcment fittings. I used shallow channel to represent these, added anchoring rivets and that did the trick.
 **
** **
**
 **
** **
**
********
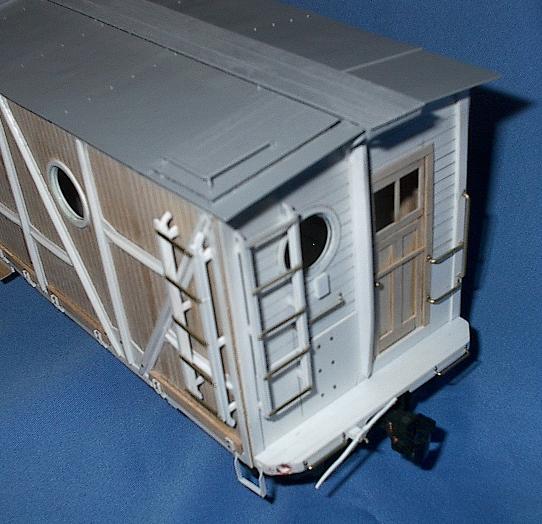
The Ends
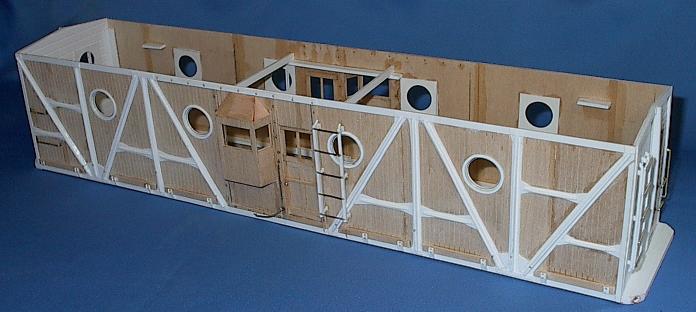
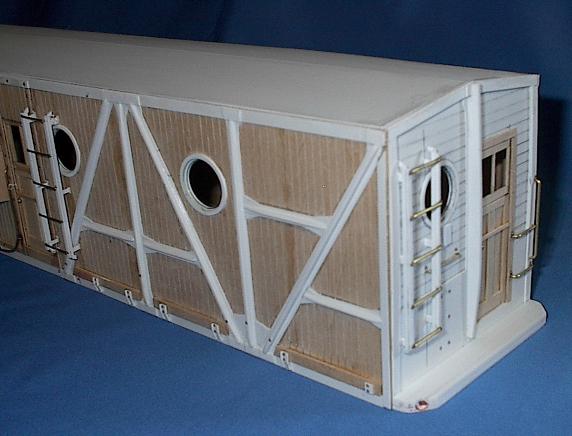
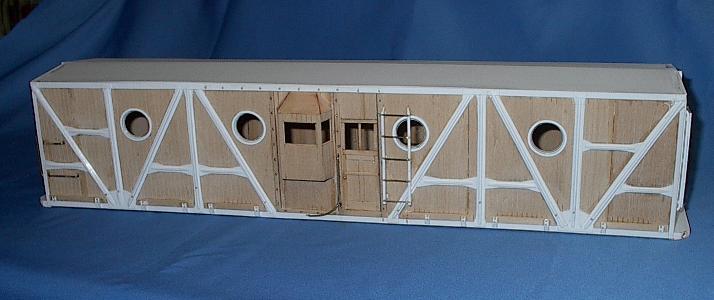
After a short wait, a large stash of styrene supplies arrived in the mail. About five hours later I had the two ends just about completed. I still need to locate several suitable brake wheels. I may try to fabricate something but I am not sure how it will come out. Soon it will be time to assemble the ends and sides together followed by fabricating the built up lap type roof. That is my next step.
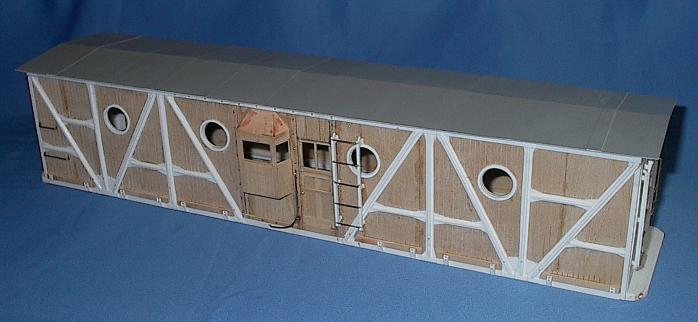
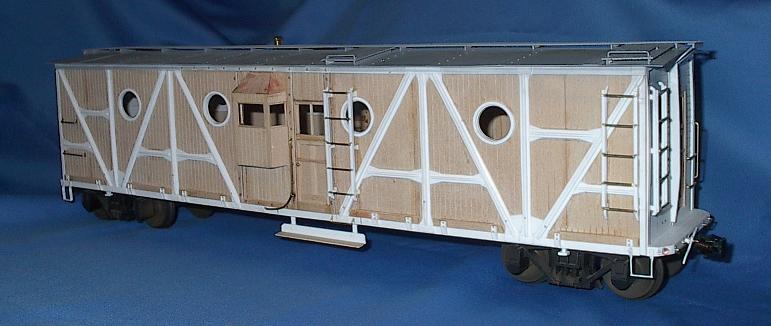
After installing the narrow platforms on the ends it was time to assemble all the pre-built parts. First the ends were installed to the sides and then the sub roof dropped in place. A little bit of sanding and then the sections of the lap roof will be installed. This roof will overhang on the ends and sides giving the final appearence as that seen in the prototype photo above.
 **
** **
**
*******
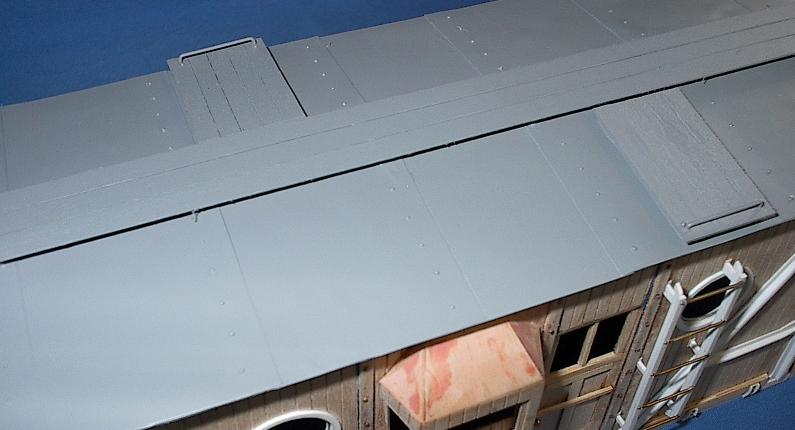
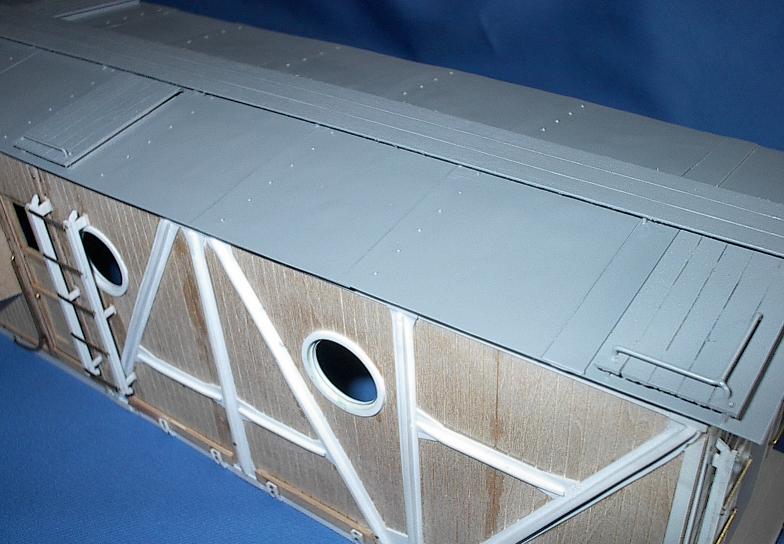
The Roof
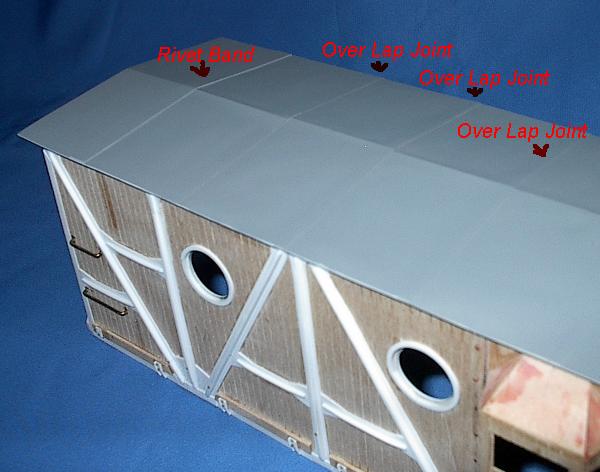
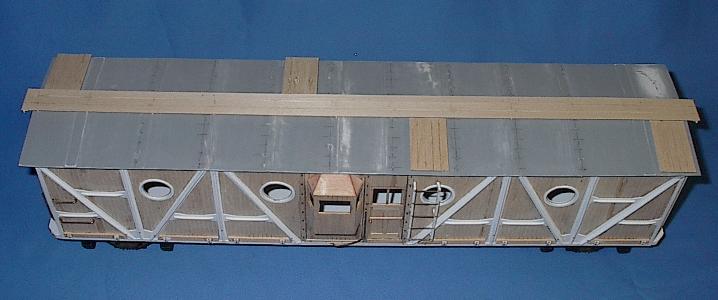
Here are several views of the roof. My original plan to duplicate the lap type roof went no where. The styrene I was using, .020, was just way to thick and it didn't give a good result. So after the sub roof was in place the primary roof was placed on top of it. Then to represent the lap joint panels, I used a very thin accetate material, similar to that used by teachers with their overhead projectors. This paper thin material was cut into the appropriate size panels and laid down, slightly overlapping the previous one. Thus the final look was what I was after. I will go back later and install the many rivets on all of these seams. Then it will look like it is suppose to. I primed the roof to show the panel seams more clearly. I also progressed enough for installation of the roof walk and platforms. Still need to install the grabs and other small details there.
 **
**
 **
** 
 **
** 
*******
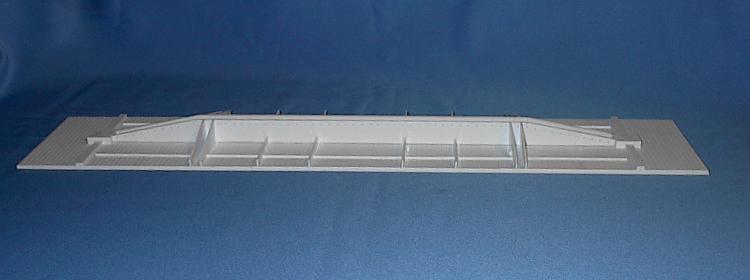
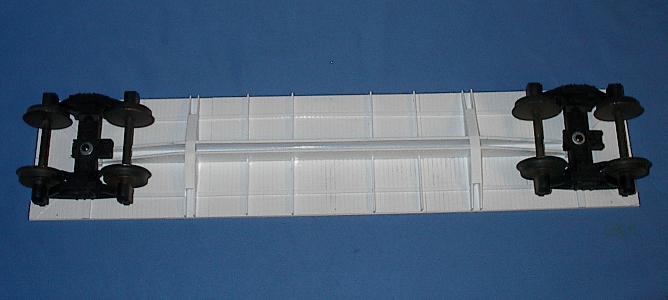
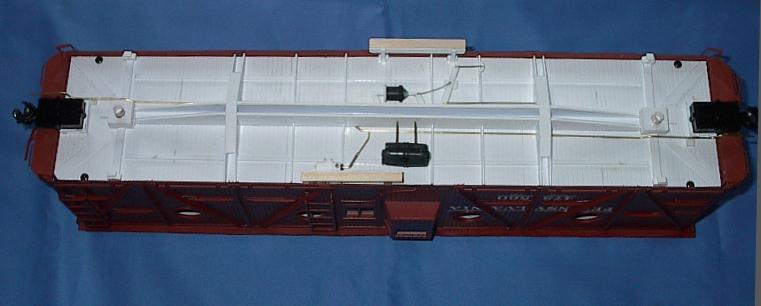
The Underframe
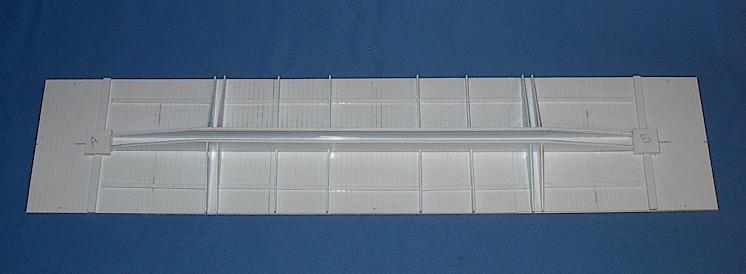
The underframe was constructed with a combination of .060 sheet styrene with a second layer of scribed styrene to represent the boards. Many sizes of styrene strips were then glued in place along with the center sills. This all resulted in a sturdy underframe. I now have to study the brake system before I attempt those details. The X23's were built with K Brake systems but the NX23's used the later AB Brakes. The main air resivoir, cylinder and triple valve are the main parts along with the levers and pipes. I hope to duplicate this to some extent. I also barrowed a pair of trucks from a previous project for test fitting. They fit just like they were suppose to.
 **
**  **
** 
**********
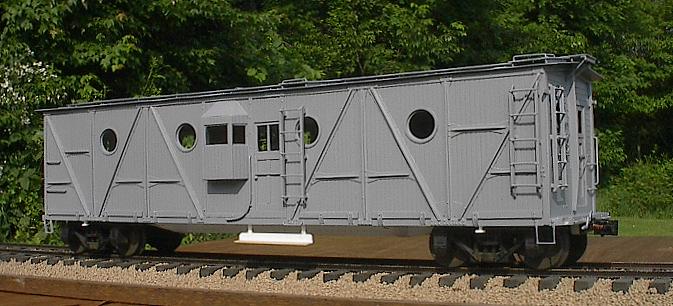
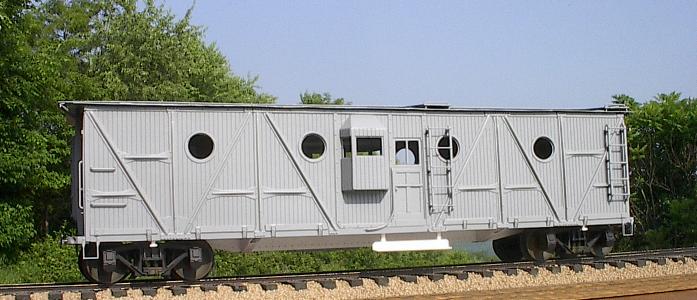
NX23 Nearing Completion
The past few days allowed me to finalize some detailing. Roof walk grabs, more ladders, cut levers, etc. Not much more I can do until some additional details for the underframe arrive. I may work on those brake wheels I need. Beleive it or not, an additional hundred or so rivets need intalled yet too. I need to order those as well. So, I am at a stand still more or less for awhile. Doesn't look like this will get painted and lettered for several more weeks. Pics will be posted when that happens. Here are the latest NX23 pics taken today
 **
**  **
** 
 **
**  **
** 
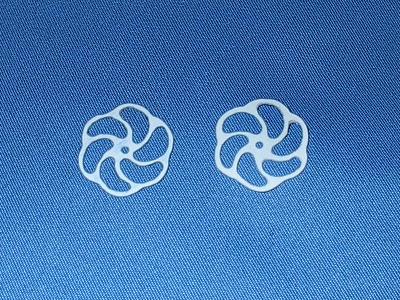
After looking on the net for some suitable brake wheels and finding nothing that would work, I decided to go ahead and spend some time tinkering with styrene. After drawing out the brake wheels on sheet styrene I cut them out and using the dremmel with a drill bit I was able to mill out the cookie cut spiral shape I was looking for. Fortyfive minutes after I started I had two very useable detail parts.
 **
** 
****************
Waiting for ordering info from the manufacturer for the underframe parts the last few days was driving me crazy. So I gave up and decide to fabricate what I needed. I had an air resivoir on hand but I needed a triple valve and a brake cylinder. With some spare parts and styrene I was able to come up with some stand ins. With all the levers, rods and clevises, I ended up with a decent looking brake system. I doubt if it is 100% correct but it captures the flavor of the AB brake system used in conjunction with several K brake system components.
 **
**
*************
Painting and Lettering
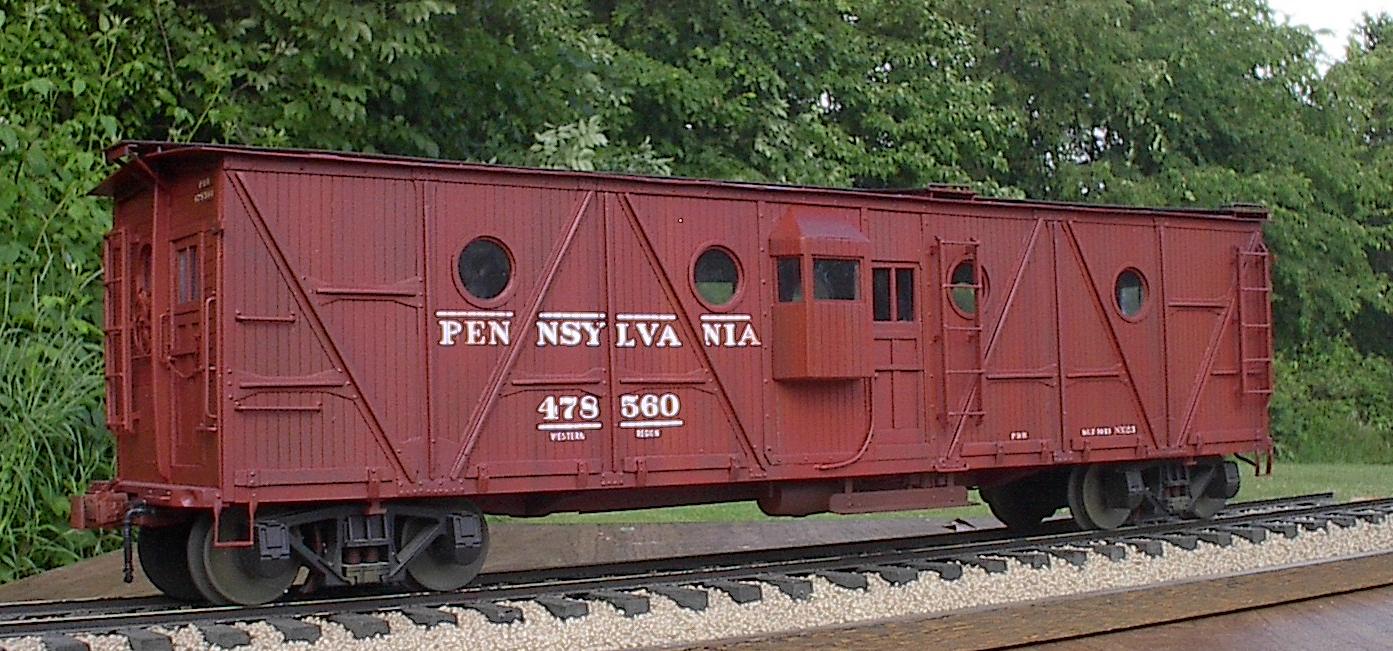
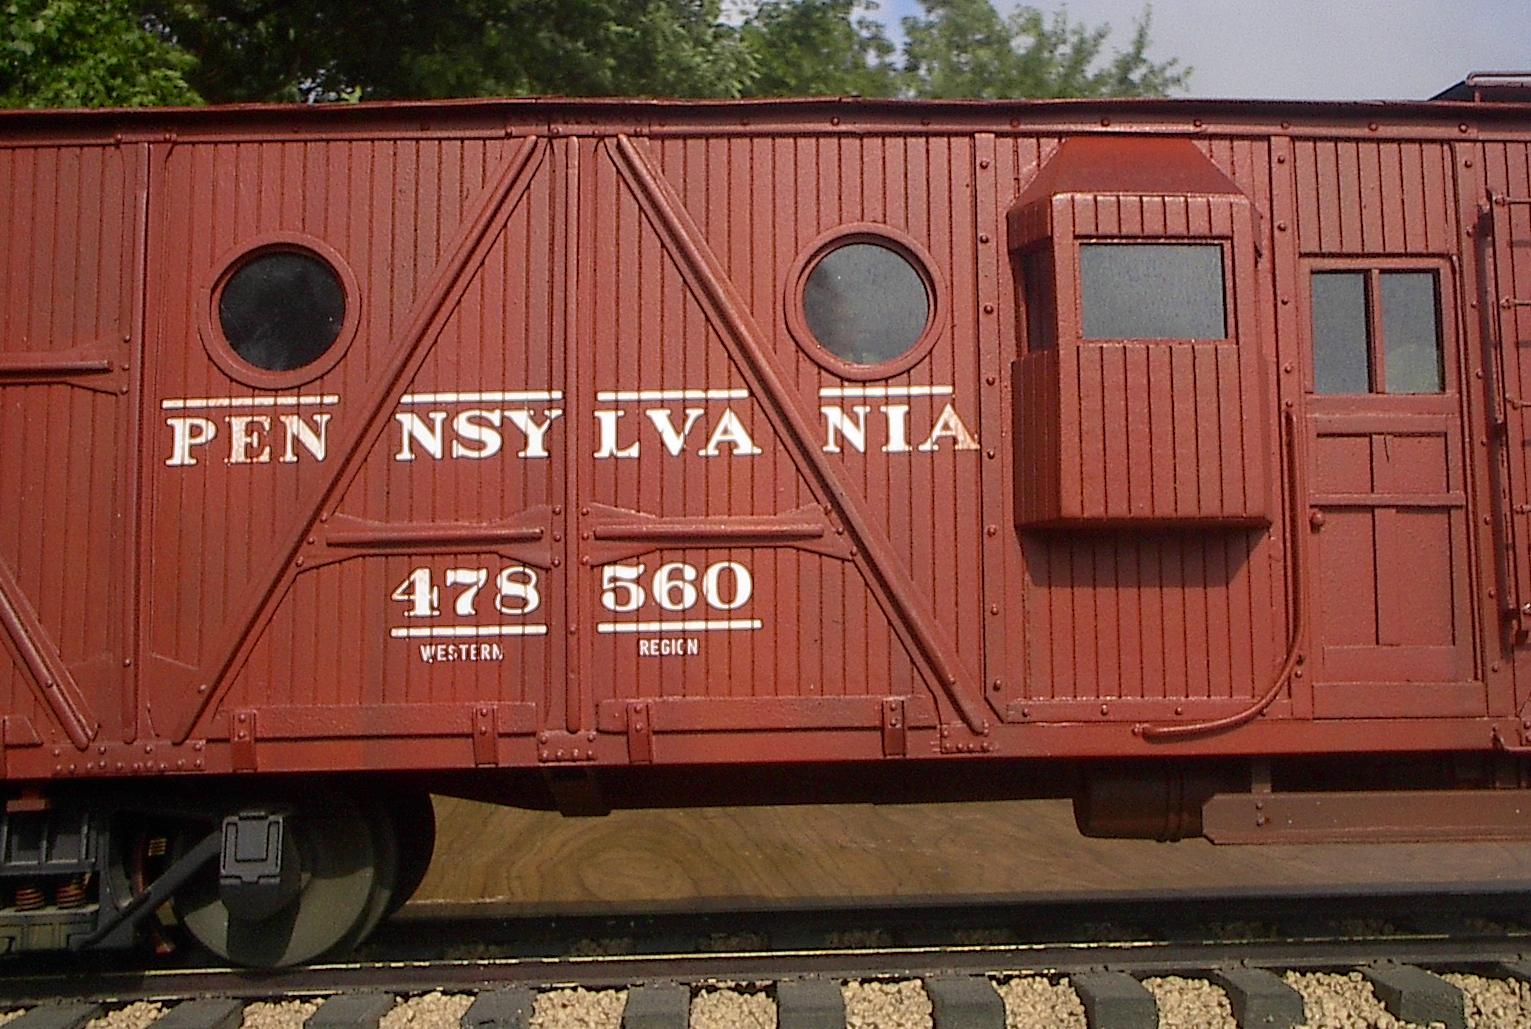
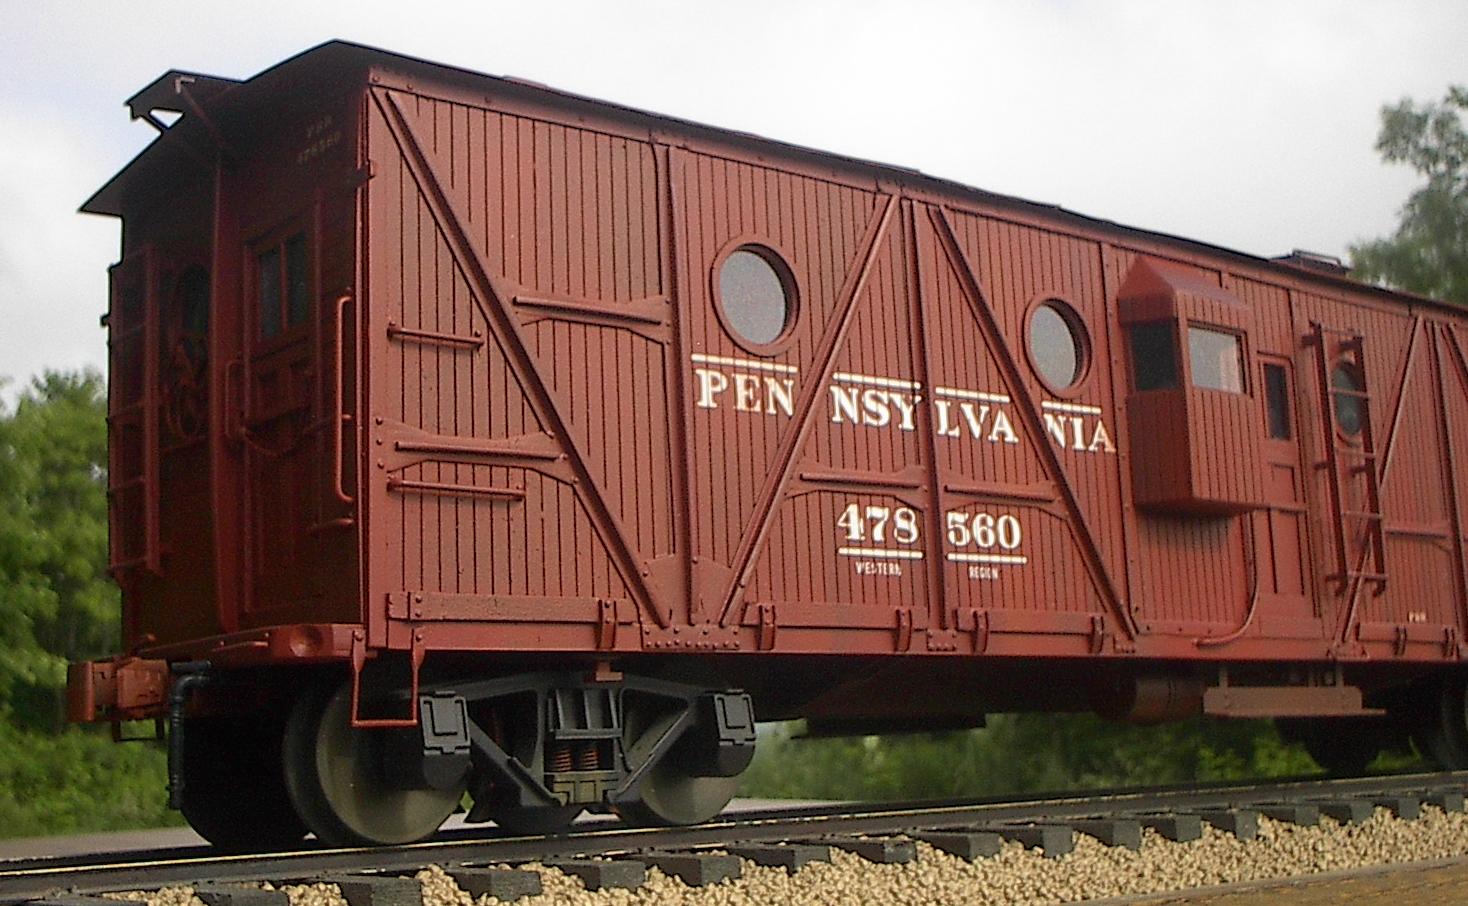
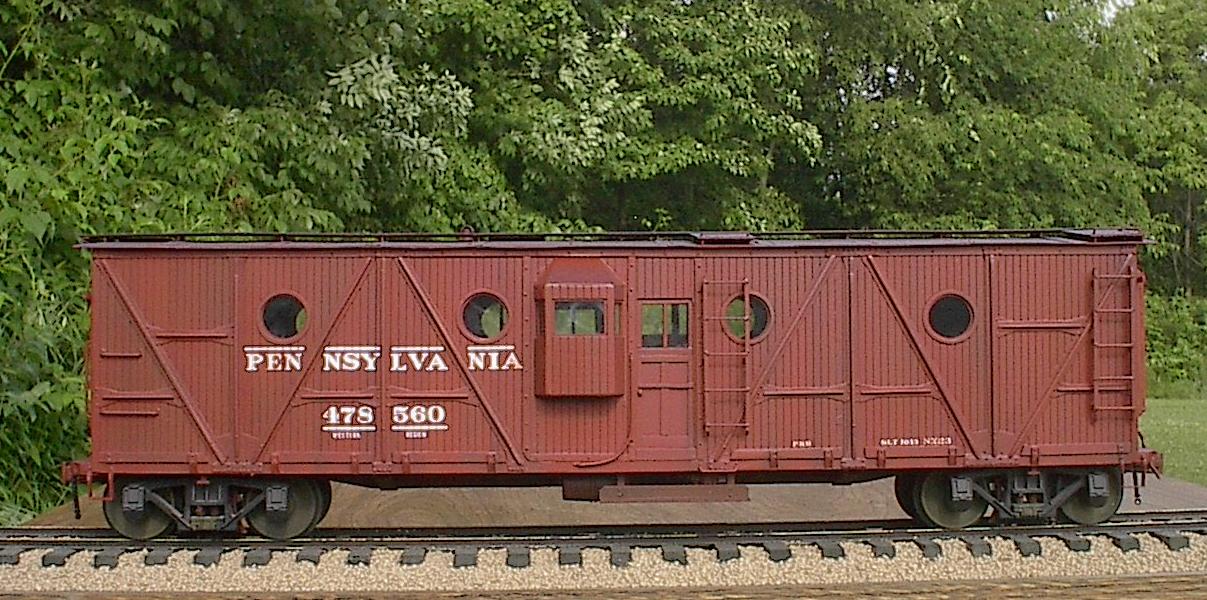
Having basically completed the major construction of the NX23, the time has come to give it a paint job. I first applied a coat of sandable primer. With a little light sanding it gave me a smooth surface for the final color. The PRR painted their cabins "Freight Car Color". I used a mix of Polyscale Zinc Chromate Primer, Caboose Red, Reefer Orange and Steam Power Black. It took several varried mixes to get the effect I wanted which was a cabin that seen several years of service, not totally new and not a weather beaten piece of rolling stock either. Once I had the basic color applied I decaled the cabin with decals that I had on hand, left over from previous projects. Once I am satisfied with the overall look I will apply a little more weathering to tone down the white lettering and give it some signs of daily use.
 **
** **
**
*******
The Finished NX23
 **
**
 **
**

 **
**

 **
**
*********************