
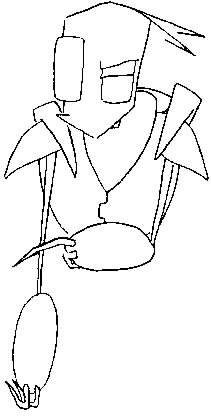
 Yeesh, it looks like he's checking his pulse... >_< Step 6: Forearms & hands...um...fingers...er...whatever. Remember where we left that one arm shorter than the other? See what we're gonna do with that? See? Seeeeeeee?? Oooooooh... *slap* Okay! Let's start with those...uh...arm...things. Just a simple oval will do just fine for this, but leave the end where the fingers are open (this makes it easier to put the fingers in without having nasty eraser marks where the oval went through them). For the fingers, you can put them in any pose you want, but just remember to either make them with 2 joints (like above) or just a smooth crescent shape (in other words, no visible joints in them). Also, once you have those arm-oval things in place, you can finish up the Tallest's shirt-thing. It's basically just a circle, and don't forget that zig-zaggy seam in front!
 Step 7: That scrawny little waist that they have Can somebody explain to me why, if the Tallest spend so much time snacking, why are they so SKINNY?!?! ACK!!! *ahem* Um... back on task here... For the waist, I recommend putting in their belts (actually, they're levitation belts which allows them to hover off the floor. If you don't believe me, check out Nick.com. Nyah. :P) Drawing these first just makes it easier, in my opinion, to place the white part of the waist, which, like I said earlier, should be rediculously thin.
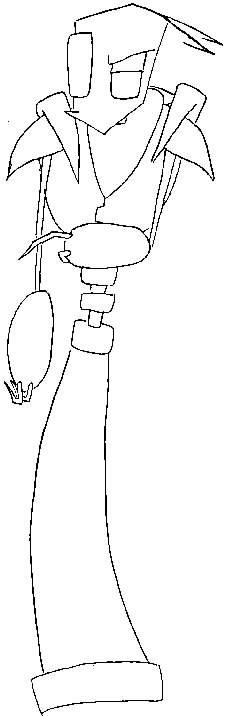 Step 8: Um...skirts? These guys wearing skirts is just odd...but at least they look good in them! ^_^ Anyways, the "skirts" (for lack of a better term) are mainly just 2 smooth, slightly-curved lines. The lines should arc towards the front of the Tallest (I don't know why, I just do it that way. ^_^ You can arc it backwards if you want. It doesn't really matter to me. :) ) The skirt should be about the same length as from the Tallest's head to the bottom of their waists (in other words, it shoudl be long). At the bottom of it, just make another belt-type thing for the skirt's cuff (or whatever you want to call it. Jhonen really should specify these things... >_<)
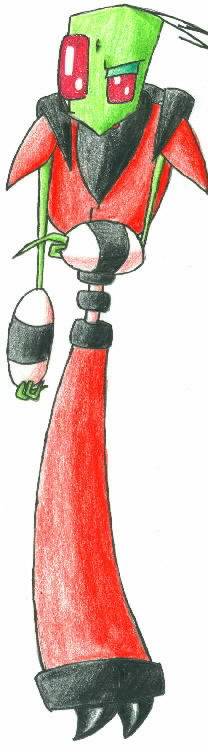 You can color your drawing however you like, but here I just drew Red. Why? I like Red. I like Purple too. I just like Red better. He's more like me. :) Here, you can finally add the little details such as the striping on the arm-things, that little stress mark between the eyes, and the shoes! Now, add a good color scheme that really makes your large Irken come to life! All right!!! Now you can go off and conquer useless planets!! Turn them into food courts! Or parking garages!! Or postal planets!!! Be creative!!!
|
