|
|
|
DIY Clearing Headlights and Painting the housing
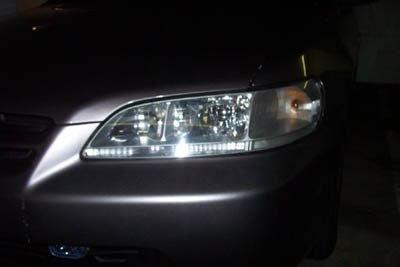
Now you start wondering whether i am tripping or not, well i am not. The 6th generations and even the 7th gen accords have this annoying orange strip in the lower part of the headlights. Well, since it looks gay and paying close to $150 is not an option, why not take it out yourself, and paint the housing to any color you like (usually people do it black housing cuz it's like "cool" or the "normal"). But i tried to do it to a color that matches my car (gray-purple-blue-silver-whateveryouwant). The color ended up being a little bit lighter since my car is a darker silver, but it still looked nice. Here's a rough overview of how you do it: First - take off your front bumper Sounds stupid, but trust me, to get to your headlights you need to take your front bumper off. There is one clip one each side of the car by the front tire well. Take those two out. Then underneath the car, there are couple of clips and couple of bolts. After you have all this, take the three clips i believe that are holding the bumper from the engine bay. You'll see what i am talking about once you open your engine bay. Now just gently pull the bumper off. Second - Take headlight assemblies off I believe there were three bolts holding the headlights to the chassis, just remove this, and unplug the bulbs and they should pop out. Third - opening the headlight assembly This is going to sound very crazy, and trust me, i was skeptical too, but it works well and fast. You gotta use the oven, again the OVEN, to heat up the silicon that keeps the headlight assembly tight. Silicon = glue pretty much. To do this: Set your oven to 350F, and make sure it is at that temperature! Turn off your oven before you put in your headlight, if you don't, your headlights will be toasted. After it's turned off, put your headlight assembly onto a tray lined by lots and lots of tinfoil. Throw it in for four-five minutes only! Take it out, and all the silicon should be soft, ready for you to pry apart! Use a flat head to work the seams, but don't apply too much pressure as always. Note that if the silicon cools (and hardens), you will need to use a hairdryer or heatgun to help soften it again. You can also throw it back in the oven for 1-2 minutes if it still doesn't want to come apart. Be careful though, excessive heat will cause warping and burn marks. Fourth - Removing orange strip and painting All right, you are done with the toughest part now the easy stuff. To remove the orange strip just remove the screws that are holding it in place and pop them out and done!. To paint them, make sure you use a high temperature paint. I used "Plati-kote"s Import Color, they are supposed to match the color of our exterior, and i think they do. Except that they didn't have anything close to my car. Make sure you only paint the housing, You'll see what i am talking about it's the thing between the lenses and the bulb "housings". It's just a piece of "chromed" plastic. Just apply 3-4 light coats over it instead of applying a single heavy coat. Wait for it to dry and you ready to put everything back. Fifth - Closing the headlights and Making it air tight! This is one of the most important steps. You need silicon, $4 a tube at Home Depot, get Silicon II if you can, it's a higher level silicon i guess, and a silicon/caulk gun. Ok, make sure you cleaned up all the old silicon that lays in the surroundings of the headlight housing. Now apply a generous amount of silicon to the surroundings so that you can put it together. Don't be cheap, you'll regret it. I used like one and a half, so that would give you an idea. Put enough silicon around the housing and put it together. Once it's together and it seems to fit nice, put some more silicon around the openings so you make sure that everything is sealed inside, and outside too. And let it dry for a couple of hours, and you are done. After a couple of days, just to be safe, if you want just run water down the hood of your car so dat it goes down to your headlights and bumpers, if there's no condensation then well done. If there's, you gotta seal it again, that's why it's better to put more than to have to open it again and seal i again, it will save you a lot of headaches. Sixth - Putting everything back Now that everything is set, put the headlights back, connect the bulbs, put back the bumper and check out your new ride. It definitely changes the look of the car. I like it more now =)
Tools you need: Flat Screwdriver, Silicon II Tubes, Silicon/caulk gun, paper towels, and gloves (you'll find out why) Estimated Time: 5-10 hours. Depending how fast you wanna work, and how lazy you are. |