
 Previous Page
Install seat cover PRIOR to installing graphics. This way you can line the graphics up w/the seat. Alot harder to line the seat up w/the graphics.

1. Peel off your old stickers - use a heat gun or hair dryer if necessary. You could also just park out in the sun for an hour, or use a razor blade.
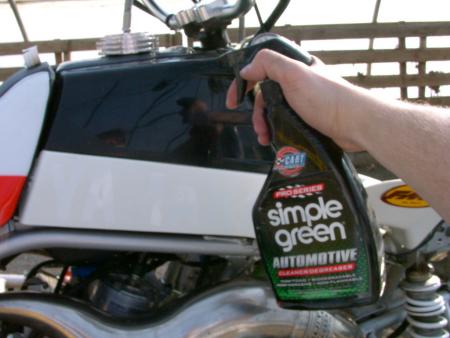
2. Clean off the plastic EXTREMELY well - use some type of degreaser that would tale off any protectant or wax that may be on them - such as Simple Green
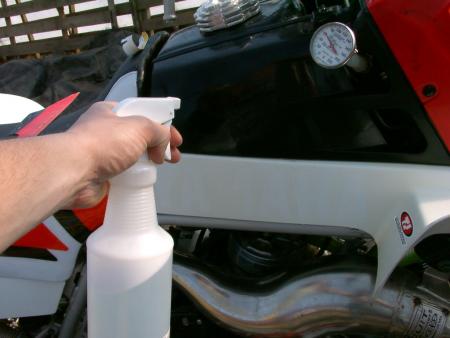
3. Create a mixture of dishsoap and water - only use a few drops of soap though (use Joy or Dawn, or some other liquid dish soap). Put it in a spray bottle, and then spray the CLEAN area where you will be applying the sticker. Feel free to use alot. This helps you move the sticker around after it has been placed down

4. Peel off the back of the label of the sticker, and then apply soapy water mixture to sticker itself also

5. Place sticker directly onto wet plastic, and move around until it is where you want it

6. Take a squeege, and apply the soapy water to it
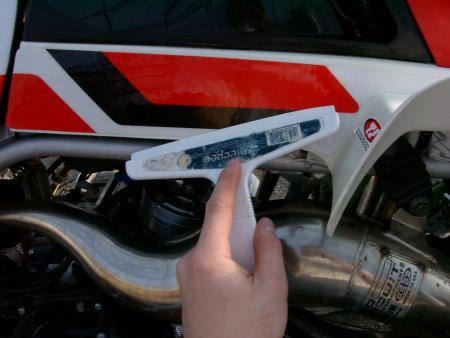
7. Using the squeege, force the water out from under the sticker, working your way from the center out. Be careful - as you push the water out, the sticker will really begin to stick!

8. Put the rest of your graphics on, and enjoy! Make sure that you wait a few hours and then check and press any sticker back on that nay have lifted up at the edges. Wait at least a few more hours before subjecting your quad to any type of "bath" or mud or dirt.

Before:

After:
You may need to use a razor blade to trim up any excess sticker that some kits seem to include
You may also need to go over lifted edges with some superglue a few days later.
If you follow these procedures, your new graphics kits will not only look awesome, but also last longer than your stockers ever could!
