Storage Shed.
I Just Need More Storage Space!
Day One.
Wednesday May 19, 2010.
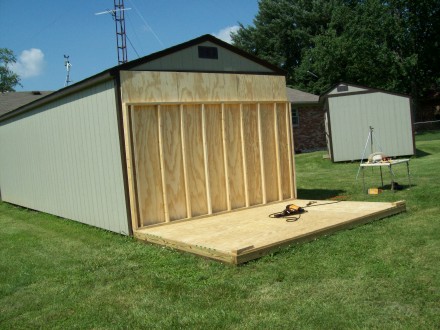
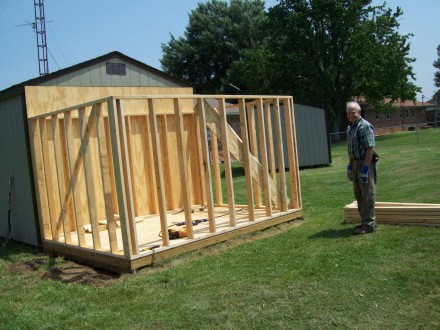
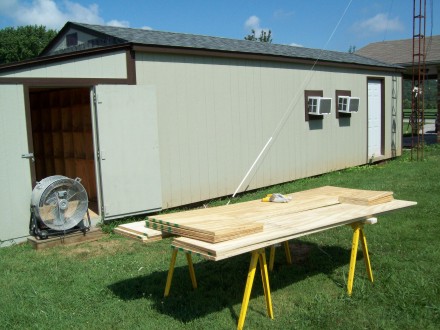
I really am not intent upon filling my entire back yard with buildings, it just looks that way. A little more storage is definitely needed.
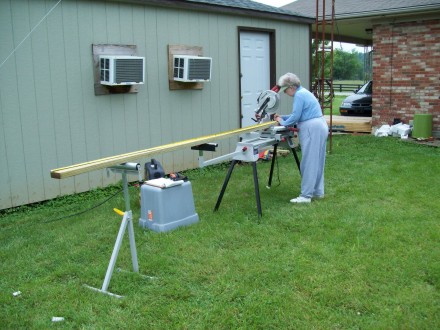
I bought all the lumber required which can be seen stored on the carport in the far background. Also the project required the purchase of a miter saw stand, I already had the saw, and a framing nailer, I already had the air compressor.
We set up everything outside the shop including two folding chairs so we can rest our aging muscles and bones when required.
|

|

|
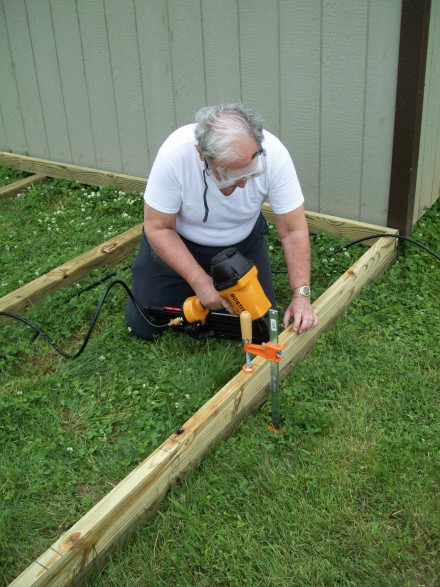
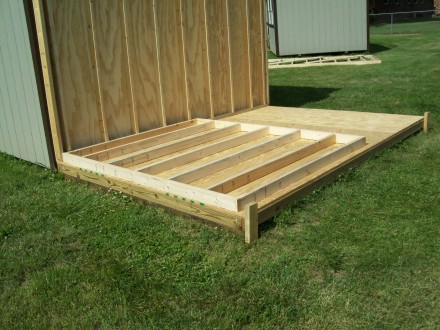
The first step is to build the floor. This is similar to the lawnmower house referred to as the barn. It begins with four 4 x 4s that are pressure treated and rated for ground contact. They are aligned, properly spaced, and squared up with the shop.
Then two treated 2 by 4s are cut to length and toe nailed to the 4 by 4s, one on each end. The air powered framing nailer makes this much easier and quicker.
|
Then another pair of 2 by 4s that are the length of the 4 by 4s less the width of two 2 by 4s are toe nailed to the 4 by 4s to complete the frame and add strength to the structure.
|
|
|
Although the miter saw stand comes in very handy for 12 foot 2 by 4s a separate roller stand helps to hold up the end.
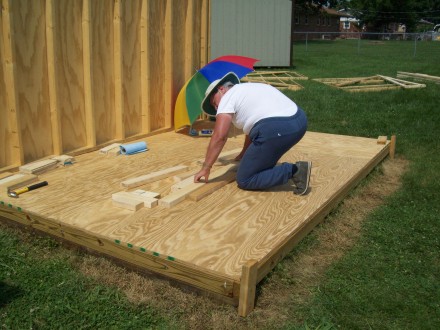
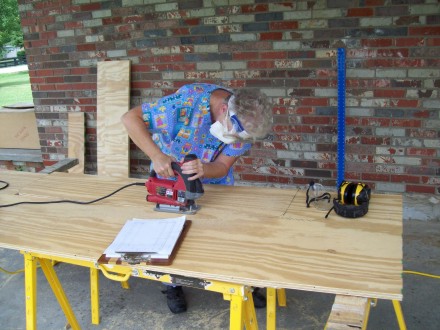
Here Sue aligns the laser line with the cut line. Actually I had to hold an umbrella over her and the saw so she could see the laser line. Maybe they should have been made a little brighter.
|
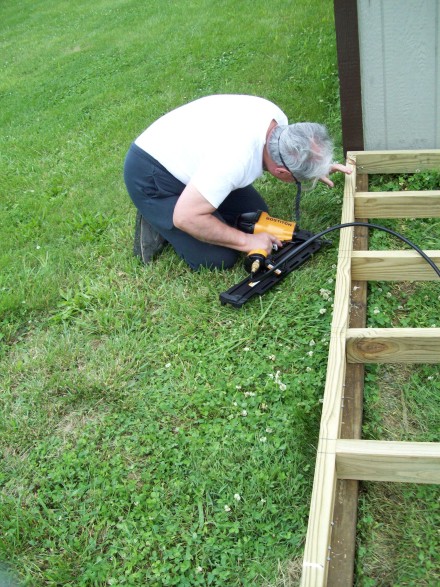
Here I am using the framing nailer to drive 3 inch nails through the outer frame into the end of the floor joist. Did I say this is a lot easier than doing it with a hammer?
|
|
|
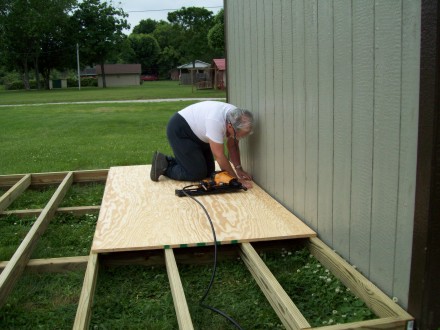
Now the 3/4 inch plywood goes on. It takes 3 sheets to cover the floor and all but one can be used without any cutting. It's called planning.
|
Day Two.
Thursday May 20, 2010.
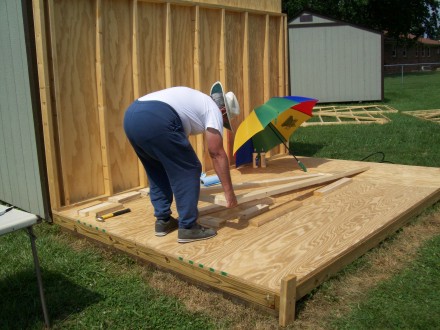
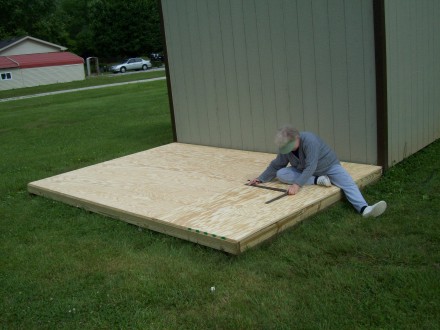
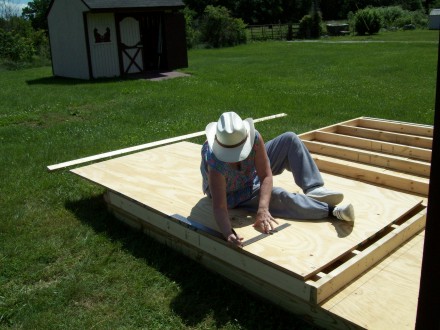
Here Sue draws heavy dark lines on the plywood to locate the joist. It's better than driving nails into nothingness on the other side of the sheet.
|
|

|
The last few nails go in and the floor is completed. The Weather Channel radar indicated a large swath of rain moving in, which ended work prematurely on this day. Rain is predicted for most of the day on Friday so it looks like the project will be delayed for a couple of days.
|
Day Three.
Saturday May 22, 2010.
Now the floor becomes an outdoor workbench. The wall which will be stood up against the back wall of the shop is assembled on the floor. That framing nailer packs quite a wallop so a couple of off-cuts are temporarily nailed to the floor to keep the frame from walking.
|

|
|
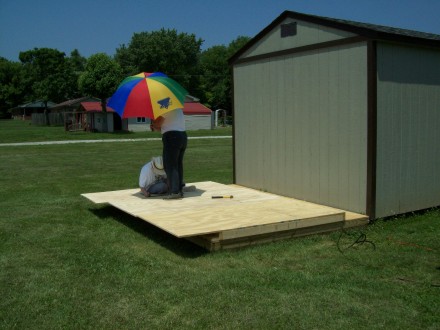
Exactly the same as for the floor the wall sheeting has to be marked so I will know where to drive the nails. Sue is shown doing this.
Initially there was to be no sheeting attached to the studs, the shed and shop would share a wall. The shop has been in place for just about 3 years and has done most of the settling it's going to. The new shed is going to settle. It was decided to build the storage shed as a separate building so they can settle at different rates without pulling one or the other apart.
|
Day Four.
Monday May 24, 2010.
On the first two days the sky was mostly cloudy with the temperature in the pleasant 70s. The third day was cloudless and the temperature high was a record breaking 94. By this the fourth day we figured out that an umbrella would be very helpful if held by the other party. After that who ever was not working would hold the umbrella for the one who was. We tried out the self timer to get this picture.
|
|

|
|
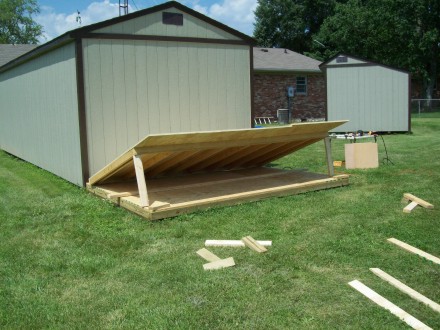
We knew from our experience with the lawnmower house that the wall with sheeting on it was going to be heavy. We had been able to lift the walls to that building into place with siding on them but this one has 3/4 inch plywood on it. The left picture taken by the self timer shows that Sue just didn't have strength enough to lift her side. Even if she had been able to lift it we wouldn't have been able to make the transition from having the load below our shoulders to having it above them.
We used some of the off-cuts with me lifting the corner of the wall and Sue putting them in place. Through a succession of lengths we came to the level shown at right. At this point we could squat a little and be lifting above our shoulders. I took up a position about 4 feet from a corner to take more than half of the load so Sue could take less than half. That worked and we got it up.
|
|
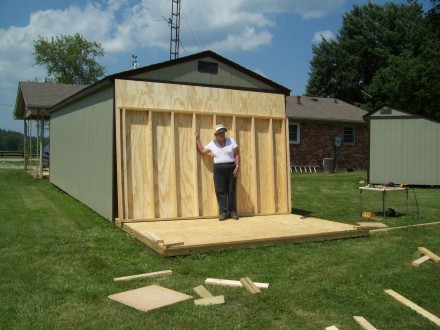
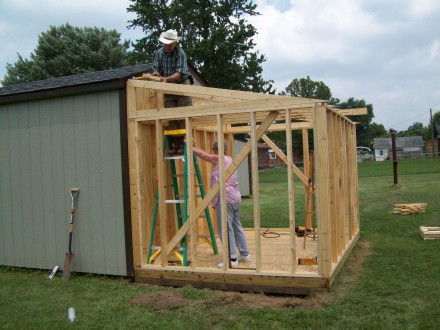
In the obviously posed picture at left I am pretending to hold up the wall. A careful inspection of the picture will reveal that the bottom of the wall is out several inches from the shop wall so it will remain standing without any support.
In the right hand picture the base of the wall has been pushed up against the shop wall and Sue held it from falling while I stood on a step ladder and drove some temporary nails to hold the top to the shop. Then the floor plate was nailed to the floor. The nails holding the wall to the shop will be pulled out after the side walls have been put in place.
Day Five.
Tuesday May 25, 2010.

|
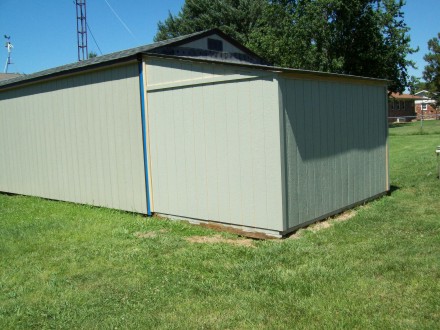
The completed wall which stands against the shop is the north wall. The one which is opposite to it, the south wall, is identical to it as to stud spacing and dimensions. Although it can't be installed until at least one of either the east or west walls have been put in place it could not be built on the floor with the east or west wall standing.
There are no windows in this structure and only one door which will be in the east wall. The distance to the top of the ceiling plate is 74 inches. We aren't tall people and since Dick Flag, who was my best man, moved to Hawaii we haven't had any tall friends. The floor is 96 by 134 inches. The walls will take a total of 7 inches off of each dimension so the interior free floor will be 89 by 127 inches.
|
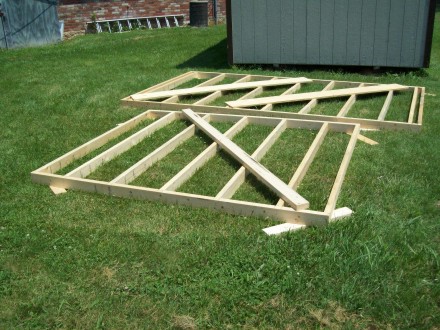
A couple of plywood off-cuts were temporarily nailed to the frame to keep it from racking while being moved. It was placed where it will be out of the way while other parts are built.
|

|
|
Next the west wall was constructed. Because the outside of the west, south, and east walls will be accessible after the wall frames are stood up in place siding will be installed later.
|
Day Six.
Thursday May 27, 2010.
The west wall had been completed on the previous day of work. It was moved to an out of the way location to make way for the east wall.
|
|

|
The east wall was assembled and a temporary brace installed. It then joined the south and west walls over on the grass.
The rest of the day was spent in an unsuccessful attempt to cut a very high angle in a 2 by 4 to build the roof trusses. If you think of a straight cross cut as 0 degrees, which is how the scale reads on a miter saw, I need to cut off a 2 by at an angle of 79.3 degrees. I built a jig that worked with a hand held circular saw but because I made it out of off cuts that were on hand it was too thick, 3/4 inch plywood, and the saw didn't cut all the way through the 2 by. That meant a trip to town for some 1/4 inch plywood. The jig was started tonight and will have to be finished tomorrow. If it works you'll see a picture of it.
|
Day Seven.
Friday May 28, 2010.
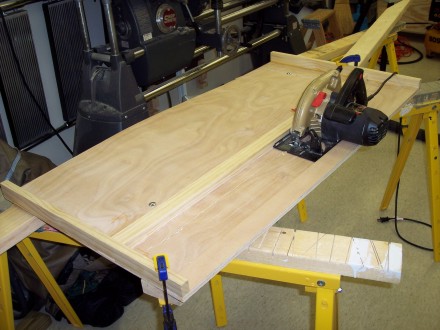
IT WORKED! At left, the saw rides in the guide and the blade extends through the kerf. The heads of the carriage bolts that hold the fence in place can also be seen.
In the picture at right the jig has been turned around so the bottom remains the bottom. The fence can be seen with its pivot bolt on the right and the carriage bolt which rides in the two routed slots to permit the fence to be rotated and locked in place. A digital angle gauge comes in handy for setting the angle of the fence with respect to the kerf.
|

|
These two pictures show the jig in use. At left the saw sits in the guide and the stop rails at each end keep the user from cutting the jig in half. The 2 by 4 to be cut and the jig are fastened together with clamps.
If you want to build one of your own the sheet of plywood is 2 by 4 feet. All other dimensions will have to be suited for your particular make and model of circular saw. The fence pivot point is set in line with the center of the saw blade when the saw is pushed against the forward stop rail. When the angle is set to zero the edge of the fence is even with the edge of the kerf.
The picture at right is looking up from underneath the jig. The 2 by 4 can be seen snuggled up to the fence and the saw blade extends through the kerf. The picture shows that if the saw were turned on and moved farther to the left the 2 by 4 would be cut at a very steep angle. As the jig is used the corner of the fence will be rounded over. That could be done with a band saw. I may get around to that some day.
Here you see the end of the 2 by 4 with the angled cut. The next job is building the trusses and then walls can be put up and the trusses installed. But I'm getting ahead of myself.
|

|
Day Eight.
Monday May 31, 2010.

|
On this day a lot of work was done but our attentive neighbors wouldn't recognize that much had been accomplished. The jig constructed on day seven was used to make angled cuts in the 2 by 4s that will be used to construct the trusses. Also the gusset plates were cut from scraps of plywood. This work has to be done before highly visible progress is made.
|
Day Nine.
Tuesday June 1, 2010.
Now comes the construction of the roof trusses. The first one was built using gusset plates made of pieces from the scrap bin which were glued and nailed to the corners. Then this was used as a pattern to make a pattern. Pieces of 2 by 4 were nailed to the floor around the truss. This was used to construct all following trusses except the last one.
Upper left shows the pattern on the floor. At upper right Sue places the short vertical piece in place. Lower left I am placing the bottom member in place. This would become a ceiling joist if the shed was going to have a ceiling. Lower right I am lifting the completed truss out of the pattern.
In order not to interfere with installation of siding one of the trusses needed the gusset plates mounted on the other side. To accomplish this one of the finished trusses was laid gusset side down on the floor after the pattern pieces were removed. The pieces for the last truss were clamped to the finished one and aligned. Then the gussets were installed. This is not shown.

|

|
At left I am shown carrying a finished truss to the stack of trusses shown at right.
Day Ten.
Thursday June 3, 2010.
On day ten I was lucky enough to obtain the help of my best friend John Smith. With his help the wall frames went up in about 20 minutes. The next step is to install the trusses which he is moving from where they had been placed while Sue drove the riding lawn mower.
|
|

|
Here John and I install the east side truss, the first of nine to be installed.
|
Then we installed the west side truss. I am taking this picture. John attempts to align the truss while Sue stabilizes his ladder.
|
|

|
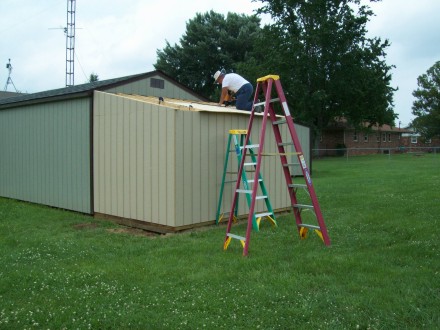
John does his imitation of a monkey, clambering around on top of the already installed trusses while nailing the last one in place. He thinks my nail gun is a wonderful thing. As you can see by the angle of the sun the trusses took most of the rest of the day.
|
Day Eleven.
Friday June 4, 2010.
Work on this day was rain shortened. By finishing up as rain began to fall we put up two sheets of siding. As you can see from the pictures we installed temporary cleats on the foundation to hold the sheets off the ground while being nailed in place.
Day Twelve.
Monday June 7, 2010.
On this day we completed the two remaining sides. The cleats and the diagonal braces inside the structure were removed after these pictures were taken.
On Tuesday we had company. On Wednesday it rained. And rained. And rained. And when it had finished raining, it rained some more. Fortunately we got this tarp in place before the heavy rain started.
|

|
Day Thirteen.
Thursday June 10, 2010.
First step on this day was to cut and install the gable ends.
Next came the roof sheathing. Left shows me nailing down the first full 4 by 8 sheet of plywood. Right shows Sue waving at the camera after marking the locations of truss members on the second sheet so I can put the nails in the right place.
Day Fourteen.
Friday June 11, 2010.
Today we were racing with thunder showers blooming in green, yellow, and orange, on the radar. We were too busy to take any pictures. If you look at the last picture from yesterday all we did today was to fill in the empty spaces. Monday John will take me to buy shingles and putting them on will be the next pictures shown.
Day Fifteen.
Monday June 14, 2010.
|
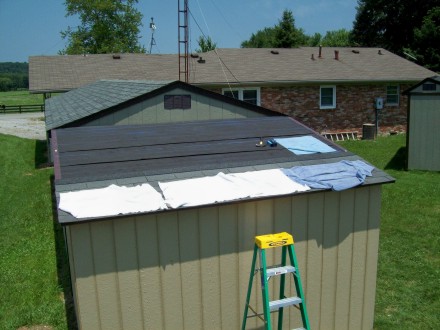
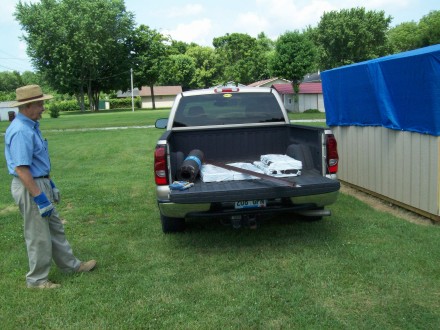
This day began with a run to Lowe's for shingles, a roll of tarred felt, roofing nails, edging, and flashing to seal off the seem between the shed and the shop.
Here we see John's famous truck. John and his truck have made all of this possible. I can't say enough good about him. He is a genuine friend.
|
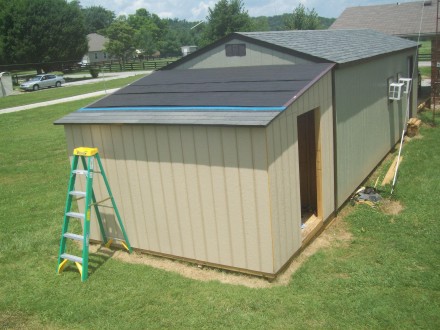
You can see that the roof sheathing was indeed completed last Friday. The single row of tarred felt was added this morning.
|

|

|
And at long last the shed has been dried in. That's a term my dad used to use for having a waterproof covering on the roof of the house that was under construction. We don't have to mess with that blue tarp anymore.
|
Day Sixteen.
Tuesday June 15, 2010.
Today metal edging strips were added. Then a starter row of shingles followed by 3 regular rows. The weather is so hot we have decided to stop work at noon. A strip of blue painter's tape was run along the top of the top row to keep water out from under the shingles in case it rains. Because of family commitments we will not be back to work until Friday.
|
|
Day Seventeen.
Friday June 18, 2010.
We started the day early by adding two more rows. Then we decided to measure and space the remaining rows so they would come out even instead of having to cut every shingle on the last row. After measuring and marking we snapped chalk lines as you can see in the picture at left.
The towels on the roof are to keep us from burning our hands, knees, and any other body parts that may come in contact with the roof. As we learned while shingling the lawnmower house a dark roof in the mid day sun can get hot enough to actually blister the skin.
At right is the picture taken at the end of the day's work. We have refined our technique and each row is going much faster than at first. Oops? Looks like I forgot to put a strip of tape along the last row. Pause. There is one there now in case it rains over the weekend.
The strip of dying grass in the lower right of the picture must have been caused by the tarred felt. That's where we rolled it out to measure and cut.
Day Eighteen.
Monday June 21, 2010.

|
Our early start was thwarted when we found that the rain had washed away the chalk lines. They weren't completely gone. Close examination found the locations with enough accuracy to permit them to be resnapped. That's a good thing because we neglected to write down the numbers.
With the temperature hitting 95 before eleven o'clock we have decided to stop work at noon. After all, we aren't professional roofers. If you have a shed that needs to be roofed, don't call us. There is not enough money in the world to get us to do this for someone else. Well, maybe for a million dollars, but not a penny less!
|
Day Nineteen.
Tuesday June 22, 2010.
The last row of full sized shingles went on leaving a sticky strip in the middle and the part of the shingle that was not meant to show, showing.
We cut off 4 shingles just above the sticky strip and put them in place along the top of the roof. Sue swings a mean hammer nailing in the last shingle on the last row.
|

|

|
Think we are finished? You've got another think coming. There is a gap between the top edge of the roof and the shop building. We don't want rain to get in there and possibly promote rot in a place where we can neither see it or do anything about it.
Sue cuts shingles into pieces to make flexible rain keeper outers to bridge the gap.
|
The plan was to cut each shingle into thirds along the slots. Then cut off the upper part just above the sticky strip. Each piece was rotated 90 degrees and installed across the gap. The sticky strips of the pieces were overlapped to make a seal between pieces. The pieces were also stuck to the sticky strip that was left at the top of the roof.
Why do we always do these big projects in the hottest of hot weather? We are currently in a heat wave and the beginning of what may well be a summer long drought. Yesterday the high was 98 and today it was 97. Although we quit at noon yesterday we worked into the afternoon heat on this day. We were determined to finish. We didn't quite get there today. The problem of how to bridge the gap at the edges where the shed roof meats the shop trim has yet to be solved.
|

|
Day Twenty.
Friday June 25, 2010.
We got an early start and an overcast sky made work quite pleasant to the extent that roofing work can be called pleasant. We had finished the roof by the time the sun came out.
Above you can see our solution to making the corners rainproof. Tomorrow we will calk the edges and overlaps that are not in firm contact where the trim on the shop forces the shingle edges out from the siding.

|
Thankful to be standing on terra firma once again, the more firma the less terra, we installed the soffit cover and started on the trim.
|
More trim surrounds the door opening, covers the crack where two pieces of siding met, and runs along the roof line just under the overhang. The gap above the door will be filled in by a ripped piece of trim board. The door will have decorative trim as on the front doors to the shop and doors to the teddybear cottage as shown elsewhere on this website.
|
|
Day Twenty One.
Monday June 28, 2010.
|
All we got done on the rain shortened day was to finish the trim. At least it's finished and we can start work on the door.
|
Day Twenty Two.
Tuesday June 29, 2010.
This is the day of the door. It is made of two sheets of 1/2 inch plywood and one sheet of siding all glued and brad nailed together. After cutting the first sheet of plywood we tried the fit in the door opening. It as nearly perfect as anything we have built to date. As the picture shows some of the trim has been installed around the edge. There is more to come. The door is quite heavy and should strongly resist being kicked in.
|

|
Day Twenty Three.
Thursday July 1, 2010.

|
We started working inside adding trim and hinges to the door. It seemed a shame because this was a very cool pleasant day. Why couldn't it have been like this when we had to work outside?
|
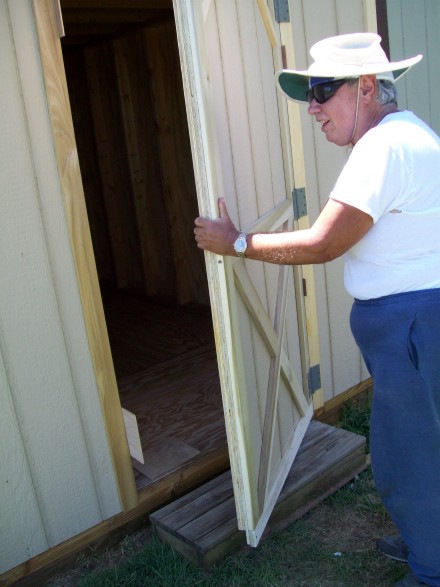
We didn't miss out on outside work after all. We got to be closer to nature while hanging the door. Our design allowed 1/4 inch clearance all around. So we tacked 1/4 inch thick shims on the floor and both sides to hold the spacing even. They can be seen in both pictures above. The door fit perfectly. Are we good or what?
On the left I am driving one of the last screws in the bottom hinge. On the right I am swinging the newly hung door open for the first time.
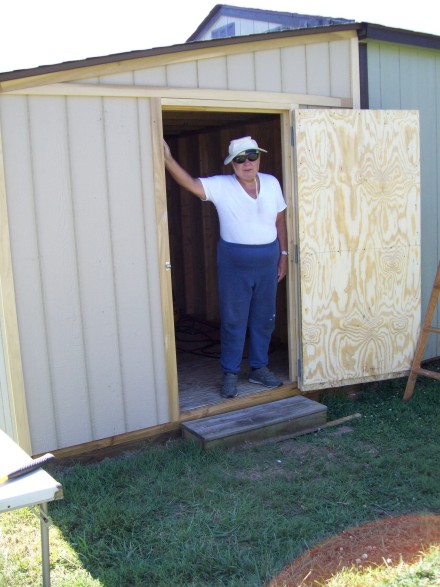
These two posed pictures celebrate a major milestone. The right picture shows a padlock in place on the door. Outside construction is finished at last. Tomorrow we paint.
Day Twenty Four.
Friday July 2, 2010.
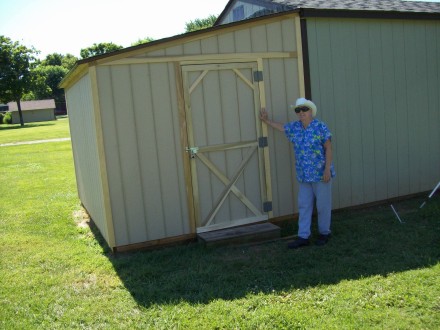
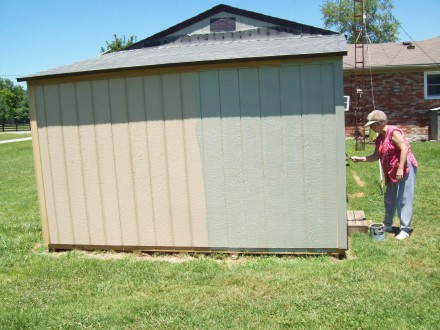
As promised we painted today. I paint with the roller which goes fast and doesn't require a lot of precision and Sue follows along behind touching up the spots I missed. At left Sue is working on the door while I took a break from painting the south wall to take the picture. At right I have finished my portion of painting. On our next work day we will evaluate if a second coat is needed. Then Sue will paint the trim brown.
Day Twenty Five.
Monday July 5, 2010.
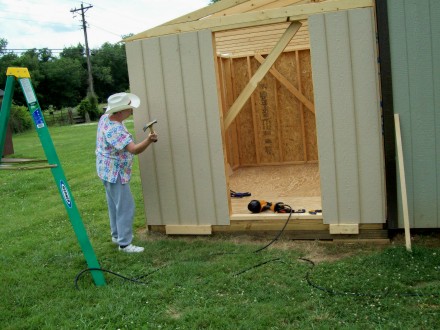
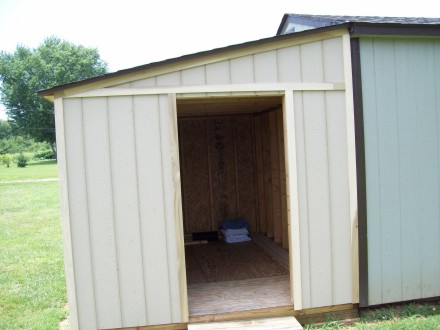
At left Sue paints the frames around the air conditioners which should have been done a long time ago. Look at the fourth picture from the top of this page to see how they looked before being painted.
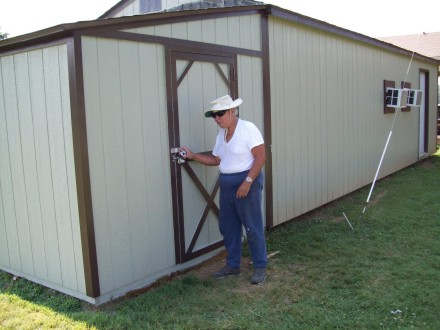
At right you see that the trim on the east side including the door is now painted. This is work for Sue and she does it well.
Day Twenty Six.
Tuesday July 6, 2010.
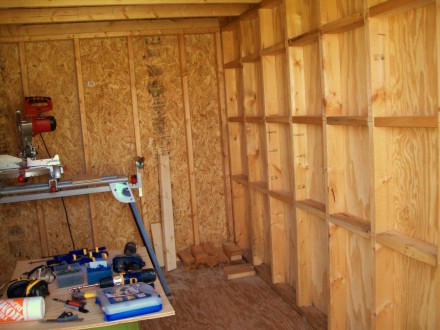
Although Sue has just a little touching up she wants to do the painting is basically finished and the door is now secure. I started working on the interior shelves but there isn't much to show. Just a few marks on the wall studs. Be sure to tune in tomorrow for our next exciting episode.
Day Twenty Seven.
Wednesday July 7, 2010.
This single picture requires a lot of explanation. Because this is a storage shed it needs shelves on which to store things. The shelves are to be mounted with brackets screwed to the studs. This leaves a 3 and 1/2 inch gap behind every shelf through which anything small enough can fall. There are three possible solutions to this problem. 1) The studs could be paneled over with 1/4 inch plywood. 2) Notches could be cut in the back of each shelf at every stud location so the back edge of the shelf touches the siding. 3) 2 by 4 stops could be fastened between each stud at the level of each shelf.
Number 1 ads more work to this longer than planned project and more expense to this already expensive shed.
Number 2 adds a lot of precise cutting with the saber saw which, although it would only cost the price of a few saw blades would take a lot of time.
As you can see number 3 is what was decided on. Off-cuts are supplying the wood. They are being mounted with pocket hole screws. I already had the jig so the only added cost was for a supply of the special screws required. The north wall is complete. One down, three to go.
|
|
Day Twenty Eight.
Thursday July 8, 2010.
Same old stuff.
Day Twenty Nine.
Thursday July 9, 2010.
More of the same. I only got in a half day's work because I had to go for a haircut. Maybe I'll finish next time.
Day Thirty.
Thursday July 12, 2010.
And still more of the same. It is now finished and tomorrow we start on the shelves.
Day Thirty One.
Tuesday July 13, 2010.
n
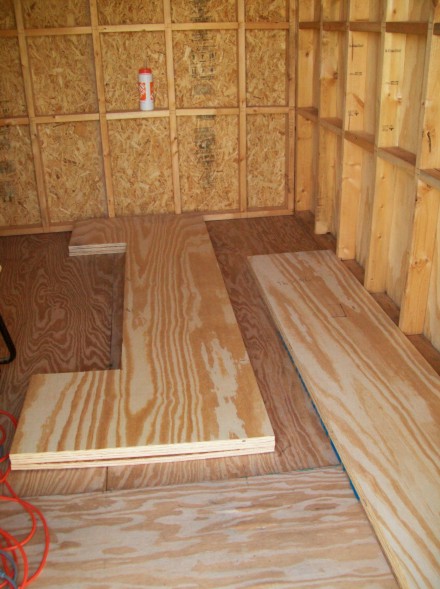
Sue makes the cutout in the end shelf at left and at right the cutout has fallen away leaving the rectangular opening.
|
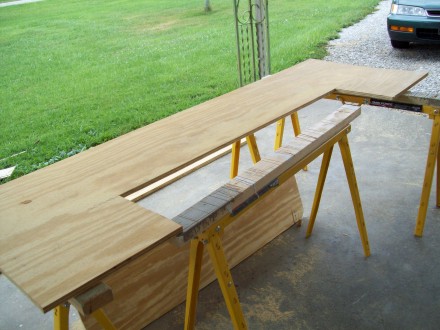
This picture was taken standing a little outside the door and looking at the end wall. The shed is longer than wide. The end shelves on the floor at left will be turned 90 degrees and mounted in the end of the shed. The long straight shelves go along the sides to make shelves on 3 sides. The fourth side is where the door is and there isn't much space left along that wall after the ends of the shelves take up their space. All shelves are 18 inches wide.
|
Day Thirty Two.
Wednesday July 14, 2010.
This is the final phase. With the shelves all cut out and resting on two sawhorses, and the industrial strength fan blowing a hurricane to keep us cool, we begin the process of hanging the shelves. As usual, so it seems, we are working on one of the hottest days of the summer. Tomorrow, they are predicting a high of 97.
|
|
n
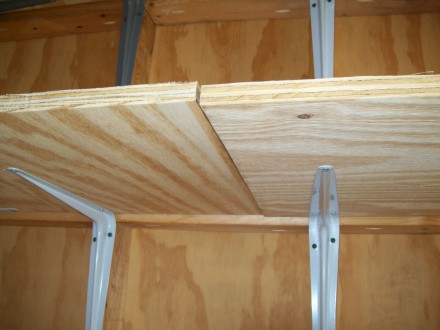
Here you see the first accomplishment of the day, left, and the end of day status, right. Now perhaps you can see the intended form of the shelves. The end pieces make up the shelf at the end plus some of the shelves on each side. Tomorrow we mount the remaining end shelf and start on the side shelves.
Day Thirty Three.
Thursday July 15, 2010.
|
On this day we completed the right side. We might have gotten farther but we had to stop at noon and mow the lawn. After doing that in 97 degree heat neither one of us felt like working in the shed so we returned to the air conditioned comfort of the house for a slightly warm shower and a rest.
A count of brackets places us 5 short. A last minute change added one more bracket on the end of the shelf, not visible in this picture. In the morning we will make a run to Lowe's for the brackets and then we hope to finish the shelves and that will finish the shed, if it doesn't finish us first.
|
Day Thirty Four.
Friday July 16, 2010.
Here is the reason we ran out of shelf brackets. The bracket which runs parallel to the shelf and at right angles to all the other brackets was added to provide extra support to the corner of the shelf where it meats the wall on each side of the door. But for this we would have had a single bracket extra.
|

|

|
Here I am wedged awkwardly and uncomfortably under the bottom shelf driving one of the last screws into the plywood shelves. The screws that hold the brackets to the 2 by 4 studs were driven using a power driver. The screws that go into the shelves were too easily stripped out to use electric power. So I turned to the Armstrong driver. There are 25 brackets on each level of shelves times 3 levels times 3 manually driven screws per bracket for a total of 225. By any measure that's a lot of screwing.
|
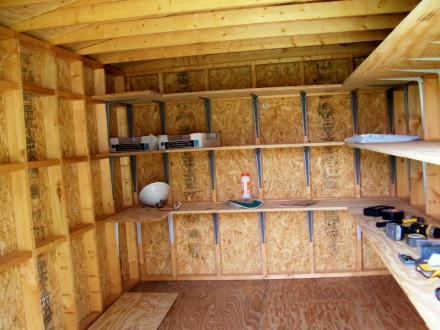
Now in accordance with a family tradition we show the finished project to a representative teddybear or two. The one on the left is Teddy Bower and Cubby is on the right. These are two brothers which were separated at berth. We adopted and reunited them. They watched from a window while we built the storage shed and gave reports to the other teddybears. It only seemed right that they should see the shed interior which was not visible from their window.
Just a little more work remains to join together the place where the two pieces of plywood come together.
|
|
Day Thirty Five.
Sunday July 18, 2010.
n
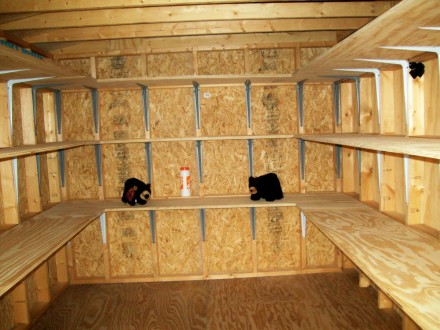
This is really the last day. At top left you see the place where two sheets of plywood came together a bit unevenly. Upper right shows a wide cleat glued and screwed to the sheets to effectively turn the entire shelf into a single structure. This only took about an hour.
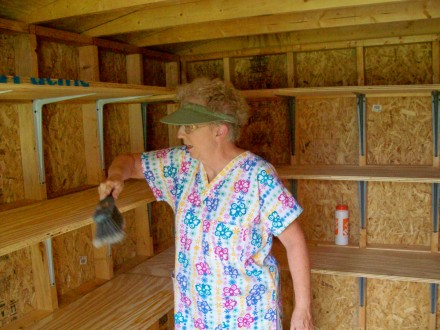
Lower left shows Sue giving the shelves the brush and at lower right I admire our work. No, you won't see pictures of all the junk that will be stored in the shed.
THE END.