
Recoloring Images
Keeping in mind that everyone does things differently, I'll show you how I do it... you can modify how you do things from there. ^_^; And for now... we focus on the red scarf you see there... ^_^;... I did this thing rather quickly, and had already recolored the rest of the pic the way I wanted. ^_^; In case you can't figure this out... this is Graphics-Intensive... Mostly cause I'm lousy with explaining things detailed and know that Visual Aides are usually better anyway. ^^;
So to give "Tetsuo" a Green Scarf... we have to make it green ourselves...
My steps to doing this... go this way:
The first thing we do is-
............
Well hang on a minute.... This pic is a jpg...
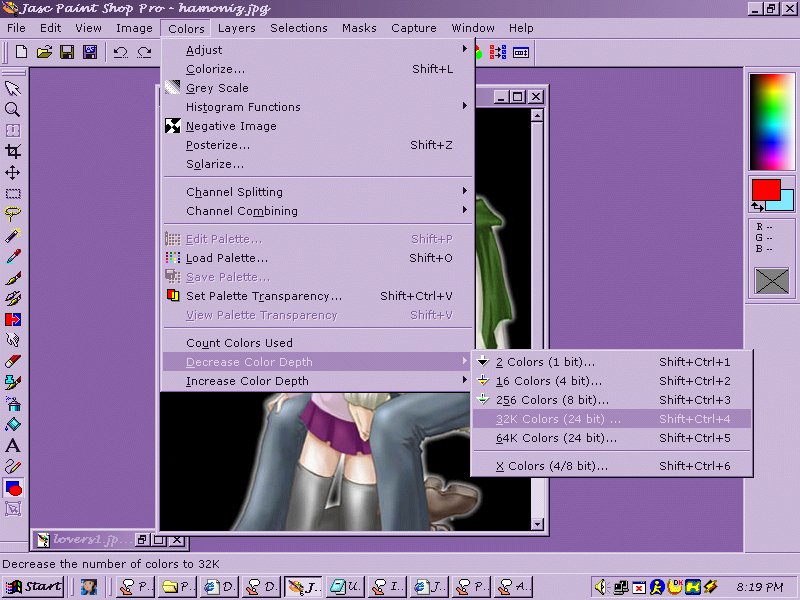
In the case your image is a .gif... "Colors ->
Increase Color Depth -> 16 Million Colors (24 Bit)" ...either
that, or, as you can see below, "Shift + Ctrl + 0"
(Yes, the Zero has to be the one on the top of your keyboard. the Number Pad
won't work. -_-;)

Anyway...
![]() Now...
With a 24 Bit image at our command, we're free to make a New (Raster) Layer. ^_^
Do so by going up to "Layers -> New Raster Layer"...
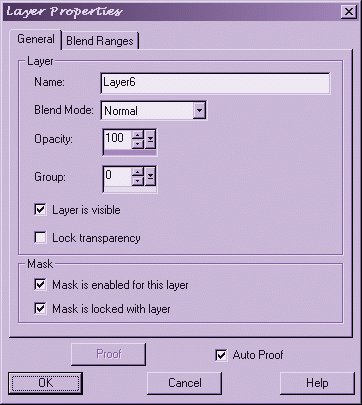
as seen on the right... Doing that, you will get the Layer Properties Dialog...
Now...
With a 24 Bit image at our command, we're free to make a New (Raster) Layer. ^_^
Do so by going up to "Layers -> New Raster Layer"...
as seen on the right... Doing that, you will get the Layer Properties Dialog...
Yeah, I could rename each
Layer to whatever I wanted, but I usually don't bother with it... If you want to
call this layer "scarf" you type that in the "Name" box.
Otherwise, leave things as they are seen here... To the right, you'll see the
color setting I used for Tetsuo's scarf. ^_^;

(Each step below opens a
screenshot in a new window.)
To get the Tool Options Dialog open in the first place, click the icon
that looks like the one below.

If you do not have it toggled (the little
icon is missing) Right click on a blank
part of your toolbars... you should get the above image. ^_^; Yes, what I've
marked in purple is what I'm referring to.
| Step One | First, the tool you'll need is the
Airbrush. With that, open Tool Options, and set it as it is seen in the image: Shape: Round Size: 10 Hardness: 0 Opacity: 100 Step: 25 Density: 100 With said settings,
cover the entirety of the area with your desired color. |
| Step Two | Now... go up to "Layers
-> Properties" to get the Layer Dialog up again. Upon doing so, change only the Opacity. Make it "50". If you have the "Auto Proof" Option checked, you'll see what you did, as I do. Hit "OK" and let us go back to the image... that green still doesn't look like part of the picture... |
| Step Three | Now the tool you'll need is the Eraser. With that, reopen Tool Options, and set it the same as the Airbrush: Shape: Round Size: 10 Hardness: 0 Opacity: 100 Step: 25 Density: 100 Using these
settings, erase any of the color that is beyond the part of the image
you're coloring. |
| Side Note: It is at
this point I wish to tell you what you might find out anyway. While it is
difficult to erase exactly around, even zoomed in to do so, if you erase
too much... right click on your mouse to recolor... I found this accidentally.
It may be common knowledge to others, but it wasn't to me. Curiosity
didn't kill this cat. ^_~ the setting of 10 for the Brush size gives you a
smaller area that is erased and the antialias of the eraser will
semi-blend the color into the image. anything below about 6 in size
becomes a harder edged brush. Experimentation will show you what I'm trying to say. ^_^; Gomen... as I said... I'm lousy with explanations... |
|
| Step Four | This one's easy... Also Optional. ^_^; Reopen the Layer Properties (like you did to make the Opacity 50) and find "Blend Mode". For this particular image, choose "Color"... (for your own tastes, try the other settings. You might find a different mode you like the look of better... ^_^) |
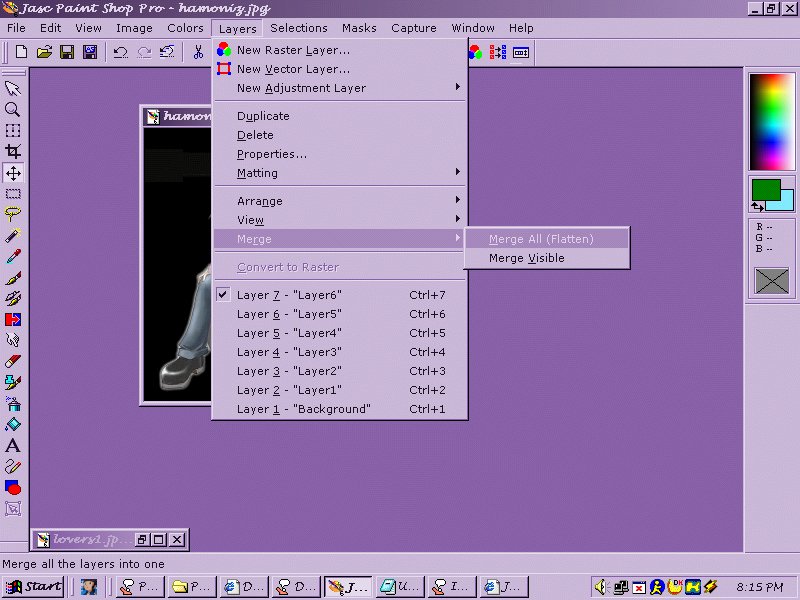
| Step Five | We're finishing up now... Here's how to
Merge the Layers together. Very simple. But the only thing is, there's two
Merge Options. "All" and "Visible". Merge
All to finish this image off.
Merge Visible if
you're going to go on and erase the black background and put this thing on
another background/image... |
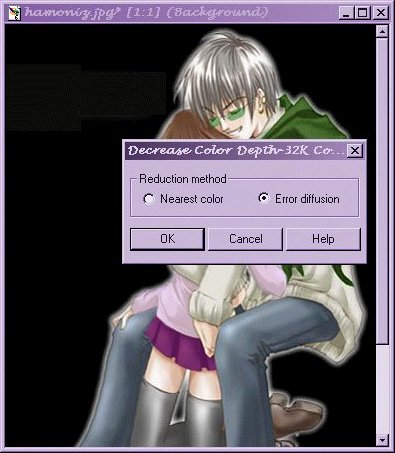
| Step Six | I know I showed you how to Increase the Color Depth... But here's how to Decrease. ^_^; This... just shrinks the file size of an image. We're taking this jpg from 64K to 32K Color (both are 24-Bit). Making this thing a gif would require you to Decrease to 256 colors. ^_^; And at the moment, that would probably look very.... bad. When you're asked, Choose Error Diffusion... (See below. ^_^;) |
Remember to save this as a .jpg image! A .gif is 256 Colors and a .bmp contains way too much Image Information. A .bmp is higher in filesize, while maintaining Image Quality... A .jpg is MUCH lower in filesize... however, you lose image quality each time the same image is saved over and over. A .gif is required for transparent background, but is good to maintain the same image quality as when you saved it.
In the end, the choice is up to you what you want to go with. ^_^.V.
In this image, you've seen "Layer 6" on these steps. That was the topmost layer I did and was my last. As a hint, try to think in Layers... Suki's skirt is under the sweater/shirt. So... I recolored the skirt before I recolored the shirt.
In this case, the colors then look different... They usually do for me anyway... If I wind up with a little lavendar overlapping the violet/purple... it won't really matter. But if I reverse that, the skirt might look funny when everything's finished. ^_^;
If I've confused you at anytime? ^_^.V. Welcome to the Club, and Gomen Nasai! ^^;
