IRC for Beginners (IRC Client)
IRC v6.31, Windows
Other Guides
Introduction
There are loads of ways to connect onto IRC (internet relay chat) – one
of the most commonly used client is mIRC. You can download it here.
If you wish to learn all about IRC this isn’t the place for it (mostly
I’m just attempting to write up a guide for how to get on UtoNet, which
is the utopian server on IRC).
Setting Up
mIRC for the first time
|
|
Run mIRC.
Press Continue when a box asking you to register appears. Even if it
appears as ‘expired’, mIRC is still shareware hence free to use
– you just have an annoying waiting time after clicking continue.
|
|
|
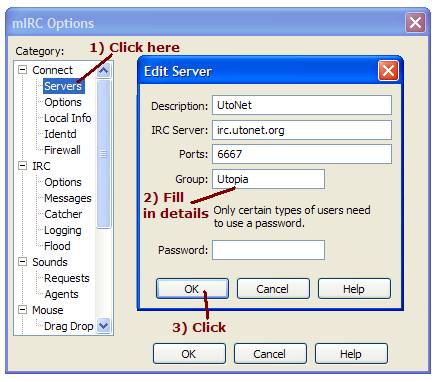
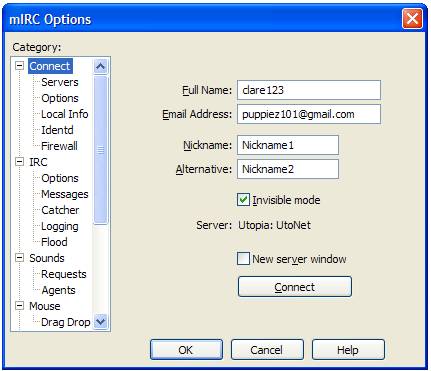
The
Connection tab should load – and you fill in the blanks! Usually just
stick random information in, all that is really important is the Nickname field
– which is what your screenname appears as in chatrooms. |
Registering
your Nickname
|
|
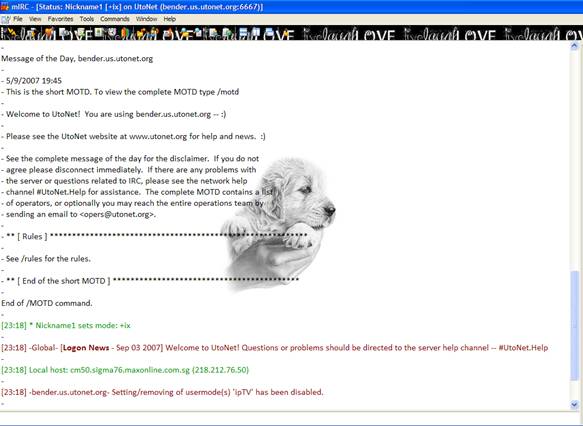
Once
connected onto IRC, you may register your nickname by typing the command : |
Commands for
Dummies
These are the commands you will need to know!
/join #channel - joins you to a channel, where you can talk to people or
just idle
/query nickname - opens a private window to talk with a particular nickname
only
/nick newnick - changes your nickname to newnick
/ns identify [nickname password]
– identifies you as owner of that nickname
To talk or use any command, just type in the bottom of the window and press
enter.
Highlights
|
|
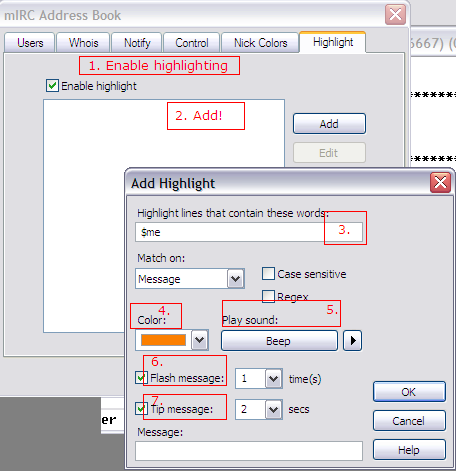
Highlights
make your mIRC play a little sound or flash when someone says a particular
word (usually set to your nickname). It's useful to let you know if someone
wants you, without having to check the mIRC window all the time. |
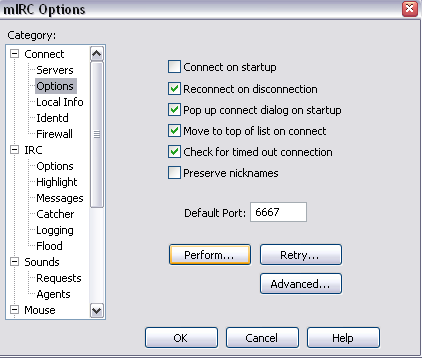
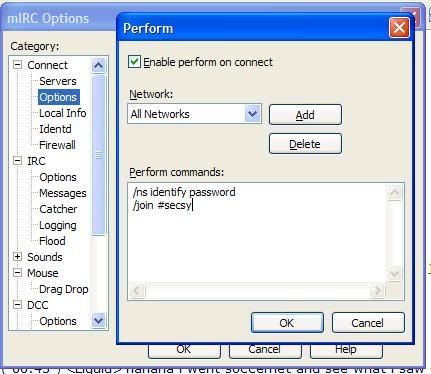
Automatic
Commands
|
|
mIRC can
execute a series of commands upon connection. Go to |
|
1. Check the box beside Enable perform on connect 2. Select the network. Click the Add button and select UtoNet
from the list of networks. Press OK and choose UtoNet from the
drop-down menu. 3. Enter the commands you want, such as channels the login
command (ns login password) and join commands for
channels you hang out in.
|
♥ puppy101