
Our Story
The Find
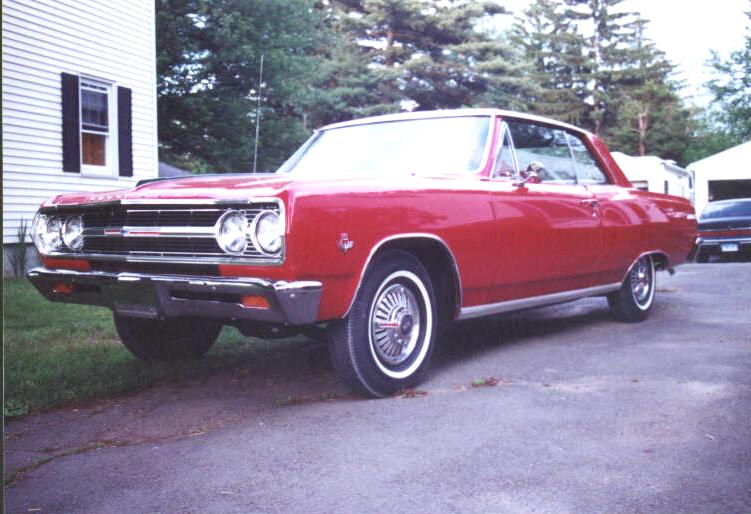
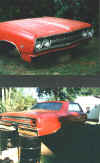
Once upon a time there was this unemployed guy. Let's call him Jeff. Well Jeff decided that he needed something to do. So he left home one day in search of a project. After long days of searching he finally found what he had been looking for. A real collector's item. A car with no floor, no trunk, no fenders, the body was up on barrels and the frame was over on the other side of the yard. But just the same he knew he had found it. A gem. A vision. A RED 1965 Chevrolet Malibu SS, 2-door coupe, 283 V8, 2-speed powerglide transmission, 10 bolt posi, and lots of parts.
He assured me that all the parts were there. Just not all together!

Our "new" baby was delivered July 6, 1996. Oh what a joy. The prescription was lots of TLC. (Tools, Long hours, & Cash). Of course, we didn't want it to be uncomfortable in its new home so we immediately got some barrels so we could pick the body up off the frame. Putting it back into the condition it had been accustomed to.
The Restoration
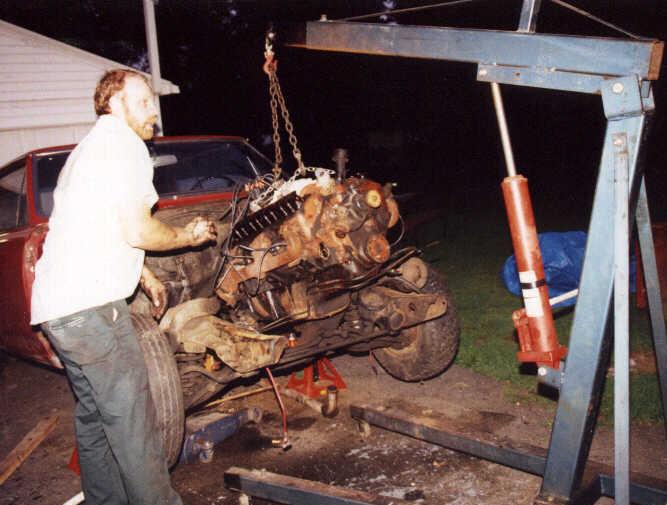
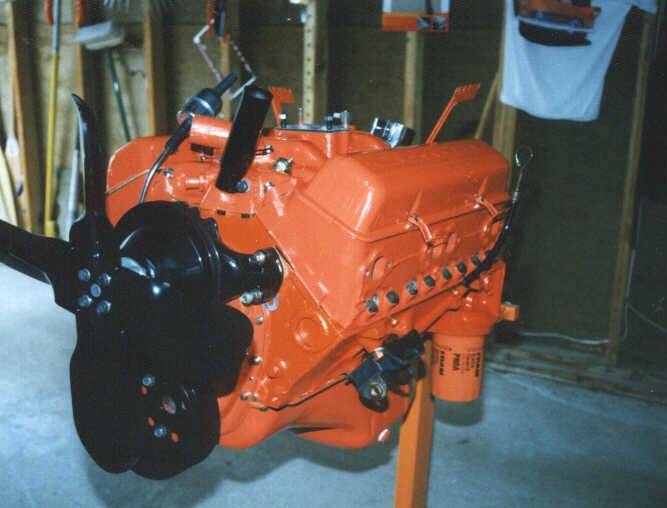
The first restoration work was done on the engine. We took the engine off the frame and started the rebuilding process. Jeff is an excellent mechanic and was able to do most of the engine work himself. He stripped the block of all the parts and took it to Eastwoods Motors in Somers, CT to have it bored out. All new interior engine parts were purchased from Kantor Auto Parts.
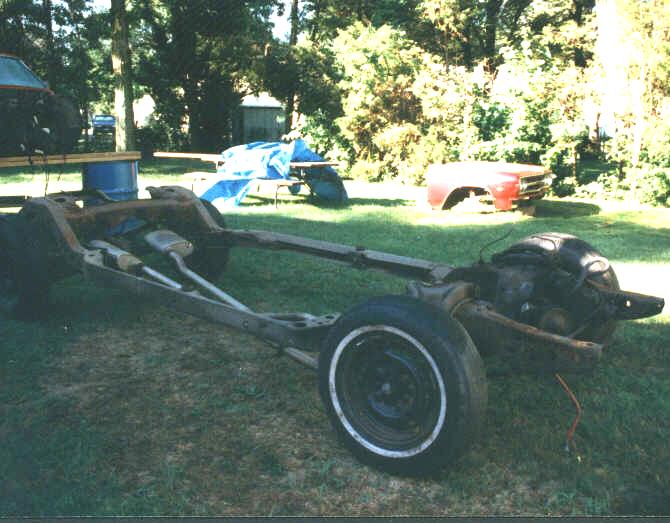
Jeff had welded in the floors when we first got the car, so we had someplace to store a lot of the loose parts. The next order of business was stripping the frame of all suspension, engine, and brake parts. We took lots of pictures as we went to be sure we got all the parts back together properly... and boy were there a lot of parts!
The frame needed new body mounts welded on then it was sandblasted and painted. Next the suspension, gas & brake lines, transmission, rebuilt engine & exhaust system were re-assembled onto the frame.
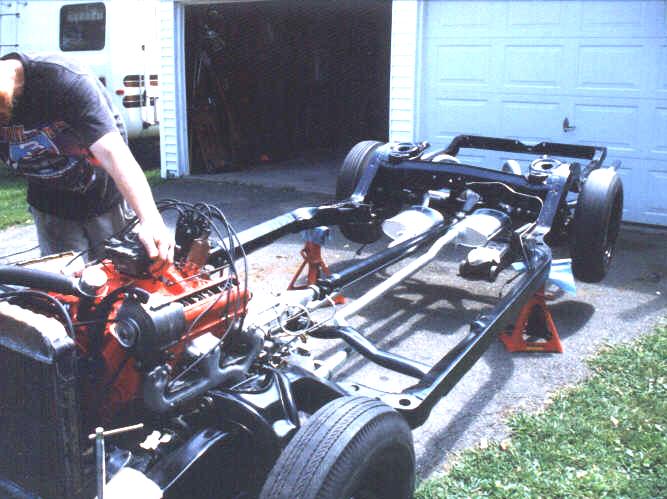
When the rolling chassis was finished there was a real sense of accomplishment. It was like "taking your first step". Jeff ran the engine and tested the transmission. He hooked up an old dashboard with a key switch to start and stop the engine. (All he needed was a seat and a gas pedal to drive down the road - and don't think he wasn't thinking about it!)
Next we got the body down off the barrels and back on the frame so we could start making it look like a real car. Slowly and surely we worked at cleaning and painting each part. The dash looked like a rat's nest of wires as we got that ready for paint. We arranged with Mitch Bryll (the bodyman wizard) to straighten and primer the doors, fenders, trunk, and most any other part that could be taken off the car individually. It was exciting to watch as each primered component was bolted back on the car.

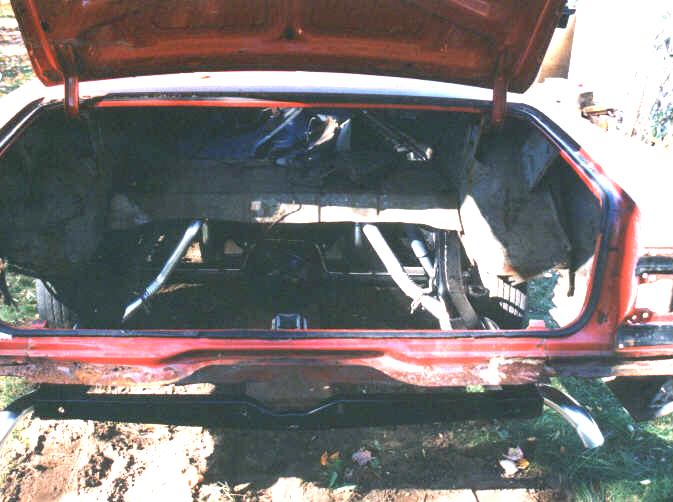
It was June 2000 when we were ready to bring the car up to Mitch for him to take on the project. There was still major work to do. No trunk, fenders, quarter-panels. Mostly rust held in the front windshield. Mitch welded in the trunk and actually had to manually fabricate the rear fender-wells. By the end of August the car was in primer. Wow! By the end of September it was all RED! There was still so much more to do - windows, trim, interior - but just seeing it in red was a thrill.
Putting together the interior seemed to take no time at all compared to the rest of the work. We were able to use the original seats and center console. We replaced the dash, sunvisors, headliner, & carpet. Our steering column had gotten bent while in storage and we needed to find a replacement, so we went for the upgrade to a tilt column. In November 2000 the car was ready to come home. We still had some things to finish, but the major body work and paint was completed.
Over the winter we had the bumpers and other smaller trim parts re-chromed, found the correct AM push-button radio and had the radio speaker re-conditioned. Come spring we were ready to put together the finishing touches. By June we had everything done & in July (exactly 5 years later...) we got it registered and on the road.
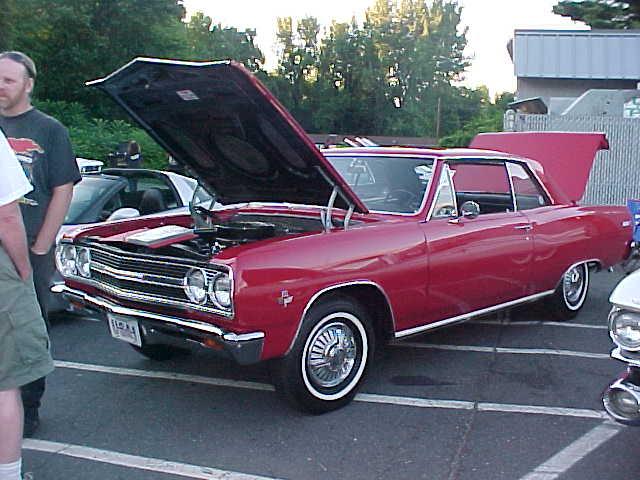


Now it's cruising time!
My Part
To all the spouses/partners who think they can't contribute because they are not mechanics, there are things you can do. (Besides supervising, watching, or holding the wrench...)
While Jeff worked on the body and mechanical stuff, there were lots of parts to be inventoried, cleaned and polished. (Remember this car came in pieces, so there was plenty to do in this category!)
I was also busy doing the purchasing and planning for the next steps. We had loads of chrome trim, emblems, and other finish parts that were packed away waiting for that final day that the car would be RED and ready for the trim! I always tried to be a step ahead of the work with the right parts purchased before the job was ready to be done.
One thing to remember when dealing with any of the parts catalogs - the bigger the order the better. We saved loads on shipping costs getting orders above the minimum levels on a consistent basis.
I saved all the receipts and kept track of the investment in a spreadsheet. The list includes all the parts purchased, dates, vendors, cost and where the parts are. This was very helpful when we finally got to the point we were assembling more than we were tearing down. Most of the list now says "Installed"! Boy, is that a good feeling!
As you can see from the website, I also took loads of pictures as we progressed. Be sure and take lots of pictures as you go. The more the better. They can be a real life saver if you don't remember how things go back together. Pictures are an important part of the documentation of your project & they are fun to look at when it is finally over!
Click on the following links to see a picture history of our Chevelle restoration project:.
Frame Off Parts-is-Parts Engine Body Work Interior Finally Finished Cruise- Night
![]()
![]()
![]()
I hope you enjoy this website and that it helps you in your restoration.
Thanks for visiting.
