This is a simple tutorial designed to introduce a beginner user into using layers, I am not the greatest of teachers but I will do my best. I will be using Photoshop 7.0 but should translate to any good graphics package.
First we have to understand the principal of layers, the best way I can think of describing them are clear canvas’s which are placed on top of each other to build up an image. This clear canvas’s are like the acetate used on over head projectors.
In Photoshop you can have nearly unlimited layer to build up your image, so never worry about making a new layer. A good habit to get into is naming all of your layers, this makes it much easier to find one once you have a few different layers.
Layers are great for breaking different parts of an image, for instance you could have separate layers for base colour, highlights and shadows. But why do this? Because say you have an error in the initial choice of skin tone, you could now easier change the base colour and the shadows and highlights would not need altering.
Let’s have a look at what I think are the important buttons to start using layers.

As you can see I have labelled each of the 5 important buttons.
I will go though all of the buttons at the end of the page. Let’s get started.
1. Go up to the file menu and click “new…” this will bring up this window.

2. Fill in the boxes as in the image above.
• Assign the new document a name, chose something that clearly identifies
what the file is, don’t like I have so many time before called it something
like a1, as you will never find it.
• Either choose the size of the document from the drop down list of manually
type in the require size, I am working small so file sizes are small when I
come to put them on the web.
• If the image is for the computer screen 72dpi (balls per inch) is fine,
but for print you really want something around the 300dpi range, so your print
outs are nice and crisp.
• Again the “mode” depends on what the image is for, the two
main types are: RGB Colour for screen, CMYK for print.
• We’ll choose a white background for this tutorial.
• Click ok. Now you will see we have a small white canvas, called Background
and it is locked.
3. So let’s make a new layer, click on the new layer button as indicated in the first image at the top of this page.
4. Let’s rename the layer, double click on the layers name, this is make
it editable, I shall name it black.

5. Now let’s draw something. see below

6. Let make another layer. Again click the new layer button, and rename it to
red. (Steps 3 and 4)
7. lets draw a red ball in this layer, make sure the correct layer is selected
( it is highlighted and has the little brush icon)
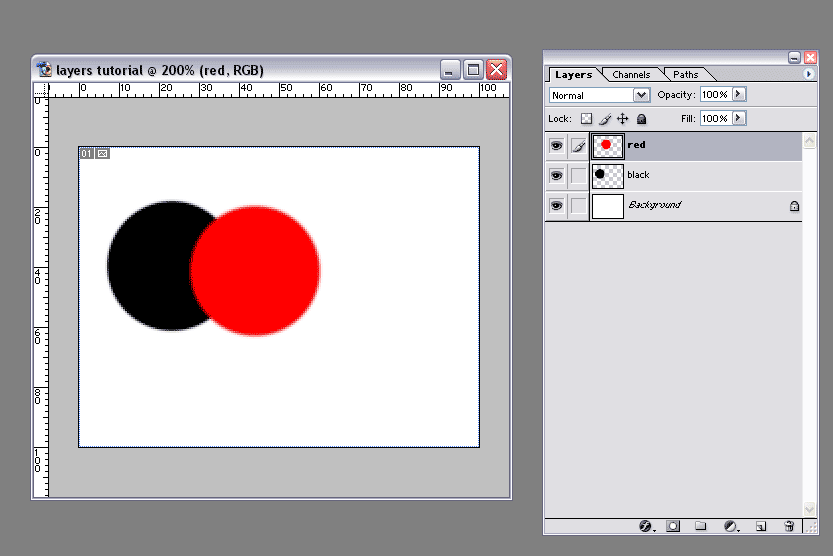
8. Let’s say that we want the red layer behind the black one, simply click
and drag the layer red to be under the layer black. Easy!
9. Now we want to be able to see some of the red layer through the black layer.
First off select the black layer (see step 7) then click the little arrow by
opacity, or type in the require value, we want it to be 50%.
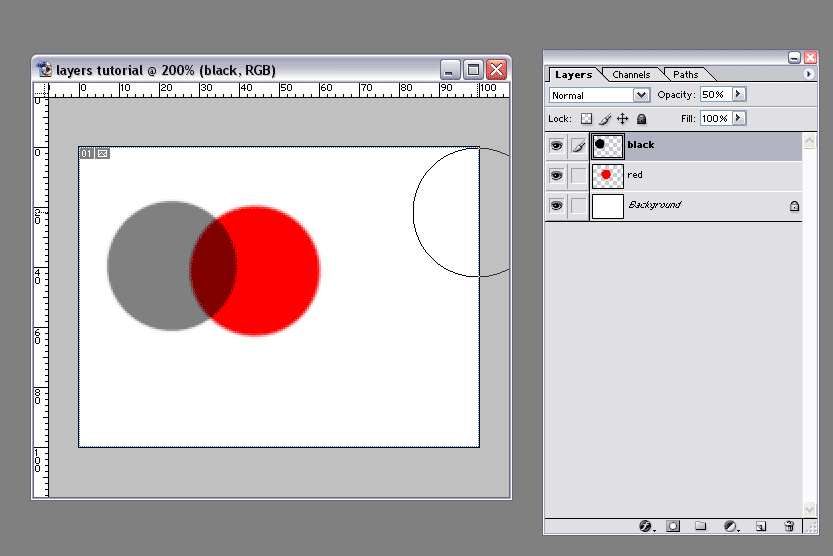
10. Now I don’t really like the black layer, with it selected click the
little bin icon at the bottom of the layers window (or you could click and drag
the layer to the bin, which ever you prefer.)
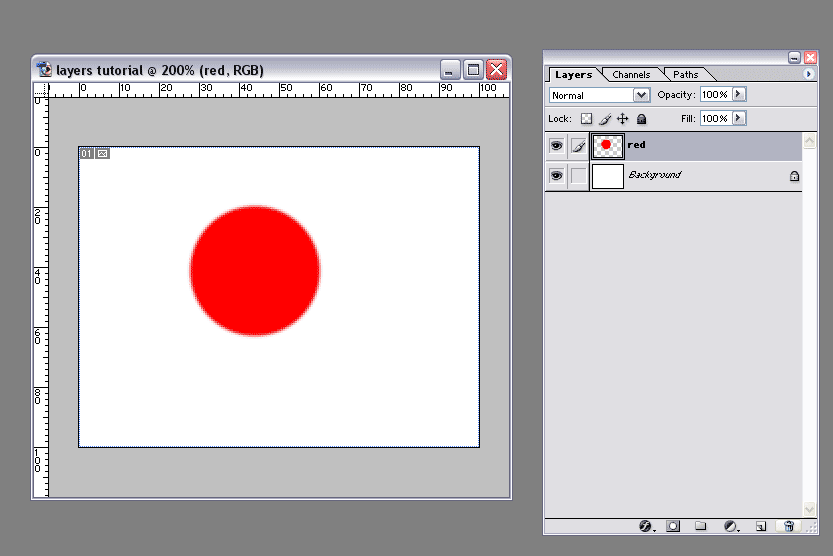
11. The red ball is all on his own ? let give him a green friend, on a layer
called green. See if you can remember, or follow steps 3-6 again)

12. Now green is a shiny ball compared to red, so green needs some shadows and
high lights. So lets make two layers one called shadows and one called highlights
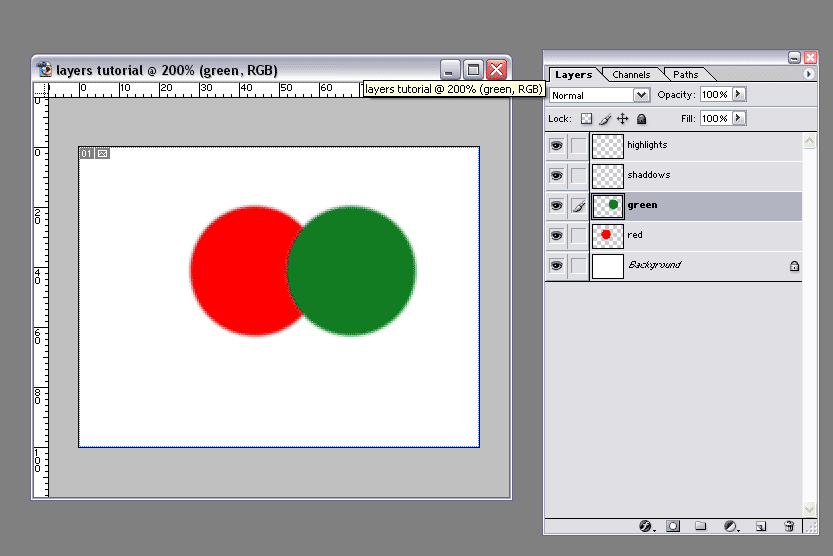
13. Now for the fun part, hold down the control key and then click the green
layer. This should select all of the green area, shown by a ballted line running
around the edge of the green. (alternatively use the magic wand)

14. I will do the shadows first, first choose a direction for the light source,
I am going from top right to bottom left. So with the shadows layer selected,
choose a soft dark brush and add the shadows.

15. Now repeat for the highlights.

16. Now the ball would be casting a shadow onto the floor, so let make a layer
called floor, underneath the green layer.
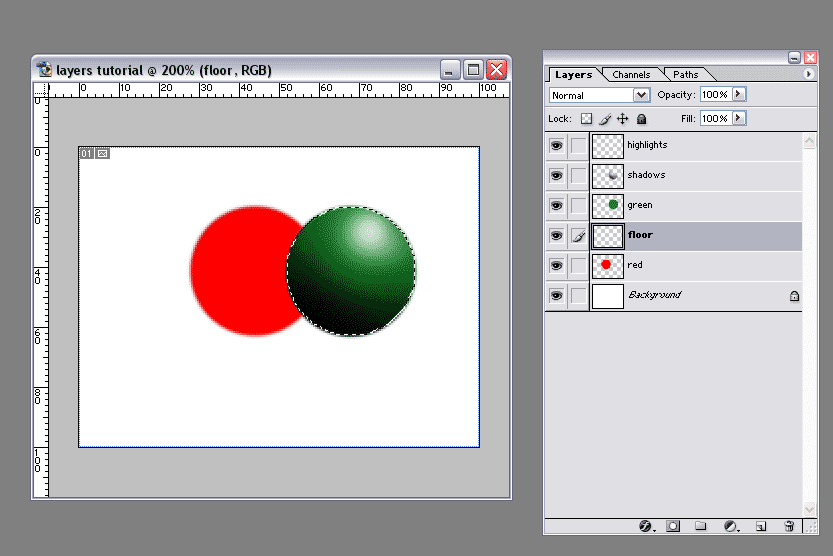
17. Now we need to de-select the green ball, which is contol+d (or from the
menu bar at the top: select- deselect) and with the floor layer selected, draw
in the shadow, I have also done the red balls shadow on the floor.

18. Now the red ball looks a little out of place, so let go and make that have
some shading too. So we need two new layers, red shadows and red highlights,
these both need to be under the green ball!
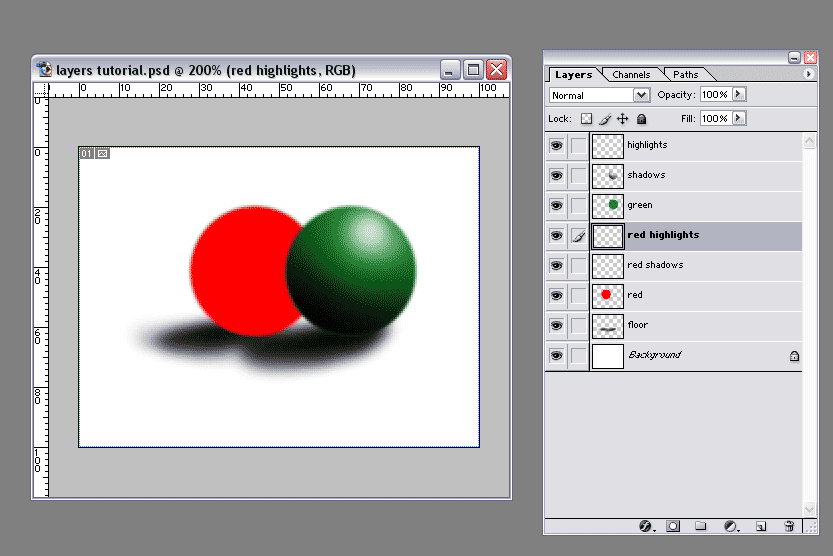
19. So we know that the other layer are the green balls lets rename them too,
so green shadows and green highlights.

20. Now lets colour the red ball in the same way we did with the green ball.
(steps 13-15)

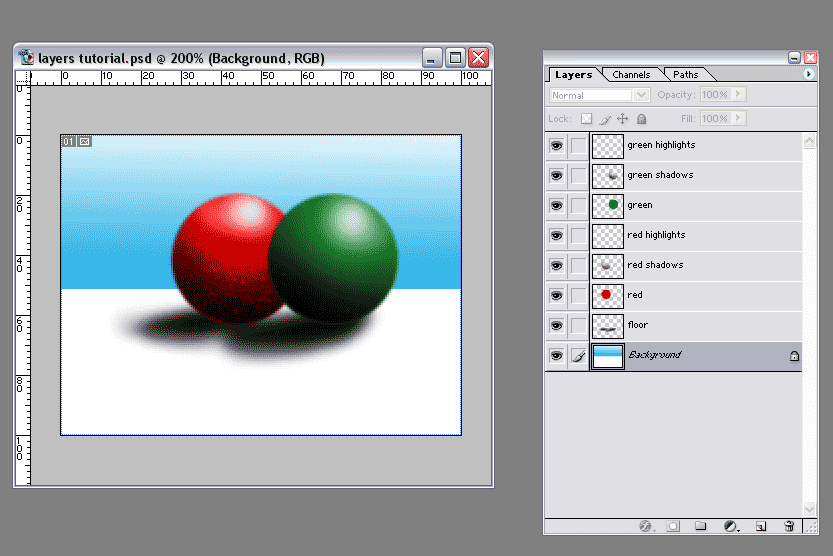
21. Now to finish off let make a background. So select the background layer,
and choose the rectangular marquee tool (m) draw a bow about the same size as
below.

22. now select the fill/gradient tool (g) click and hold to to get the gradient
tool at the top of the workspace click this:
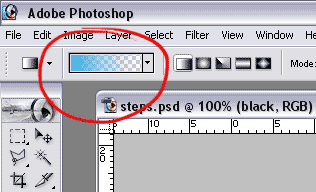
23. This will open the gradient settings window. Choose the colour to transparent
option. Then click ok.

24. Draw a gradient for the background colour. Deselected and save, and we have
finished!
I am on the aspen boards under the name of zeke, if you have any problems or question drop me a message. Also let me know of any suggestion for further tutorials you would like to see, thats if you liked this one i guess!
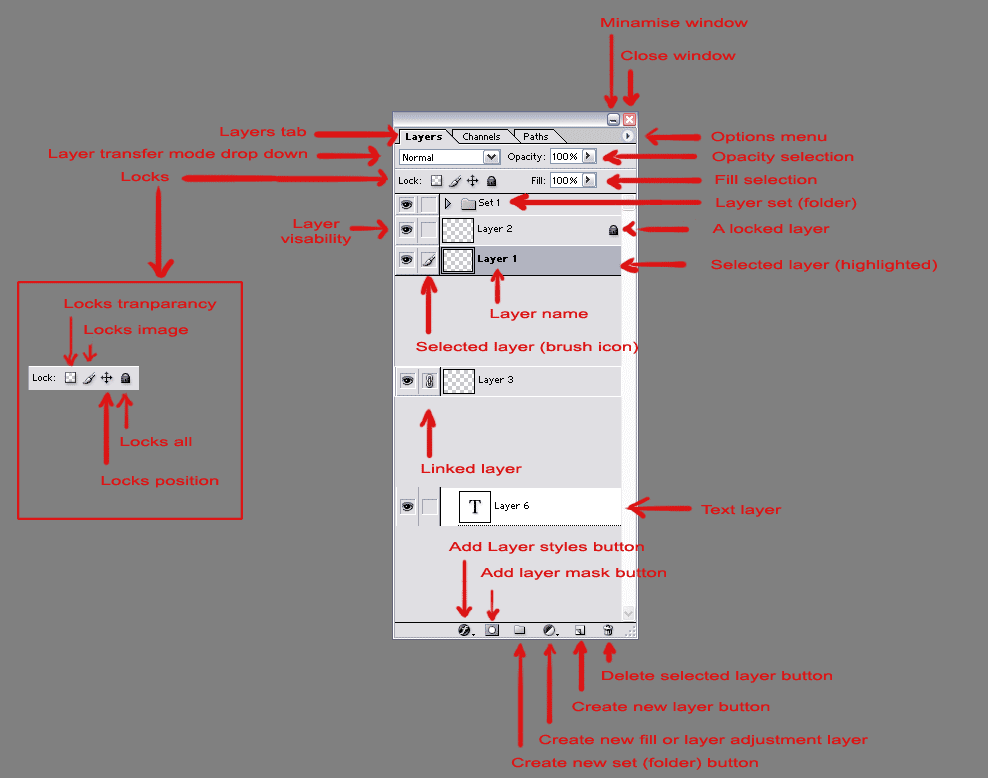
I hope you have had fun and have learnt a few things about Photoshop. Below is an image with labels for all of the buttons in the layers tab.spend some time and play around with some of them!
Made by Philip Brown.