
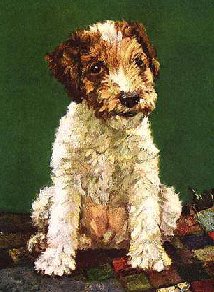
We're actually doing two techniques here, we're using an artistic effect available in the new Paint Shop Pro 7 to give an impressionistic look to the picture, then we're framing it. For practice, you can use a picture of your own you want to work with, or you can use the picture on the left. (Right click and choose save as; make sure to download to a destination where you can easily find the graphic).
Where the illustrations below are too large to fit with the writing, I'll use thumbnails to illustrate the step. Run your mouse over the top of the picture, if the arrow turns into a hand, there is a large version of the picture. Just click on it to view.
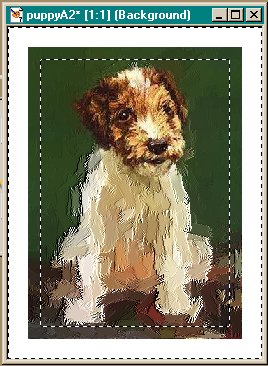
 Run the selection tool around the outside of the dog's head (or the head of the subject you chose for your picture). This doesn't need to be exact, just get in the general vicinity. When you have the head selected, the feathering will make your selection look much bigger. Go to Selections on your top menu bar, and choose Invert; everything except a small portion of the face should now be selected. (Maximize picture on right to view).
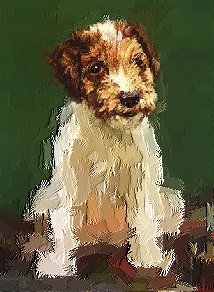 Now select Effects/Artistic Effects/Brush Strokes. Use the settings already there unless you want to experiment a bit. The feathering should make the portion you applied the effect to blend in the with the non-affected portion. If you want more or less of the picture to be included in the effect, select undo (under Edit) three times and reselect the face or change the amount of feathering, then invert and apply the effect again.
 on the styles bar
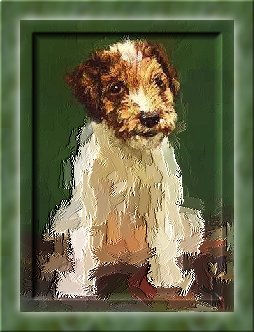
 We're ready now to add the frame. Right click on the picture to deselect it (or click on Selections/Select None). Go to Image/Add Borders. Check Symmetric, and type in 20 (or arrow up to 20), then click ok. Use the magic wand to select the white border. Leave your settings as before; due to the feathering, you'll notice that you have selected not only the white, but part of the picture as well.
 click on the top box in the Styles Panel, and select the third icon (outlined in red)
 A dialogue box will open (diagram on left); notice that you can change the size and direction of the pattern. For now we'll leave the current settings as is.
 (you'll have to click to view large enough to see the settings) to get the same effect as on my finished illustration, or play around with various settings. Click on the eye icon to preview what the various settings will do on your picture (as opposed to just viewing it in the small window).
 Click ok and view your finished picture. Go to File/Save as and give it a name. You should save it as a jpg file.


Back to Main Page
Back to RaggBagg index
![]()
