
What follows is a description of the conversion of a standard Yamaha RBX
bass guitar to a customized fretless.
Yamaha RBX
Four-string, bolt-on, 22 fret neck, single p-style pickup, two knobs
(volume and tone), and output jack on knob panel.
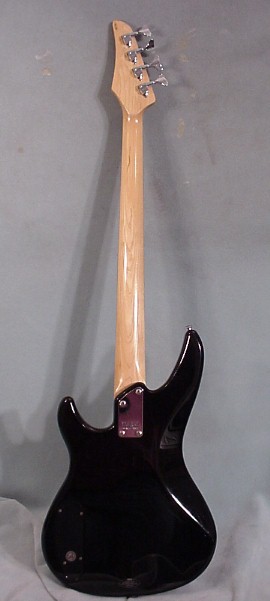
Fretless
Four-string, bolt-on, fretless neck with inlaid wood lines, bookmatched bird's-eye maple pickguard and headstock,
purpleheart control cavity cover and neck plate, tung oil finish, stock p-style pickup, Bartolini 9JL1
bridge pickup, passive electronics: two volume knobs for each pickup, tone knob, three-position switch
(normal operation/p-style pickup soloed/enhanced fretless mmwwah), two-position
switch that works only when the enhanced fretless setting is in place (regular/bass
boost), two-position switch that selects between different capacitors for the tone
knob, and side output jack.
You are on Page 1
Page 2
Page 3
Page 4
Index
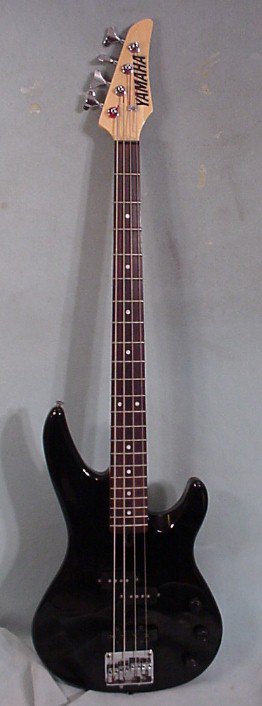
This is the Yamaha RBX. It has nice action (especially for slap), a slim neck, and a very light-weight
body. I thought the p-style pickup sounded great; not especially thick like Duncan Quarter Pounders, but
scooped in the mid-range, airy, and a very noticeable peak in the low-low frequencies. This seemed to me
like a good pickup to leave in for the fretless. It would provide very low-frequency bottom without
much muddying of the midrange of the bridge pickup that's necessary for fretless tone. I also liked the
tone control. I found that Yamaha used a 0.047 mfd polyester capacitor for the tone circuit; I ended up putting one in
the fretless too, along with a 0.1 mfd capacitor. It's nice to see that Yamaha used higher-quality
polyester capacitors instead of ceramic. If you use a ceramic capacitor in a circuit where the attenuated
frequencies are sent to output, you hear them, and they tend to sound brittle.
Here, the body has been belt-sanded on the face and back. All of the paint, and some of the primer, has been
removed from the face and back. Using the belt-sander for this purpose was not easy. The face must be sanded
as flat as possible because the bridge and pickguard will be added later. Most importantly, the bridge needs to
rest on a perfectly flat surface so that all of the vibrations from the strings are sent through the guitar. If the
coupling of the bridge to the body is compromised, it will change the tone of the bass, and the response and sustain
of the strings. Sanding away the paint revealed that the paint was about 1/16 of an inch thick. That's a lot
of paint; which deadens the sound of the wood. Also, it was revealed that the body is made up of 6 pieces of wood glued
together.
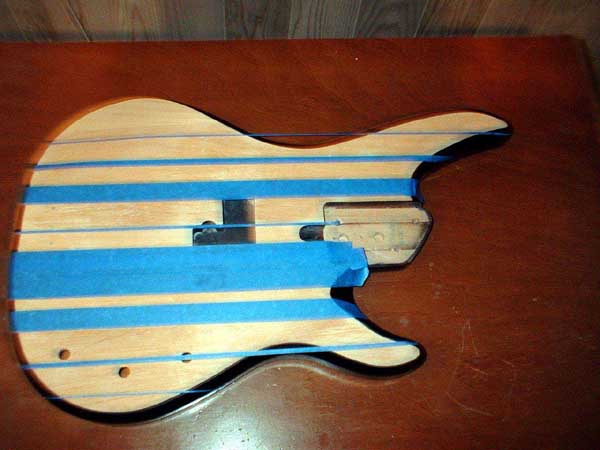
Originally, I decided to stain a design on the bass. I cut tape to specific widths, and put them on the bass in the
design I wanted. Then I applied stain. When the tape is removed, what's left is a two-tone pattern. After the stain
dried for 48 hours, I masked off some stripes with tape, and used 000 and 0000 steel wool on the other stripes. This
allowed me to vary the color of the stripes; depending on how much stain I took off with the steel wool.
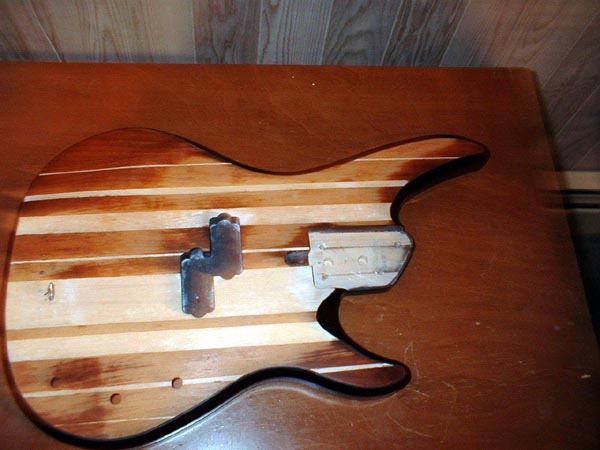
This is a picture of the bass after the stain, but before any of the steel wool rubbing. You can see some light areas, where the
stain didn't take as well. I thought this was a pretty
cool design, and was happy with it. However, just when the body design was finished, my friend James completed work on the
neck.
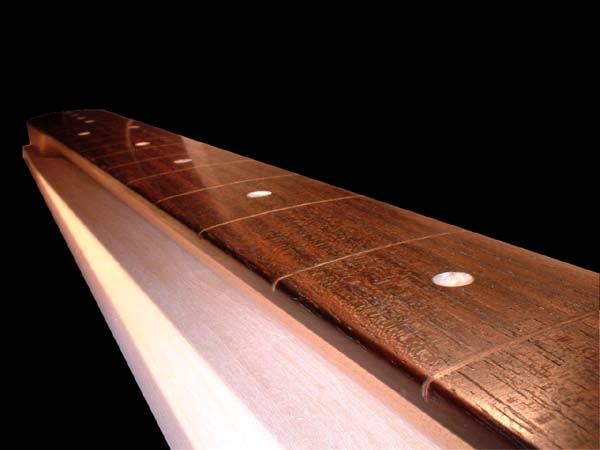
First, he had to pull the frets out. Initially, they were heated with a soldering iron to loosen the glue, then chisel-pried loose. After several frets were pulled, he found that the heating wasn't necessary. Once the frets were removed, wood
fretlines were inlaid. We considered using purpleheart, mahogany, and tried to use an exotic Mexican wood (never heard of it before or since, don't remember the name, it will remain a mystery, and exotic). We settled on
three-ply birch plywood. The birch was cut to shape and profiled to the radius of the fretboard before inlaying. The
result is a fretline with two tiny dark stripes, and a tiny
bright stripe in the middle. Also, the edge of the fretboard was re-contoured to facilitate playing. The
fretboard exceeded my expectations. When I put it on the body, it didn't look right.
The body looked shoddy when paired with the fretboard. So I had to redesign the body.
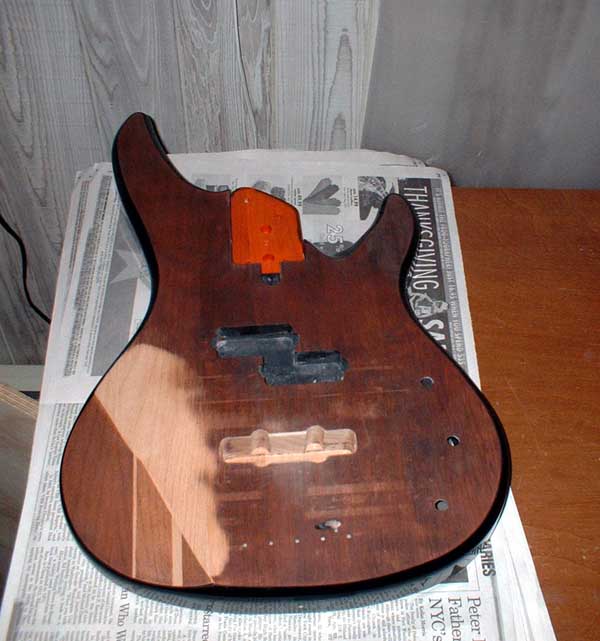
This is the bass after the pattern was sanded off, and all of the primer was sanded off; so that the stain would take evenly. The
only way to tell if all of the primer is off is to stain the bass. So I had to stain and sand several times. I
decided to leave the pattern on the "arm-rest" because I thought that the shape of the bass was too fat on the bottom, and the
stripes helped to streamline it. The bridge pickup cavity was also routed out.
Page 2
Page 3
Page 4

