
 As you may or may not know, we were never into computing or electronic gizmos until after I retired. We bought an 'off the shelf' Hewlitt Packard computer from Office Depot about 4 years ago. It was bottom of the line when I first got it and the rate of depreciation on computers is about ten times faster than cars. Needless to say, it was hardly worth saving. On my birthday last year (2002), I ordered a new custom built computer with money I had saved from little part time job I have been doing. We are now the proud owners of a CyberPower Built AMD 2100+ computer. The AMD processor is on an MSI KT3 Ultra-ARU motherboard. It has two 40 Gig Hard drives set up in Raid Array (Raid 0) and 1 Gig of PC2700 memory. The graphics card is a GForce4 w/128 Megs video memory and TV out connection. It also has a 16X DVD player and a 32x24x48 CD-RW. All this is enclosed in an Ahanix mid-tower case and 465 watt Enermax power supply. Pictures are below.(Captions under pics.)
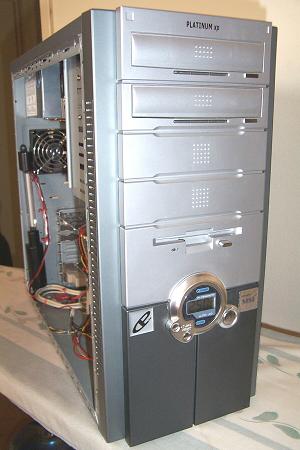
On Arrival
When I brought it home, it's removable side panels were solid metal. Pictured above it has the left side panel removed but you could not see in without removing that panel. I had read about modifying your own case and decided to give it a shot. At the local hardware store I bought piece of "Lexan", ordered some window molding from a 'case modding' website and cut a huge hole in the left panel.
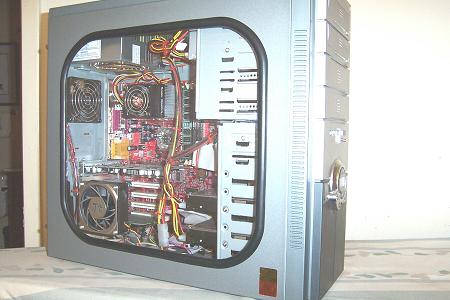
The Window
This is the side window installed. You can also see that I cut a hole in the window itself and installed an extra fan....But that wasn't enough. I had seen some really fancy mods to cases on the internet and wanted more, so, I cut another hole in the window and went out and bought two lighted L.E.D. fans to install.
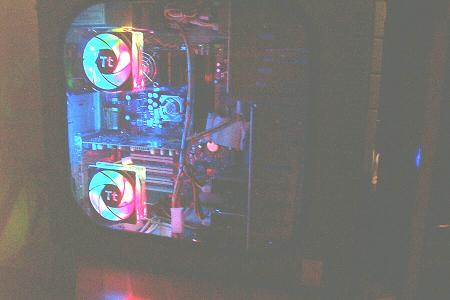
Lit Up
This is how the window looks now, except for the CPU heatsink and fan. I replaced the stock Thermaltake heatsink and fan with a ThermalRight SLK-800 and an 80 mm fan that has blue LED lights. Now it is even brighter on the inside. This picture is taken in the daytime with the blinds closed. It looks better and brighter at night. That still wasn't all I had in mind so I set to work again. If you look at the first picture above you can see that the front of the case was pretty plain and there is a nice open dark colored area near the bottom front just under the temp. gauge and power buttons. Here I cut another hole right through the plastic 'bezel' and the metal grillwork under it. This hole provides and open airflow for a fan I mounted inside. The fan provides extra cooling for the entire case but also blows directly over the two hard drives (keeping them cool) mounted on the rack in the lower front of the case. To decorate this fan, I glued a plastic spinner from a model airplane propeller. Then I inserted a cut to length piece of 3" PVC drain pipe into the hole I had cut and glued everything in place and painted it all black. I custom made a light ring using L.E.D. lights and a piece of plastic rod that you spin to open and close venetian blinds. I heated the plastic rod and wrapped it around a small can, (when it cooled it hardened and just fit perfectly into the 3" pipe), cut the ends and inserted the LED lights to light it up. Then, by filing notches in the plastic, the rod refracts the light and looks nice when lit up.
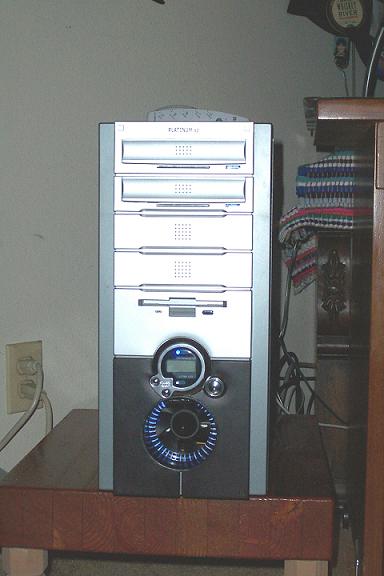
Front Fan Hole
This is how the front looks now. You can see how the fan has open access to the outside air. All intake fans like this one and the two on the side have filters to keep the dust out.
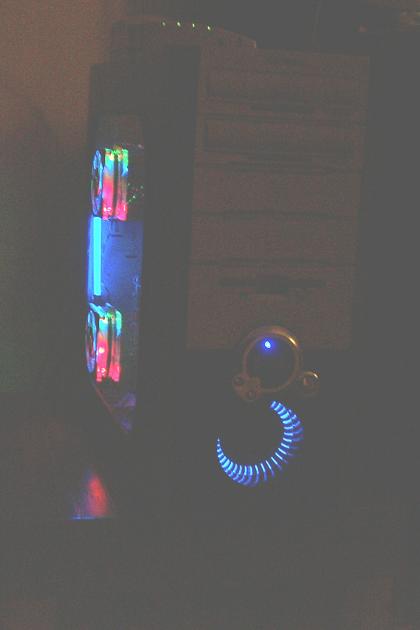
Night Shot
Here it is in the dark with all the lights, bells and whistles working!
 |
 |
 |
