March 23, 2003
I have started the body work on the exterior of the car. As you can see
in the photos below, this can be scary for someone (like me) who
has never cut away parts of the exterior of their car before with an
angle grinder.
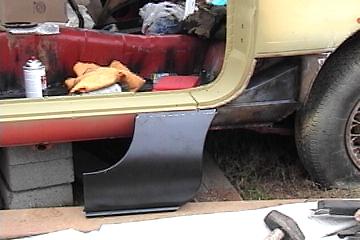

The first photo shows the left side area (most MG people call the
"dogleg" panel) cutout. I used an angle grinder to accomplish this. The
repair panel is a piece made to replace only a portion of the original
panel, so it
does not fit exactly where you take another panel just like it off.
I
placed the repair panel up over the area it was going to replace, and
drew
a line across the top with a marker. I have a flanging tool, so I had
to
come down 1/2" from the line I drew to make the line I was going to cut
along. The flanging tool places a .40 mm flange in the edge of the
panel
so that you can attach it to the area it meets, and have the finished
connection
between the two virtually flat, as opposed to one being overlapped over
the other. This worked fairly well except I was not prepared for the
repair
panel to be flatter than the area it attached to. There was apparently
a
bend in the original panel that was not put into the replacement piece.
To fix this, I used self tapping 1/8" screws and drilled them into the
area
where the flanged part of the new metal was behind the original panel.
This
brought the two together with the same degree of bend in both. I took
one
screw out and a time and mig welded the hole where the one screw was
removed
while leaving the others in place. This kept the bend in the panel
uniform
when the welding was completed. The welding part was fun, the angle
grinding
was not so fun.
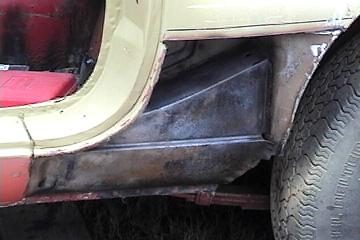
The second photo shows a closer view of the area cut out. There was
some light rust there, so I cleaned the area with a drill and wire
brush attachment. Then I used some rust converter that comes in an
aerosol can and converts rust to a primer like black base coat.
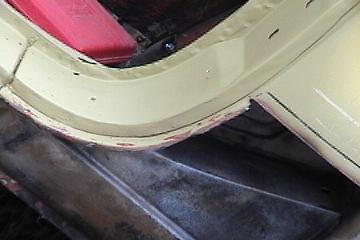
The third photo shows the forward most area that the repair panel
attaches to. Be careful not to cut too much of this away. The repair
panel does
not provide enough sheet metal in this area to attach it unless you
leave
at last as much as I did.
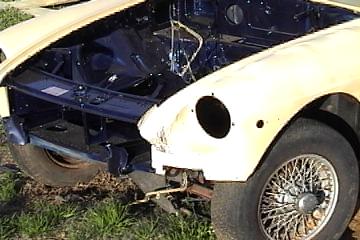
The fourth photo shows the right side dogleg panel. It is rusted out
in about the same place that the other side was. I will be repeating
this
same process again soon on the other side.
Other body work yet to be completed:
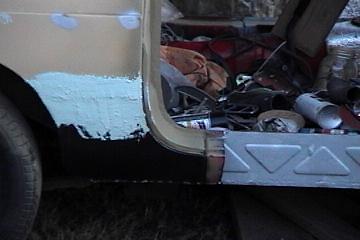
The first photo here shows the bashed in front of the left front
fender. Lots of work needed there. The other photo shows rust in the
threshold
of the right side. I have a complete replacement threshold to weld in
here
after I cut this one out. I have read that you should make sure you
have
the door fitted correctly before you take the threshold piece out, so
that
you can weld the new one in with the correct spacing between the door
bottom
and the threshold. This looks like the most complicated of the body
work
tasks I have ahead of me.The bumper mounts look rough too! Not sure
what bumper I will use yet, so I am leaving that alone for now. I can
go back
with the original rubber bumper (heavy and unattractive) or I can
convert
to the chrome bumper found on older MGs, or I can go bumper less with a
Sebring
front Valence (more modern look).
These are some photos I found on the net of an MGB with the Sebring
Valences:
Below is a photo of what the new dogleg panel I installed looks
like (I plan on cleaning it up a bit more before painting).
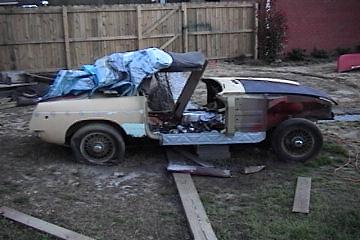
The engine shop has still not made much progress. The reason I already
painted the engine bay, was because I thought the engine would be
completed soon, Guess I was wrong. We had a really nice weather weekend
this past
weekend so I made a lot of progress. The rain has finally
stopped,
at least for a while. I hear April here is wet though ( I Just moved
here
this past summer).
March 30, 2003
The engine shop suddenly says that my motor may be ready this week.
Things
are starting to come together.
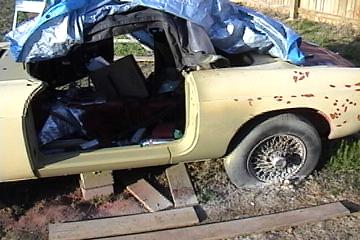
I decided to tackle the rusty threshold this afternoon. Below are
photos
of what the car looks like with the outer threshold piece cut off:
I didn't have time to start fitting the new one so I guess it will be
left
like this for now.
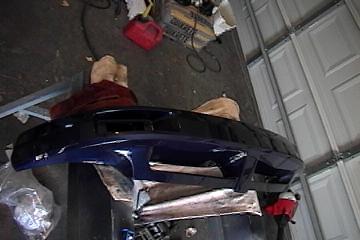
September 15,2003
I have painted the front rubber bumper to match the car color and I
would NOT reccomend that anyone else do this.
The process of getting the bumper to accept paint without bubbling up
was painful. This is what it looked like while I was preparing it.
 Before
After
Before
After
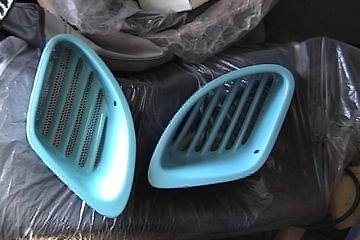
Porsche style Boxster vents I decided not to use. They are for sale on
E-bay now!!!.....Well not any more, they sold.

 Project