Note, this aura tutorial is mainly for use with characters. Sizes depends on the size of character on your graphic.
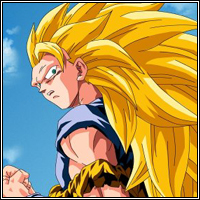
This is the original image.
Step 1
Select the colour of your choice.

Step 2
Use the airbrush tool with 85% pressure and draw a horizontal line from the left all the way till the right of your image. Never mind if the line isn't straight.
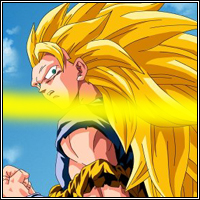
Step 3
Select Filters -> Distort -> Waves and change those options until you get something thats up down up down.
Step 4
Select to Edit -> Free Transform and make it smaller to fit the size of your character in the graphic if your character is only a small part of your graphic. In this case, we need to resize the aura smaller.
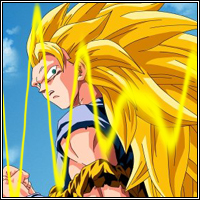
Step 5
Duplicate a few more of the aura like image and move them around the character. You may want to use Edit -> Free Transform to change some sizes of the other aura image to that they are not all the same. You may also want to use Filters -> Distort -> Twirl on some of the aura to make it slightly bend. After that erase some of the lines sticking out on their own. Use Screen as Blend Mode and lower opacity to around 60-70% for all of them.
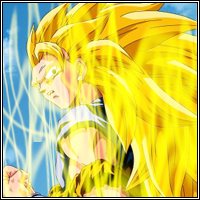
You're done with the aura now. Another example of how the aura look is below. Maybe the aura will look better if the line is longer, try it out yourself.


