|
How to Control PC Serial Ports Using Visual Basic
by Rodelio P. Barcenas
 |
In
order to access the Serial Port using Visual Basic, we need to
add a component to the standard components in the control toolbox
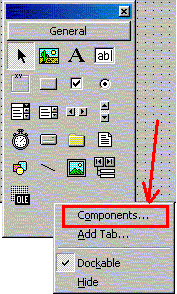
This
can be done by executing a right-click on the control toolbox.
Select
the components to add new components to the control toolbox
|
| |
|
|
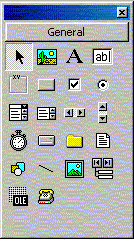
Check
the check-box named "Microsoft Comm
Control"
This
Comm Control is the OCX responsible for controlling the PC serial
ports
MSCOMM32.OCX
will be called everytime an access to the serial port will be
executed by the program
|
 |
| |
|
 |
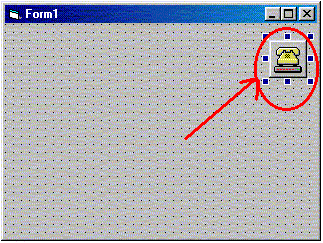
You
can now see in the control toolbox an additional Icon which represents
a picture of a telephone and modem.
This
Icon should be present in the control toolbox in order to be able
to create applications controlling the PC Serial ports.
|
| |
|
|
Add
the control to the form that you are using. This icon is visible
only on editing while hidden during runtime.
The
default name of the control is MSCOMM1.
You may change the name as you wished using the properties panel.
|
 |
To
open the port;
MSComm1.CommPort
= 2 (this sets the control to COM2)
MSComm1.Settings = "2400,n,8,1" (this sets the
baudrate and hardware configs)
MSComm1.PortOpen = True (Must be executed to
open the port for use)
To
Write to the port;
MSComm1.Output
= "This is a Test"
To
Read data from the port;
ReceivedTxt
= MSComm1.Input
RPB
|


