
VW mk3 Stereo Replacement
|
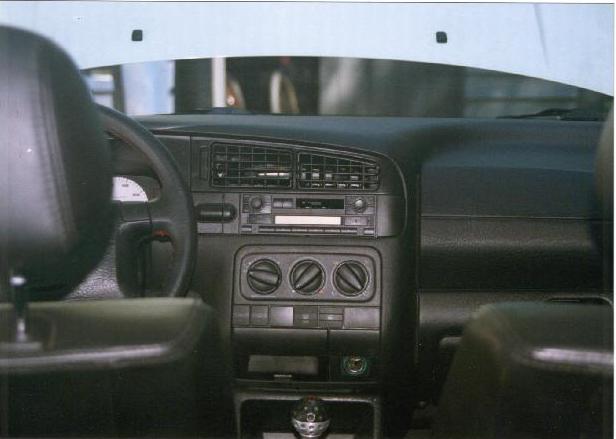 Before: The crappy stock stereo
Yeah, it looks OK in the dash. Only problem is, it sounds
like CRAP!! Sure, you could probably get some improvement
by adding an amplifier to all eight speakers...but the best
way (in my opinion) is to just get a new stereo. For the
price of a good four channel amp, you can have a new head
unit with an in-dash CD player (like it should have had from
the factory) ! It's also my opinion that Crutchfield is hands
down the best place to buy your new stereo. Why? Because they'll
give you a free installation kit including the wiring harness
adaptor and the antenna adaptor, along with a detailed intruction
guide. Add to that technical support via 1-800 number and you
can't go wrong. |
Step One: Disassembly |
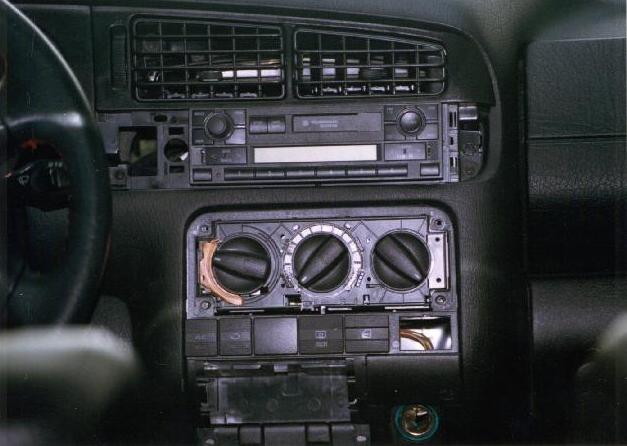
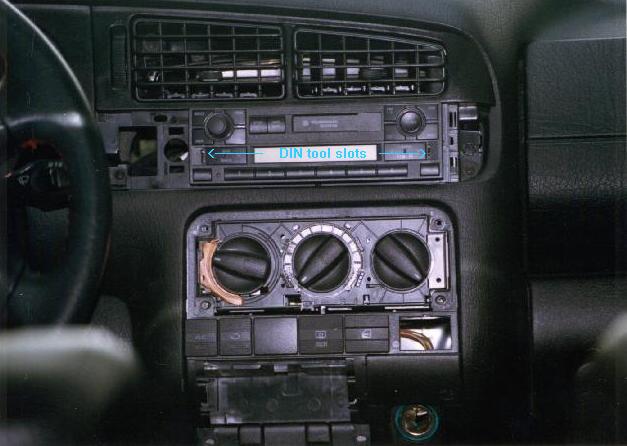 Step Two: Removing the Factory Unit
This is where your DIN tool comes into play. According to Crutchfield,
your stock stereo has four small holes...one at each corner....and they
are supposed to send you the DIN tool that you use to pull out the radio.
Unfortunately for me, the radio in my car was different. It has two small
vertical slots instead of the four holes. Luckily, I have a friend at a
local stereo store who has the required tool and was willing to pull the
stereo out of the dash for me. Insert the tools, push gently outward, and pull.
I've heard of people using
butter knives instead, but that method didn't work in my car. You may be
able to fabricate your own from aluminum sheet if you're ambitious.
Once you release the stock unit with the DIN tools, it will simply pull
out of the dash. You need to stop with the radio partially out and reach
behind it to unplug the antenna lead from the back right corner of the
radio. Now take it out of the dash and unplug the wiring harness from the
back left side. You'll want to go inside and clear off the kitchen table for this step. Unpack your new stereo and find the wiring instructions, the wiring harness, and the wire harness adaptor. If you have a soldering iron, now's the time to heat it up. If not, get out your wire connectors. Simply follow the instruction sheets, matching up the wires from the adaptor and the wiring harness for the new stereo, and make the connections. Soldering/heat shrinking is the superior method, but if you don't have a soldering iron, you'll also get good results with butt connectors. DO NOT twist the wires together and wrap with tape!!! You'd hate to have to take everything apart after you're done because a wire came loose. Home How-To Gallery Links |
