Tubing with Tammy
by MdnyteShadow@aol.com
Often I am asked how I do my tubes, how I get the edges so smooth etc. So I have decided to write this tutorial on tubing my way.
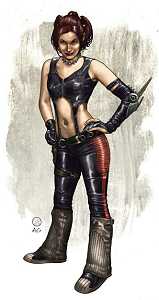
1. First of all, start off with an image that you want to tube. For this tutorial I will be using this image.... (resized for faster loading) I prefer to work with very big pictures when I tube. You can always resize stuff later!
2. Next, note the size of the graphic. Look in the lower right corner of your screen and it will tell you the size.

3. Now go to file, new and set the size so its bigger than your graphic by at least 50 both ways. I like to round up to a nice even number so I am going to make mine 400 x 700. Make it a transparent background and click ok.
4. Choose a color that is NOT in your graphic and flood fill your transparent background with this color. I suggest using a color that is not going to be hard on the eyes, you will be staring at it for awhile.
5. Now go back to your image that you are using to tube. Copy it and then paste as NEW LAYER onto your colored background you just created. The reason I do this, is so that I can see the edges of my tube as I go around them and make sure to get a nice close clean cut.
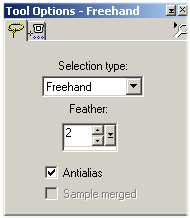
6. You are now ready to tube. On your tool bar, select the lasso tool.
Set your tool settings to Freehand, feather 2, Antialias checked
7. Now, I prefer to start at the bottom of my tube and work my way up one side, then start at the bottom on the other side and work my way from there. It's totally up to you where you start. Using your lasso tool, you are going to begin by cutting a small area around your picture. I suggest you zoom in for this. Again, remember to only do small parts at once.
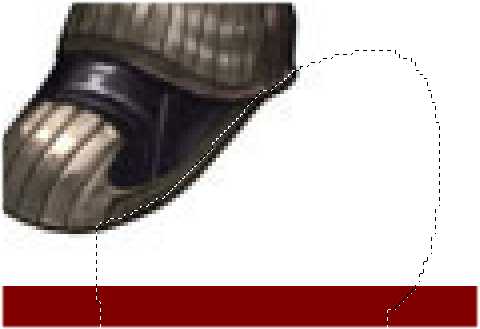
8. After you have outlined a portion of your graphic, hit delete on your keyboard, or you can hit the pair of sissors on your tool bar to cut out the area within the ants. Now you will notice that there is still some of the background left over that did not get cut out.
Deselect your ants, Ctrl D on your keyboard or selections, select none.
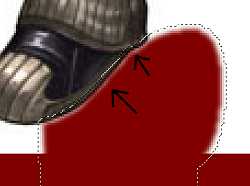
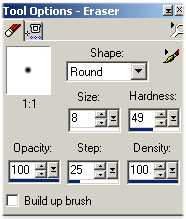
9. Now we need to clean up that edge so that it is nice and smooth and get rid of all that white around the shoe. Go to your eraser tool.  Set it as shown below...
10. Very carefully start going around the edges of the area that you just cut out, up against the very edge, do this until it is nice and smooth. You may want to occasionally view it at normal viewing to see how well it looks.
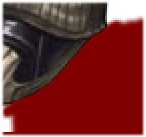
Now notice how clean the edge is around the shoe..
Continue to do this in small portions throughout your entire graphic. If you reach an area that is too small to get to with your eraser set at 8, reduce it to 4 and increase the hardness to 53. I don't like going smaller than the 8 becouse then you lose the rounded shape eraser and get a square which does not work as well. Be sure when you go back to 8 you change the hardness back to 49.
When you have finished going around your entire graphic, set your eraser at hardness 100, increase the size and go around cleaning out the rest of the background that still remains.
I like to then copy and paste my tube onto differant color backgrounds just to double check and make sure that everything is clean and smooth.
Copy your tube, right click anywhere in your screen and select paste as new image. You can now go to file, save as and save it as a .psp file.
Congratulations, you just made a tube!
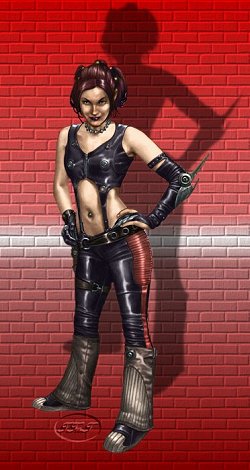
Here is my finished tube displayed....
I hope this tutorial has helped.
I would appriciate any feedback and always love to see results!
MdnyteShadow

