|
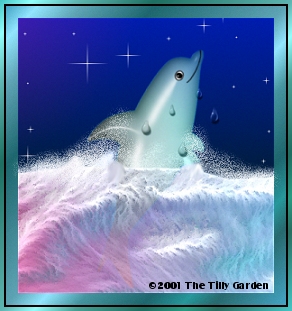
Fantasy Photo, Part One! Simple and Easy Tutorial.. This is a series Tutorial, I will have other tutorials all including the Fantasy Photo, and different techniques to create different scenes. This tutorial teaches you how to turn a regular landscape photo into a Fantasy Photo for framing and incorporating into graphics. I have many photos of water, trees, landscape etc..that I seldom get enough use of and I'm sure others do as well. So I created ways to make them into painted portraits. I am now sharing this technique with you. Beginning with a water scene of a dolphin or a mermaid. One of The Finished Fantasy Portraits By The Tilly Garden
Another Finished Fantasy Portraits By The Tilly Garden
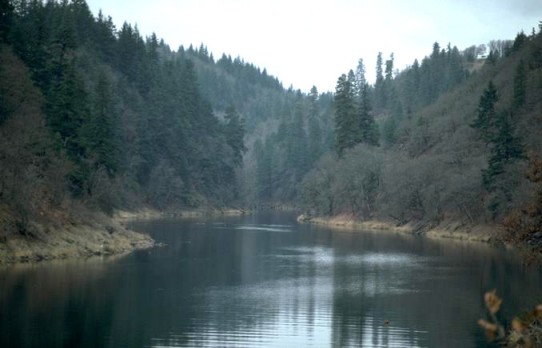
Materials Required: Filters: To create the painted effect, several filters are required, the following is the list of filters. Make a list of the ones required. Go to the Following url, Filter Links, and download the plugins from their sites. 1) Harry Ravers Filters, Colour Rave which includes atmosphere and color cocktail 2) Fantastic Machine's Paint Engine 3) Ulead Effects, Art Texture, if you want the purple frame. Not required. 4) Mura's Meister, Cloud, if you want to add the undersea frame. Not required. 5) ..and your PSP program. This tutorial can be done with either level 6 or 7. I choose to work with PSP6 because I find it a challenge converting tutorials from level 7 to 6. The next item required is a photo. When selecting a photo for this, you must use a water scene. Below is a thumbnail of a scene you can use. Just left click on the thumbnail, then save the enlarged photo by right clicking on the original.
You will also need a tube of a mermaid or a dolphin. Karin's site has many different tubes of these water creatures. You may download this tube of this dolphin I created by vector shaping and adding effects, by the way, if you want to learn how to create this send me an email and let me know. Just left click on the dolphin and save the zip file. Then open and place it in your tubes.
Lets Begin: The Fantasy Photo we are going to create is the second image above.
Open your psp program. Open a new image transparent background 300 x 300. Open your photo. Resize your photo to 300 x 300. The best way, to resize is to resize your image if its too big down by 80%. Image, resize percentage of original, 80%. Then edit copy, then go to your working image and select all, then go to edit paste into the selection.
Close the original.
Now with your working image go to plugins, find Harry Raver's color rave, and colour atmosphere. Now play around with the sliders moving them around until you have the colours you like. If your image is quite dark, you can lighten it by going to brightness.
Once you have it coloured to your liking, add noise, uniform, amount 5%.
Now take your freehand selections tool, selection type: freehand, feather 1, antialised checked. Trace around the water edge as following The following has been cropped and resized, as are most of the graphic images.:
Take your airbrush tool size 53, hardness 10, opacity 31, step 7, and density 12. Change your foreground or stroke colour to #00C0C0, which is teal. Spray some on the water randomly. Now change your colour to CBFFFE, which is a very light teal. Spray randomly. Then finally change your foreground, stroke colour to white reduce the size of your airbrush to 30, and spray waves on the water. Here is what I have so far..
Now go to your plugin Fantastic Machine, paint engine. First apply river wild, then apply flakes. Then you can add a bit of glow wind if you like.
Selection invert, then back to Fantastic Machine, Paint engine, and apply brush strokes.
Then select none. What you should have is a painted portrait..similar to the following
Add a new layer. Open your tube, or paste your tube on this layer. Rotate the tube if necessary so that the tail is down and the head up. Now you want your mermaid or dolphin coming out of the water. So take your freehand selection tool once more and trace an area around the bottom going half way up the tube and remove by deleting the bottom half of the tube.
I have done an example below:
Now position, with your mover tool, the dolphin or mermaid in the water.
Add a new rastor layer. Go to your airbrush, same settings, change your foreground or stroke colour to #CBFFFE. Spray over the bottom line of the dolphin or mermaid going up where you believe the splashing water would be. Go to Fantastic machine paint engine and use bold.
Merge visable..You should have something similar.
The frame could be done several ways..this finishing touch is up to you..
Resize your image by 80% percentage of original, maintaining aspect ratio.
Add a frame and do try and keep your graphic under 300 x 300.
Hope you enjoyed this tutorial.
©2001 The Tilly Garden by PeggyN
|