Preparation
Step 1F-Keys The very first thing that needs to be done is to set up your work station. This to me seemed to take the longest but it was well worth it because now if I see a background or gif that I want to use for a border, I'm ready to just grab it and go to work! Two things that I use freguently to make my BrBgs are ImageMagick and my favorite tools site Owens4 Tools
I have these both saved on an FKey. It makes thing much easier as you go along. I always make sure that I have a pencil and notebook handy whenever I'm working on any project, that way I can jot down needed urls instead of going back and forth trying to ccp them. Especially when I go to composite the gif onto the background at Image Magick.Web~Space Provider Hopefully you already have a web site provider and you are familiar with transloading images to your files. If not, you might be jumping ahead of yourself This tutorial will show you how to make ezee~BrBgs, but you do have to have some experience with html and web-page designing. I use Angelfire because I like the fact that they offer you a transloader right there in the webshell. There are several to choose from including; Geocities Tripod Go.Com TalkCity The Zone I do not endorse or denounce any of them. Each person should make their own mind up as to what works best for them.Resizing
Step 2For the purpose of this tutorial I have taken the liberty of resizing the blankbgs for you. So we cheated a little, it will save some time! LOL!They can be found at BlankBgs They are width=640 and height=113. Feel free to resize them to your own taste but remember what the height is, because this will be a very important value when it comes time to put the BrBg together. I'll explain this in further detail in the next segment about the gif or Bgtile that you will be using for your BrBg. Images Have you ever found a background tile that you absolutely loved, but when you put it on your page you exclaimed "what was I thinking"?The font color did not show up because the Bg was to loud and just jumped out in that "look at me, I'm horrid" sort of way, right?
We've all been there, but I've come up with a way to use that background and still see what is written on the page as well. It's ezee, just use it for the border. They look awesome running down the left side of the page, so you now can have your border and use it too! I have the perfect example!
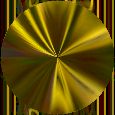
My opinion is that this makes a very "busy" background in and of itself, but I love it so much and really wanted to use it, and it does make a beautiful BorderBg. In fact I made a whole Set using this design.
check it out! and feel free to transload it if you'd like to use it!OK, getting back to resizing. I am by no means an expert at "ImageMagick", and this definately is not an ImageMagick tutorial! LOL! I just play around until I figure out what I'm trying to accomplish, but I did learn how to resize, finally! (WooHoo!)
This is where knowing the height value of your blankbg is going to be quite necessary. You will need to make the image the same height as the blankbg because. You want it to fit nice and snug onto the blank when you composite.
Copy the image above into your browser, (or use your own image if you'd like) and go to "ImageMagick".
Once you have the image in view, go to the top right of the page and click on "resize".
Since my bgblank is 640 by 113 (width and height respectively, width is always the first number, height the second) I am going to resize this image to be 113 x 113.
You will scroll down to the box that says "image size" above it. Here is where you will put in he size that you want your image to be. Delete the default values so the box is empty.
Remember that "width" is the first number and height is the second, you will type in 113x113! It's important to use the exclamation point to force the image size to exactly the size you specify.
Click on the resize button and it will bring your resized image into view.
Transload it to your files and get ready to composite your image to your blankbg.
How to Composite
Step 3
So now you have ImageMagick and Owens4Tools saved on an F-Key, you are going to do 2 things before you go to ImageMagick. Write down either the url of your blankbg or your image, and ccp the other into your browser. Now go to ImageMagick and enter the url of the blankbg. For the tutorial I will use https://www.angelfire.com/art/boogiesbgs/blankbgs/black.gif for the Bg, and https://www.angelfire.com/art/borderbgs/brgifs/goldorb.gif for the image.
Once the url for the blankbg is entered press the "view" button, you will see the blankbg. Go to the top of the page and click on the "composite" button. It will take you to the page where you will put in the url of your image.
Just below that you will see the gravity drop down menu for the location of where you want your image to be placed. Click on it and find "west". Now you are ready to composite your image onto your blankbg. The default is "over" so you don't have to change anything there, just click on the "composite" button and voila, you have your very first Border~Background!
Click on the output button at the top of the page, make it a gif or jpg, you can save it as a single file or to the clipboard, click output and click on your finished Bg. Go To, Show Last, and take it where you usually go to transload.
This is where my plug for Owens4Tools comes in. They have got the background tester on their page, so I take it there to view my finished product, and go right down the page to transload. It works out great!
How am I doing so far? If you have any questions please don't hesitate to email me or visit my group, it's called TvWebbys-WebTv <>
home