This tutorial was written for FlyByNightGraphics March Challenge of the Month and is not to be copied, uploaded to another site, or group list without prior written consent by the author.
All rights are reserved.
March 6, 2001.
For this tutorial you will need
the BellBottom Fonts
a Floral Picture
and a Tube.
You can download this Zip file.


It has the BellBottom Fonts, the Floral Picture and Tube that I used.
Download Here
1. Open a New Image 400 X 250 Transparent.
2. Click on your Text Tool: Fonts>BellBottom Laser, Size>100 or size to fit your name Color>White, Click Standard Text, Floating and Antialias Checked. Click OK. Move your text where you want it.
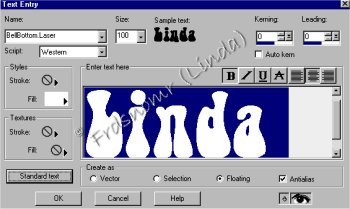
3. Go to Selections>Save to Alpha Channel. Click, OK and OK.
4. Go to Layers>Delete. You should just have marching ants were your name is.
5. Open the Picture of the flowers for fill. Click on your Flood Fill Tool (Paint Can). In the Tool Options Window settings: Blend mode>Normal, Match Mode>None, Tolerance>Grayed Out, Opacity>40, Sample merged>Not Checked.
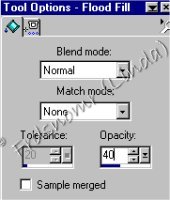
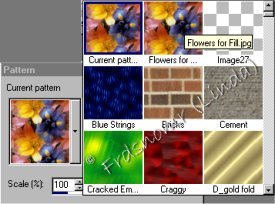
Click on the arrow of your Top Style Button. Click on Pattern. Click on the color part of the Style Button and the Pattern Window will open. Click on the Arrow and Click on the Flowers for Fill. Setting: Scale>100, Angle>0. Click inside your fonts to fill it.

6. Go to Selections>Invert
7. Go to Selections>Modify>Expand by 6. If you used smaller fonts you may want to set this to 5 or even lower.
8. Go to Selections>Modify>Feather by 10. Most of your Ants around your name will be gone. Remember to lower this number too if you used a smaller fonts.
9. Click on your Flood Fill (Paint Can). In Tool Option Window use same setting but change the opacity to 100. Click on the checkered background to flood fill it.
10. Go to Selections>Load from Alpha Channel. Click OK
11. Go to Selections>Invert.
12. Hit the Delete Key on your Keyboard. Now you should just have your Flowered Name.
13. Go to Selections>Invert.
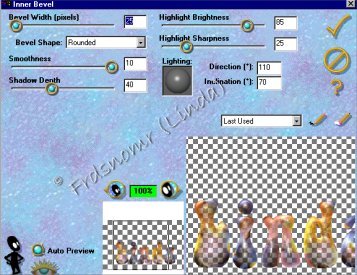
14. Go to Effects>Eye Candy>Inner Bevel. Settings: Bevel Width>25, Bevel Shape>Round, Smoothness>10, Shadow Depth>40, Highlight Brightness>85, Highlight Sharpness>25, Direction>110, Inclination>70. Click on the Checkmark. You may want to play with these settings too for the smaller fonts.
15. Go to Effects>3D Effects>Drop Shadow setting: Vertical & Horizonal>1, Opacity>45, Blur>4

16. Go to Selections>Select None.
17. Open the Yellow Day Lilies.PSP in your PSP like you would a graphic. Go to Edit>Copy. Click on your name Image and go to Edit>Paste>as New Layer.
18. Go to Effects>3D Effects>Drop Shadow setting: use the same ones.
19. Go to Layers>Arrange>Send to Bottom.
20. Move your name and flower to where you like them.
21. Go to Layers>Merge Visible
22. Go to Image>Resize Setting: Pixel Size>Checked, Width>300, Height187, Resize Type>Smart Size, Resize All Layers and Maintain Aspect Ration> Checked. If you are going to put a frame around this tag you may want to make it smaller.

23. Go to Colors>Adjust>Gamma Correction Setting: Link>Checked, Red,Green,Blue>0.90. This will put a little depth back in the color that we lost when we resized it. (If you use a white background and you merge all before this step it will change the color of white and will not look good.

24. Go to Effects>Sharpen>Sharpen.
25. Go to Layers>Merge>Merge All
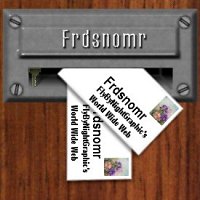
26. Add a frame and we are done.
I hope you enjoyed this Tutorial.
Linda (Frdsnomr)
Mail Questions to
Frdsnomr@aol.com

This tutorial was written for FlyByNightGraphics March Challenge of the Month and is not to be copied, uploaded to another site, or group list without prior written consent by the author.
All rights are reserved.
March 6, 2001.
My Favorite Web Sites
FlyByNightGraphics
FlyByNightGraphics
Back to my Home Page
Thank you for visiting my page at Angelfire.
Please come back and visit again!

Home Page