
Flare Round
Here is my project:
You will need:
Let's Get Started:
3. Click on your flood fill tool
5. You will get a pop up window please use the following settings below:
6. Repeat step #4 and this time in your pop window use these settings:
You can play with these settings and you will see how many different effects you can receive. It is a fantastic plug in so please do use it.
9. At this point you can add a drop shadow on your tube.I used the following settings.
10. Open your Star Beam tube up in PSP. Go to Edit>Copy
Then click on the image and go to Edit>Paste As A New Layer I mirrored mine because I wanted it on the side of the man below is what I have at this point:
11. At this point I added the Southwest Flippery Jewel. I resized as above. Added the same drop shadow as above.Here is what I have at this point:
12. I added the Southwest Flippery Tube the same step as previously explained. You will resize it, add a drop shadow, and this time you will go to Layers>Arrange>Move Down so they appear behind the Jewel gate. Here is what I have at this point:
At this point you can add any tubes you might have in your files with the steps we used above. I attached the sparkle tube I used on my example.
14. Go to bottom style palette and select solid color white.
Settings:
16. With the magic wand
19. Go to Selections>Invert
Below are the settings:
21. Do the Cut Out one more time only this time change the vertical and horizontal to Minus -3 Click ok.
Setting:
24. With the magic wand click on the white around your image. You will have marching ants all around your image.
Settings:
27. Deselect your ants.
Setting:
29. Click on Effects>Sharpen>Sharpen
If you have any Questions
Web Page Created By Angel Breezes (Carol) Copyright © 2001 by Angel Breezes,
all rights reserved
Tutorial
By CC
Sweet Magnolia C
All rights reserved

Paint Shop Pro 7 or 6
Filter Factory M
Download Here
Tubes I used in the tutorial
Download Here
1. Open a 400x400 transparent image.
2. Go to top style palette and select solid color of your choice and the second style pallet put on the null sign.

 and flood fill your transparent image. I used color #7B1229.
4. Go to Effects>Plug ins>Filter Factory M>Pearl's Girl


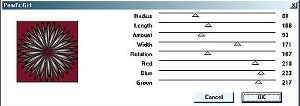
7. Select a tube you would like to use on your effect.
Attached is the tube I used the name is BB Vic at piano. Please leave the tubes in tact so the proper person can receive credit for their work.
8. Click on the tube to make it active. Go to Edit>Copy. Then click on the image you are working on to make it active and go to Edit>Paste As A New Layer.
(At this point you may have to resize your tube below is the setting I used to resize mine)
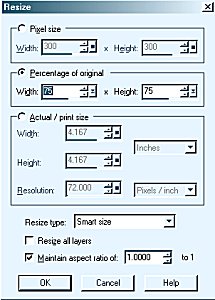
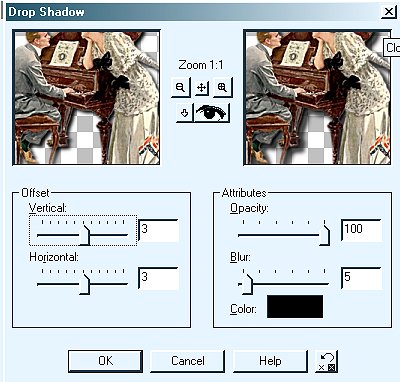
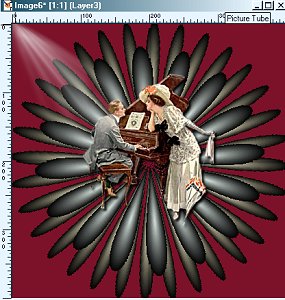


13. Go to Layers>Merge>Visible

15. Go to Image>Add Borders
Symmetrical Checked
Size 5
Click ok

17. Click on top style box and this is the color I used #C5AE7B now flood fill with this color.
18. Go to Effects>Texture Effects>Blinds

Here are the settings I used

20. Effects>3D Effects>Cut out

22. Deselect Your Ants
23. Go to Image>Add Borders
Symmetric Checked
Size 15 Click ok
25. In the top style box select solid color and use the color we used in the beginning for our background #7B1229 Flood fill the marching ants with this color.
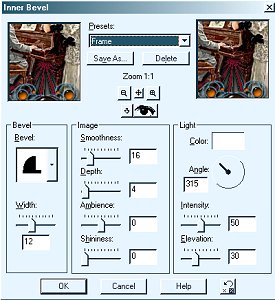
26. Go to Effects>3D Effects>Inner Bevel. Under Presets you can select Frame.
28. Go to Image>Resize

You have your completed the project.
Hope you enjoyed The tutorial.
Have Fun!!!
CC
Carol
Click on the link below to Email me
