Unreal Tournament 2004 Mapping Tutorial
(Continued)
Okay.. I'm back. Let's finish up the wierd map we planned on making..
(Notice the hallway really doesn't go anywhere)
Dang, I lost the original tutorial map.. Oh well.
I just followed my own tutorial and remade it :)
Checking Dimensions
Checking Dimensions is not always needed, but it is helpful to avoid
testing your map every five seconds.
For example, in the map I made from the tutorial, I checked to see how high the
platform was off the ground, to see if a person could actually jump on it, or
be under it also. I checked the torch to see if a person could hop on top of it.
How did I do this, you say? Does it involve complex math and confusing buttons?
No.
Just Go to your actor browser, open Pawn, open UnrealPawn, and highlight xPawn
Now right-click somewhere in the map to place the xPawn. Example:
 ..yeah, just remember to get rid of them ASAP, because if they stay there during
build, then Unrealed assumes that they are bots, so whenever the map is played,
the dummies stand there, but for every dummy there is a clone that shoots and moves.
Very odd and annoying.
Now, seeing as you can stand on the torch (if you can't in your map make it so you
can :) ,we need to place something that will "burn" the player when he stands on it.
This way, it's more realistic. Scroll down to an icon on your toolbar that looks
like this:
..yeah, just remember to get rid of them ASAP, because if they stay there during
build, then Unrealed assumes that they are bots, so whenever the map is played,
the dummies stand there, but for every dummy there is a clone that shoots and moves.
Very odd and annoying.
Now, seeing as you can stand on the torch (if you can't in your map make it so you
can :) ,we need to place something that will "burn" the player when he stands on it.
This way, it's more realistic. Scroll down to an icon on your toolbar that looks
like this:
 Behold, that is the volume button.
Now, having said that, don't touch it.
Instead, right click on the cylinder button. Set the inner and outer radii to
30, and set the height to 128. Honestly, I don't see anything useful about
inner radius, but just to be safe :) Hit build.
We can now position this 8-sided "cylinder" where we would want the player to get
hurt. Preferably over the torch, unless you want to be wierd and have invisible fire
everywhere. Not a whole lot of people like that type of stuff though.
Then, when you have positioned your brush, right click on the volume button and
hit lavavolume. Now move your brush out of the way and you will see an annoying
wireframe brush that's a different color:
Behold, that is the volume button.
Now, having said that, don't touch it.
Instead, right click on the cylinder button. Set the inner and outer radii to
30, and set the height to 128. Honestly, I don't see anything useful about
inner radius, but just to be safe :) Hit build.
We can now position this 8-sided "cylinder" where we would want the player to get
hurt. Preferably over the torch, unless you want to be wierd and have invisible fire
everywhere. Not a whole lot of people like that type of stuff though.
Then, when you have positioned your brush, right click on the volume button and
hit lavavolume. Now move your brush out of the way and you will see an annoying
wireframe brush that's a different color:
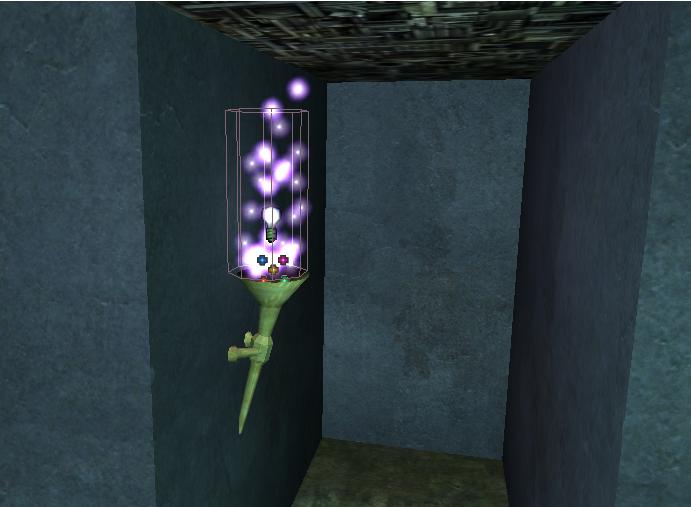 Whenever the player steps inside of the brush in the game (it'll be invisible),
he will get hurt 20 - 40 health per second every time colision is made with the
volume. To jump right through would mean instant death :)
Okay, lets add a room. Subtract out a cube that is 512 tall and 1024 * 1024 across.
Allign this with your dead-end hallway somewhere in the middle, and hit subtract.
Add yer nice textures.
Don't ya just love it when this happens?:
Whenever the player steps inside of the brush in the game (it'll be invisible),
he will get hurt 20 - 40 health per second every time colision is made with the
volume. To jump right through would mean instant death :)
Okay, lets add a room. Subtract out a cube that is 512 tall and 1024 * 1024 across.
Allign this with your dead-end hallway somewhere in the middle, and hit subtract.
Add yer nice textures.
Don't ya just love it when this happens?:
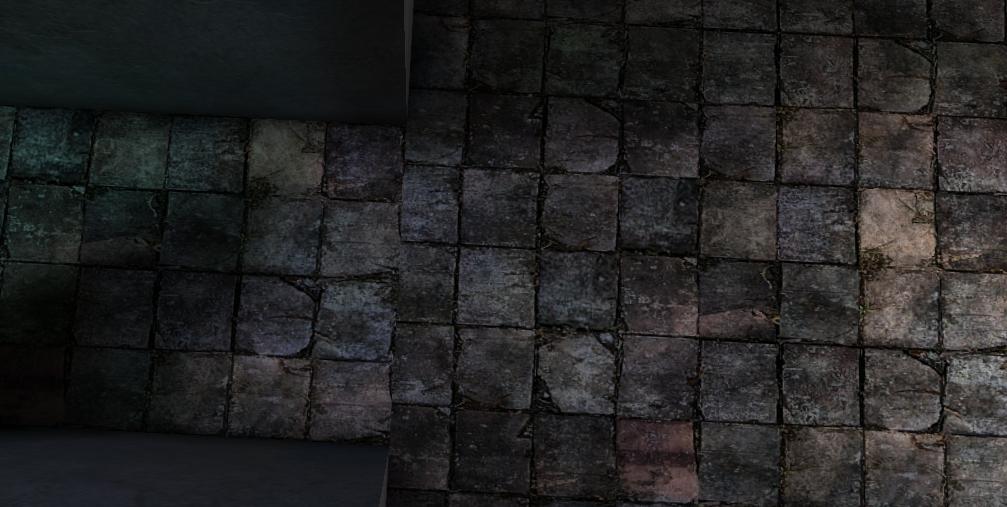 (For those of you who don't see it the tiles are misalligned.)
Let's allign the stuff. Select all of your textures in the level.
Right click and go to surface properties. Hit the allignment tab.
Select box and click allign. Now all of your textures are alligned smoothly.
Let's make the new room more roomy. Select the left and right sides of the room
(facing the hallway.) Make sure you select the right ones. Save before continuing.
What you're about to do cannot be undone unless you delete the room itself.
Select a texture slightly different than the actual wall textures.
Right click, and select bevel..
For bevel, put 128, and for depth, put 100.
Hit OK.
Wow! AMAZING! Nothing happened. Yeah, now rebuild your map. That should look
different:
(For those of you who don't see it the tiles are misalligned.)
Let's allign the stuff. Select all of your textures in the level.
Right click and go to surface properties. Hit the allignment tab.
Select box and click allign. Now all of your textures are alligned smoothly.
Let's make the new room more roomy. Select the left and right sides of the room
(facing the hallway.) Make sure you select the right ones. Save before continuing.
What you're about to do cannot be undone unless you delete the room itself.
Select a texture slightly different than the actual wall textures.
Right click, and select bevel..
For bevel, put 128, and for depth, put 100.
Hit OK.
Wow! AMAZING! Nothing happened. Yeah, now rebuild your map. That should look
different:
 See where this is going? We are going to make a ship. Now, the torch doesn't
really fit, but we're original, right :)
Okay, now you need to subtract a 1024 * 1024 * 1024 cube to the right of your
level, not touching anything, like somewhere here:
See where this is going? We are going to make a ship. Now, the torch doesn't
really fit, but we're original, right :)
Okay, now you need to subtract a 1024 * 1024 * 1024 cube to the right of your
level, not touching anything, like somewhere here:
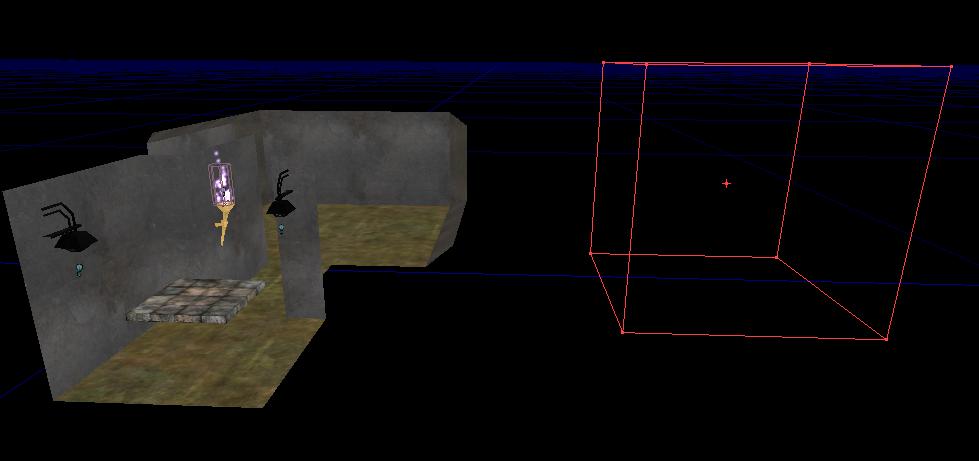 This will be your skybox. That is, your space will all be here.
You'll see. Subtract the stupid cube. Now open your staticmesh browser.
Open a package called AWStellarMeshes.
Because we are going to use a staticmesh to make the "sky", it doesn't matter
what color the walls are. Insert the skyball mesh into the skybox. Position it
in the middle. Because it's so tiny, let's scale it up.
Near the bottom of the screen, you should see three slots called DrawScale3D.
Select your skyball in the level and type in 5 for all three slots.
Now for the "REALLY DIFFICULT" part. Go into the actor browser, and expand Info.
expand ZoneInfo, and highlight SkyZoneInfo. Rightclick and place it in your skybox.
Place it in the center. Now double click on it (or go to properties in rightclick).
Expand ZoneLight, and set ambientbrightness to 128 for a nice "spacey" feel.
Great, you have just identified this box as the skybox. You can't tell though,
because it isn't linked to anything on the map, like a window. Let's make a window.
This will be your skybox. That is, your space will all be here.
You'll see. Subtract the stupid cube. Now open your staticmesh browser.
Open a package called AWStellarMeshes.
Because we are going to use a staticmesh to make the "sky", it doesn't matter
what color the walls are. Insert the skyball mesh into the skybox. Position it
in the middle. Because it's so tiny, let's scale it up.
Near the bottom of the screen, you should see three slots called DrawScale3D.
Select your skyball in the level and type in 5 for all three slots.
Now for the "REALLY DIFFICULT" part. Go into the actor browser, and expand Info.
expand ZoneInfo, and highlight SkyZoneInfo. Rightclick and place it in your skybox.
Place it in the center. Now double click on it (or go to properties in rightclick).
Expand ZoneLight, and set ambientbrightness to 128 for a nice "spacey" feel.
Great, you have just identified this box as the skybox. You can't tell though,
because it isn't linked to anything on the map, like a window. Let's make a window.
This tutorial isn't finished yet, primarily because the author is busy.
I haven't given up hope yet!! (as of 2/6/2006)

