
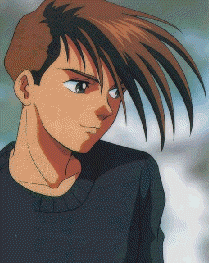
Trowa ![]()
Trowa is the second most distinguished character due to his
hair. ;) And just because you don't have to draw both
eyes...doesn't mean he's easy!! ;)
FEATURES DETAILS HAIR STEPS
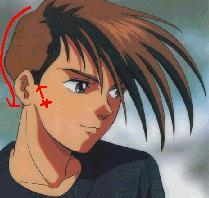
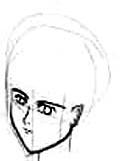
| FACE |
 |
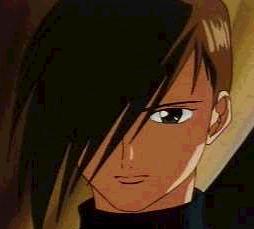
I hope you can see his face here. ;) Just stare at it for awhile...okay that's enough on to the tutorial!!
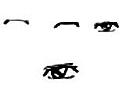
| Features | |
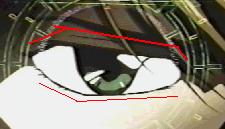 |
Eyes: I found a pic of just his eye! It's basically has the same shape as Heero's eye, but it's narrower. |
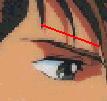 |
Eyebrows: Trowa has really thin eyebrows too. They're often at an angle too. :P |
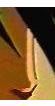 |
Nose: This is a frontal shot of his nose. But it's still really simple. Two lines. He does have a pretty long nose too. But not too beaky or upturned. |
 |
Mouth: Trowa's mouth is pretty small and hardly ever opened. ;) just a simple line will do. His lower lip is pretty prominent in this pic. |
| Details | |
 |
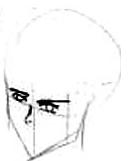
Now, I've shown you the basic features. Let me show you some details. |
 |
Jawline: Trowa has a long, narrow face. See my arrows? |
 |
Tips: Ah! He really does have 2 eyes! Don't forget his ears...his hair doesn't completly hide them. |
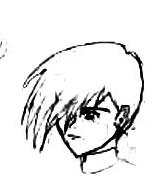
| Hair | |
|
Believe it or not, Trowa's hair is pretty simple compared to Heero and Duo! Blah! |
 |
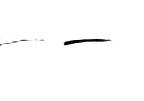
1. (This is not the best pic of his hair. :P) But I need to show you where his part is. The back of his hair just follows the shape of the back of his head. Make note of that little sideburn too. ;) |
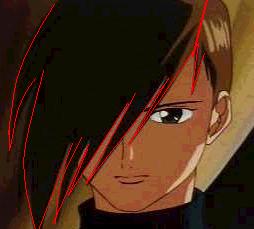 |
2. I've outlined the basic shape of his hair. Try to keep the top of his hair smooth and the spikes kinda gather at a point near the end. Notice there's that one spike by his part, don't forget that one too! ;) |
| Steps | ||
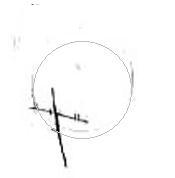 |
1. As always, I start with my circle, verticle face line, and horizontal eye line. I've also added little dashes on the eyeline to help my place the eyes in the right spot. | |
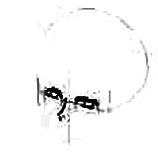  |
2.
I've placed the leftmost face boundary. I put in the eyes
and nose to help me place the rest of his features. (I
draw both eyes to help with placement. One will
disappear). 2b. I make the basic shape of the upper lid first, then thicken that. Trowa's iris (colored part) is small and round. The highlights aren't too big. Make note of my shading. ;) |
|
  |
3.
Next, I pencil in the geometeric shape of his jaw line. I
made sure I made a face boundary line on the right side
too. 3b. The eyebrows are jus a thickened curved line as shown. |
|
 |
4. I smooth out the angles in the geometric jawline to make the real one. I've also placed the ear and neck in. The mouth is just 2 small dashes. | |
 |
5. Hair is added last. I start at the back of the circle and make his part. From there, I go right around his head. Then I go to the left mostly around his head, but then I start spiking his hair. Note that I remembered the sideburn and little spike near his part. | |
